


Sick Bees – Part 11: Parasite Monitoring

August 9, 2011
Sick Bees Part 11:
Parasite Monitoring
Randy Oliver
ScientificBeekeeping.com
First published in ABJ August 2011
Last month I was presumptuous enough to try to boil successful beekeeping down to four basic rules. Giving the bees a dry home with plenty of honey is pretty obvious, so I’m going to make the other three easy to remember. Think of them as the “Three P’s”—Protein, Parasites, and Pesticides (including miticide buildup). Parasite management centers around keeping an eye on varroa and nosema levels. In this article, I’ll focus on monitoring the mite.
I’m typing this article in the home of my beekeeper hosts Graham and Valerie Gammell in Auckland, New Zealand, prior to speaking at their national conference. Kiwi beekeepers are entering Phase Two of “Life with Varroa”—the development of mite resistance to fluvalinate. Tragically, despite many of them being top-notch beekeepers, some are already suffering from unexpected colony losses, as did beekeepers in Europe and the Americas when that Silver Bullet lost its magical power. The reason for being blindsided is due to their unquestioning faith in by-the-calendar treatments with a synthetic miticide, without verification of its continued efficacy by the monitoring of actual mite levels in their hives.
I’ve previously explored methods for monitoring the degree of mite infestation in IPM 4: Reconnaissance (www.ScientificBeekeeping.com). It’s been over four years since I wrote that piece, and it’s time for some updates. Most of the information has not changed, but I’d like to revise my assessment of mite monitoring methods, and to introduce you to my current favorite–the alcohol wash in a “mite shaker jar.”
In my humble opinion, any monitoring method should be quick, simple, easy, inexpensive, reasonably accurate, and not involve counting above the number of fingers on your hands.
Stickyboards
Natural mite drop is a time-proven method for varroa monitoring, with the main advantage of being noninvasive.

Figure 1. At moderate temperatures, petroleum jelly (Vaseline®) serves as an excellent adhesive for stickyboards. It is most easily applied with a mini paint roller. The actual boards can be made from rigid plastic sheets, corrugated plastic signboard, or white plastic or laminated Masonite® panel board. Petroleum jelly doesn’t get moldy or gummy, and can be easily cleaned off with a windshield ice scraper, and then renewed.
Mite assessment via natural mite drop on stickyboards does, however, have several drawbacks:
- It is only reliable when done repeatedly over time in order to detect trends, as it can vary greatly day to day,
- It requires either screened bottoms, or clear beespace under the frames for both the board and the protective screen (to keep the bees from removing the mites),
- It must be protected from ants (which may also carry off mites),
- It requires two trips to the hive for a single reading (a big problem with multiple out yards), and doesn’t give meaningful results for at least several days,
- The actual counting of mites is tedious, time-consuming, and late season thresholds require counting up to at least twenty. Moreover, it is difficult for older eyes to pick out the mites from the hive trash (Fig. 2).
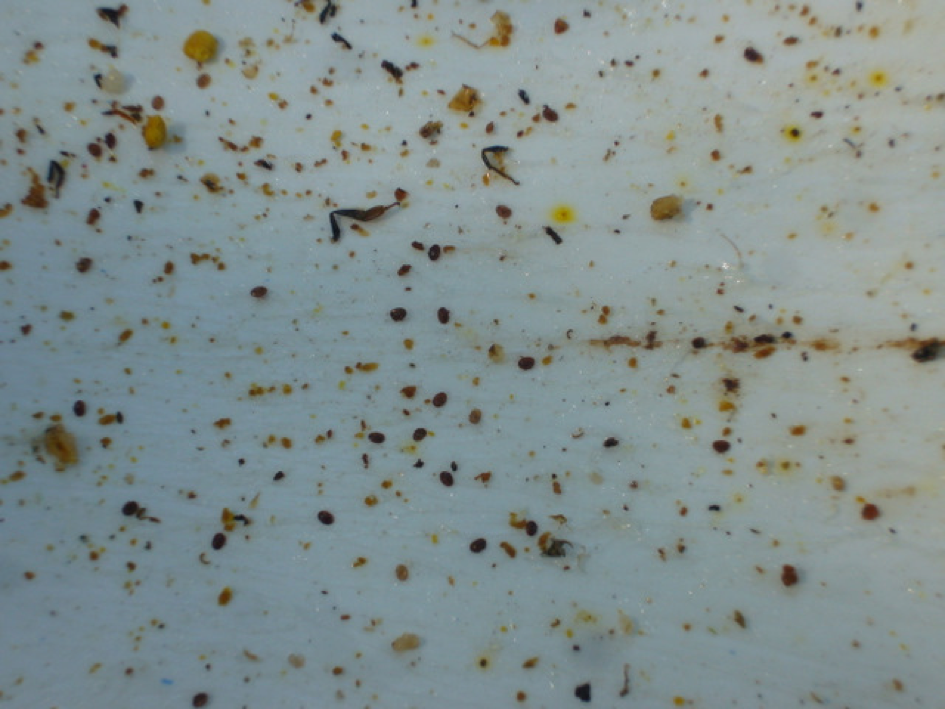
Figure 2. A close up of a typical 48-hr stickyboard from a colony with a high mite load. Hive trash and wax worm droppings can make the mites difficult to differentiate (there are about 25 in this photo).
Accelerated Mite Drop
The natural mite drop can be greatly accelerated by any fast-acting miticide or mite repellent, such as formic or oxalic acid, amitraz (while it is still effective), essential oils, or powdered sugar dusting. Such a monitoring method has the advantage in that you are causing the drop of a proportion of the mites from the entire hive, rather than from only a small sample of bees.
The Sugar Shake
A popular sampling method is to roll a half cup of bees (approx. 300 bees) in a jar with a tablespoon or so of powdered sugar, and then to shake the mites out through a screened lid (see photos in “Reconnaissance”). This method is wonderful for a few samples, but is time consuming and brutal on your arm for multiple samples.
The Alcohol Wash
Ah, and now we get to my current favorite sampling method! It meets all my criteria for simplicity and quickness in the field, requires a minimal amount of equipment, and does not require sharp eyes nor much counting. Best of all, the alcohol wash gives an immediate and suitably accurate assessment of mite levels in a yard within a few minutes.
Many in the research community have gone to using the alcohol wash of 300 bees from the broodnest as their standard method of mite assessment. The suitability of the alcohol wash is supported by extensive sampling and statistical analysis by Katie Lee for her doctoral research (Lee 2011).
Which Bees to Sample
A number of researchers have found that mite levels are highest on nurse bees (Pernal 2005). However, Lee found that “bees on frames containing brood comb had significantly more mites than frames without brood, but the difference is small biologically.” She suggests: “for convenience, and to increase sampling precision and chance of detecting mites when they are rare, we recommend beekeepers take a single … sample of 300 adult bees from any frame in the uppermost brood box. … The present research confirms statistically that this recommendation will yield adequate precision.”
I tested this recommendation by taking half-cup (roughly 300 bee) samples from eight different frames from the same colony. That very limited test supported Lee’s conclusion (Fig. 3).
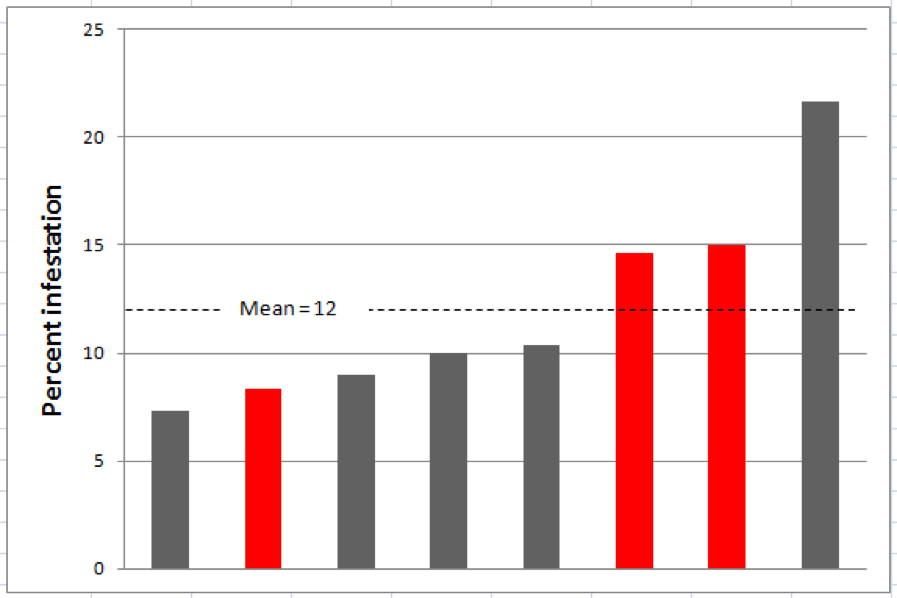
Figure 3. Mite levels from half-cup bee samples from 8 different frames in the same hive. Levels for the 3 sampled brood frames are in red (the graph is not in the actual order of the frames). Note that mite infestation estimates ranged from 7 – 22%. Although the differences are significant at this high infestation level, proportionally they would mostly be within a point or two at typical threshold levels.
I was also curious as to whether one could estimate mite levels from samples of bees taken from the entrances of hives for the purpose of determining nosema infection levels. So I took matched samples from both the entrance and a brood frame from 15 different colonies, and compared the mite infestation levels on the bees. There was virtually no correlation (Fig. 4), so I’d stick to broodnest samples.
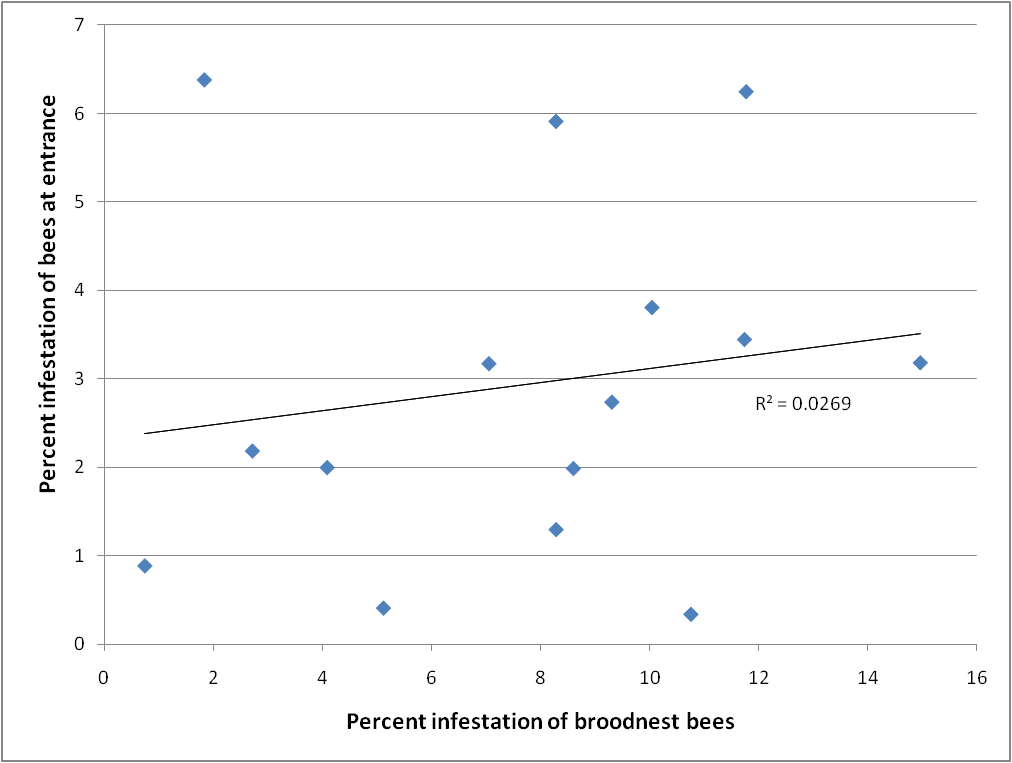
Figure 4. Comparison of mite infestation levels of bees taken from the broodnest vs. those taken from the entrance. There is little correlation, so don’t use entrance samples to estimate mite infestation levels.
Dr. Lee also found that the proportion of mites in either drone or worker brood varied greatly (pers. comm.), but that on the average, about half the mites in a hive at any time would be in the brood, with the proportion being higher if there were a great deal of brood, and down to zero if there was no brood.
Practical Tip: For practical purposes, beekeepers can make mite management decisions based simply upon the infestation rate of a sample of ½ cup of adult bees taken from a frame from the upper brood box.
Taking the Sample
With the right equipment and a bit of practice, the alcohol wash takes only about two minutes per hive. There are a number of tips and tricks involved, and in this case a picture is worth a thousand words. So I’ve made a photo essay of the technique.
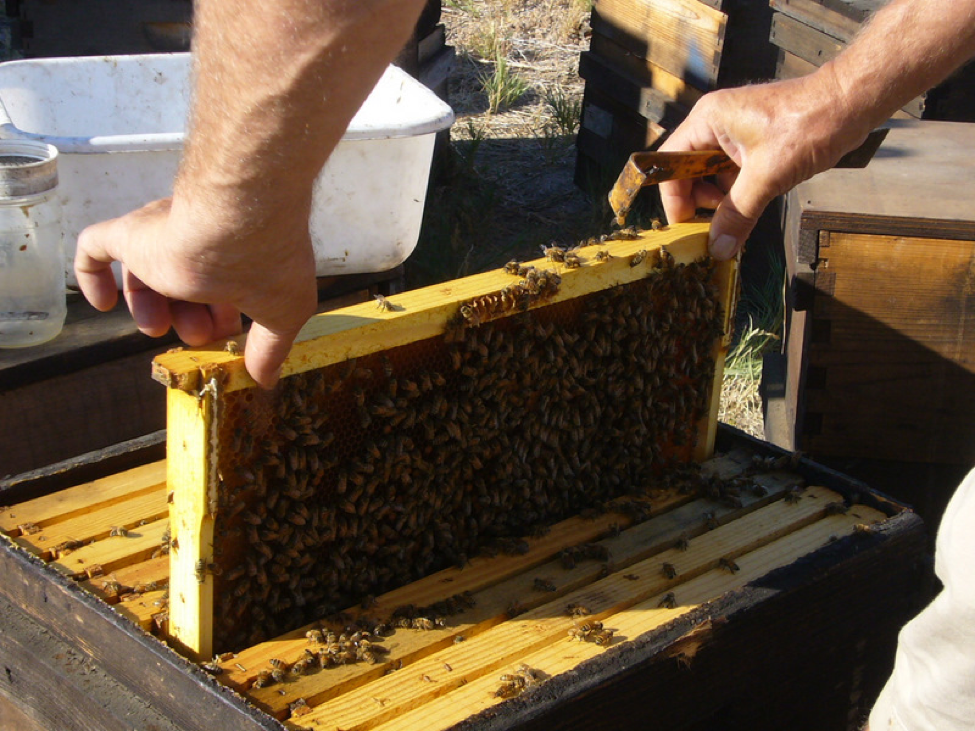 Step 1 – Pull out a brood frame from middle of the cluster in the upper brood box. It does not appear to be all that critical that the frame actually contains brood.
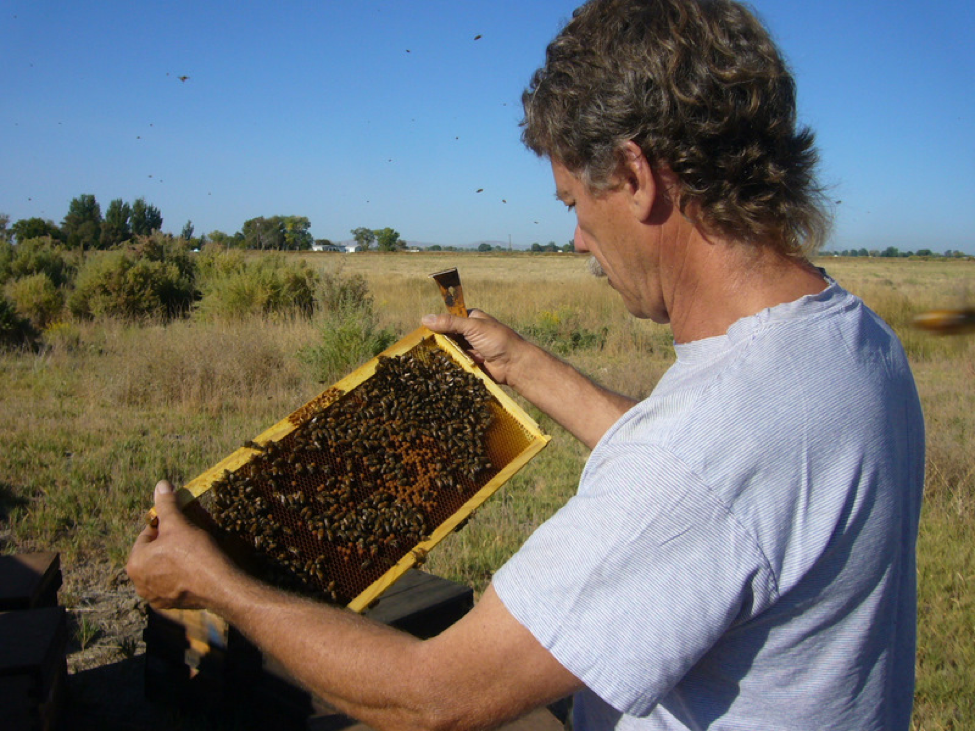 Step 2 – Make sure that the queen is not on the frame! The one drawback to this method is that you must sacrifice 300 bees (and you don’t want one of them to be the queen). I don’t like killing bees any more than anyone else, but to me the sacrifice of a few bees in order to prevent the death of a million bees in a yard is akin to taking a blood sample (or mowing your lawn). Disclaimer: to avoid eye injury, you should always wear a veil when working bees!
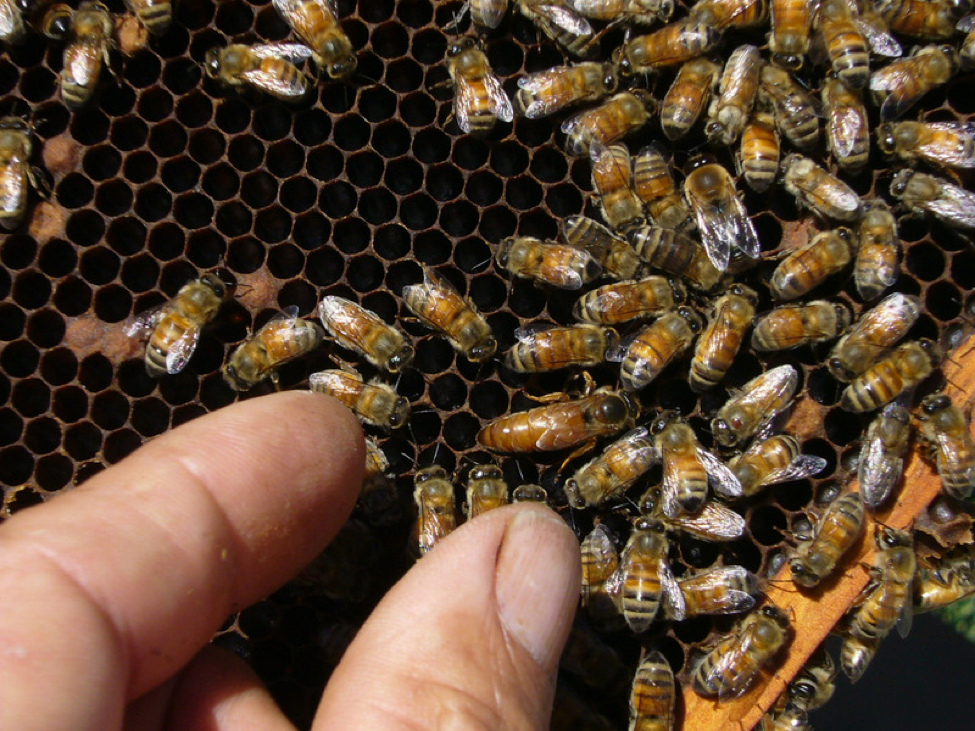 Step 3 – If you see the queen, either remove her, or sample another frame. I like it when I see the queen (which is quite often when I take the frame from the center of the cluster), since I am then home free!
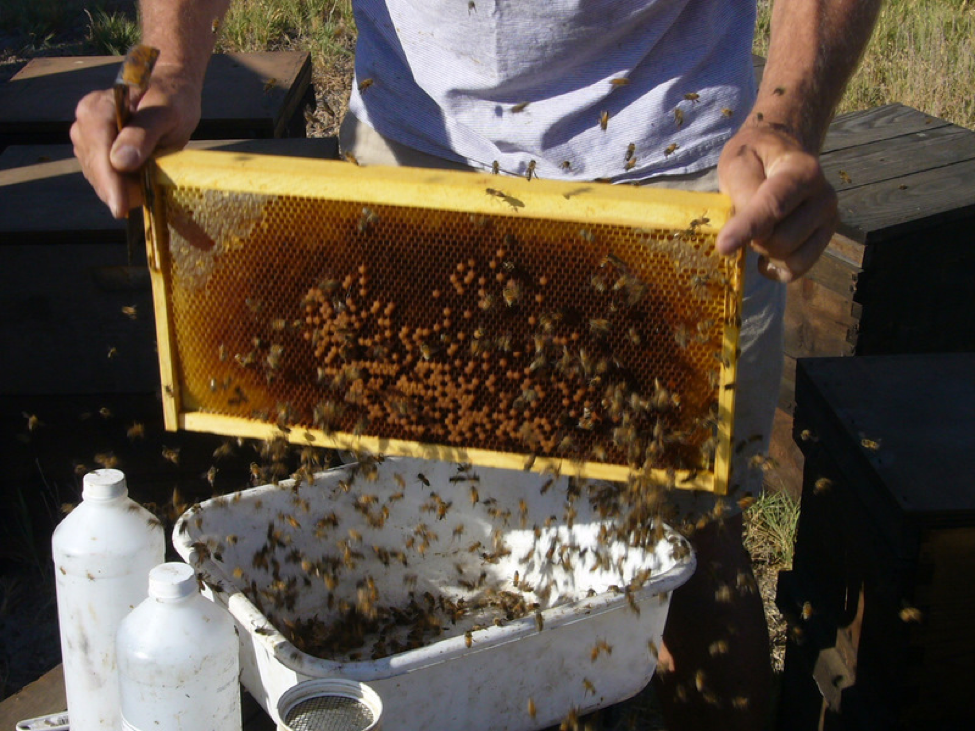 Step 4 – Shake the frame to dislodge the bees into a tub. Tip: the technique for shaking is to make the frame bang down-up-down sharply and hard between your loosely-held thumb and middle finger, making sure that your thumb never clamps down (which would cause the bottom of the frame to swing wildly). Alternately, you can hold the frame vertically, and bang the ear against the bottom of the tub (the tub would need to be on a hard surface so that you don’t punch a hole through it!).
 Step 5 – Allow the older bees (which carry fewer mites) a few seconds to fly off. If you hadn’t already confirmed that the queen is not in the sample, she is easy to spot at this moment.
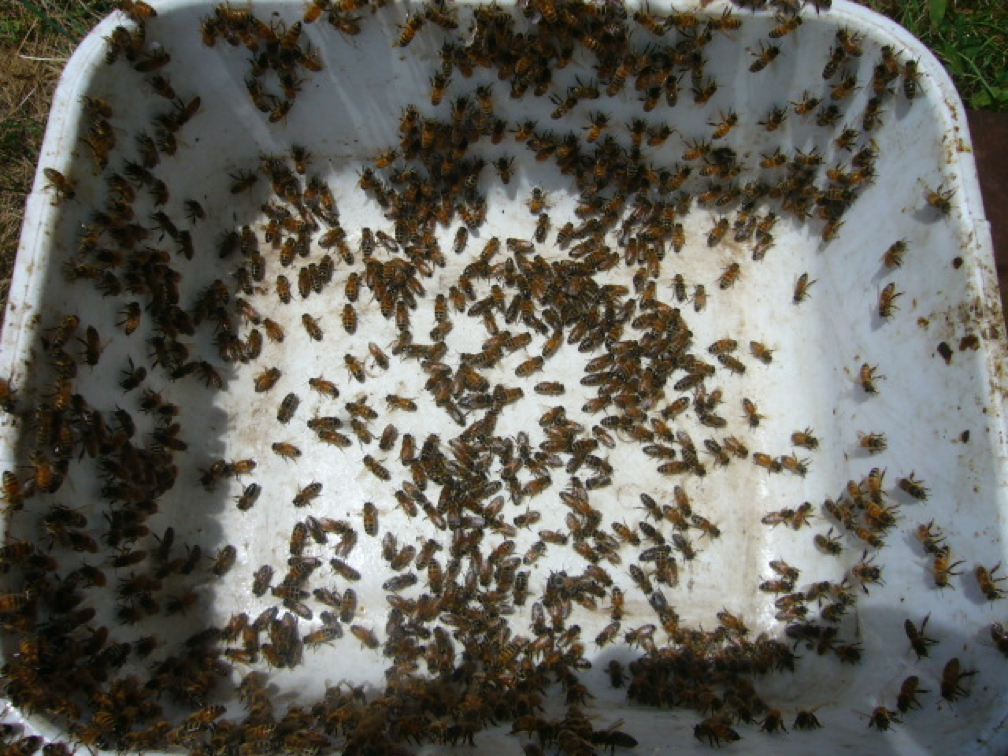
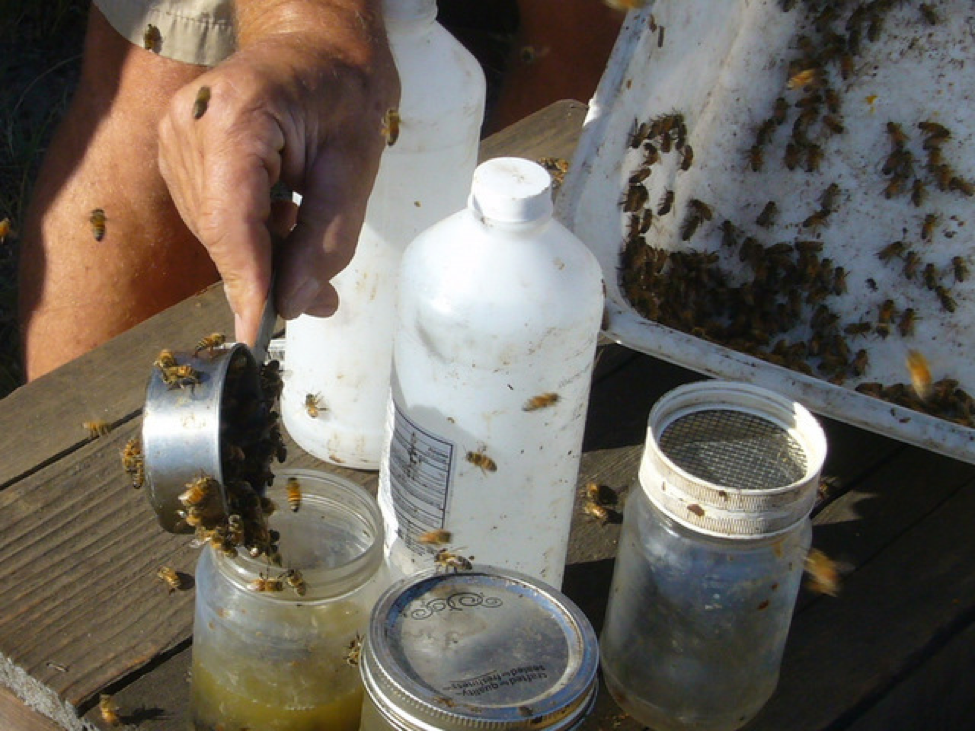
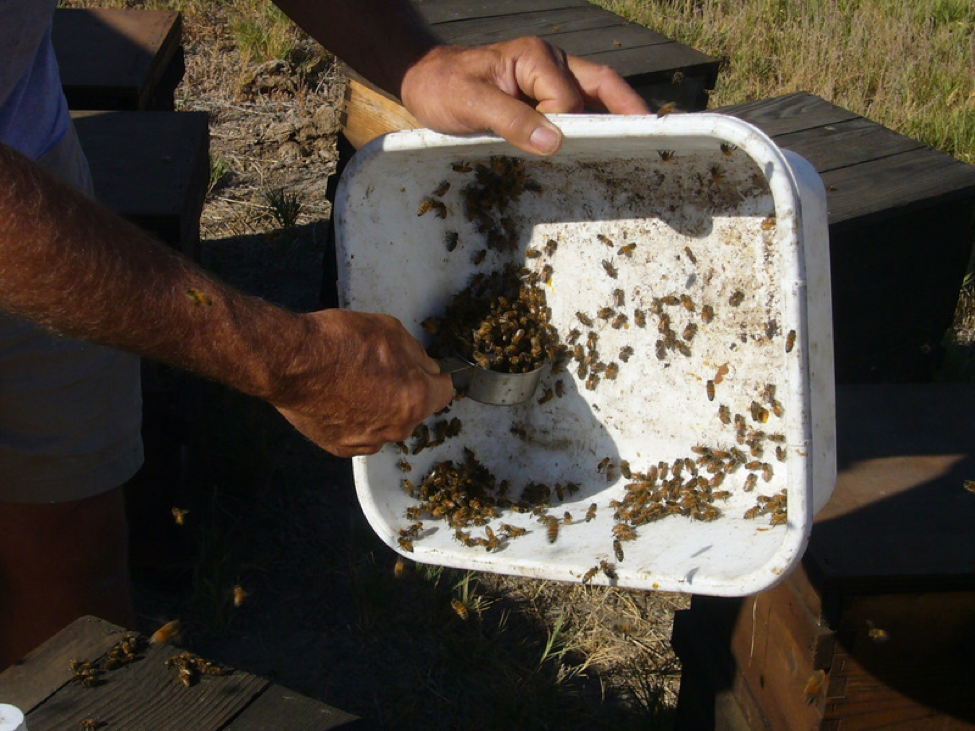 Step 6 – Shake the bees into one side of the tub and use a ½ cup (120 ml) measuring cup to scoop up the bees, then shake them off dead level. If nectar is shaking from the frame, making the bees sticky, then hold the cup below the bees, and jiggle the tub to fill the cup. Tips: use a stainless steel cup that measures ½ cup to the rim, and a white Rubbermaid® dishwashing tub. The curve of the Rubbermaid brand tub corners exactly matches that of the cup, making for easier scooping. Dump the bees into a wide mouth pint jar of alcohol.
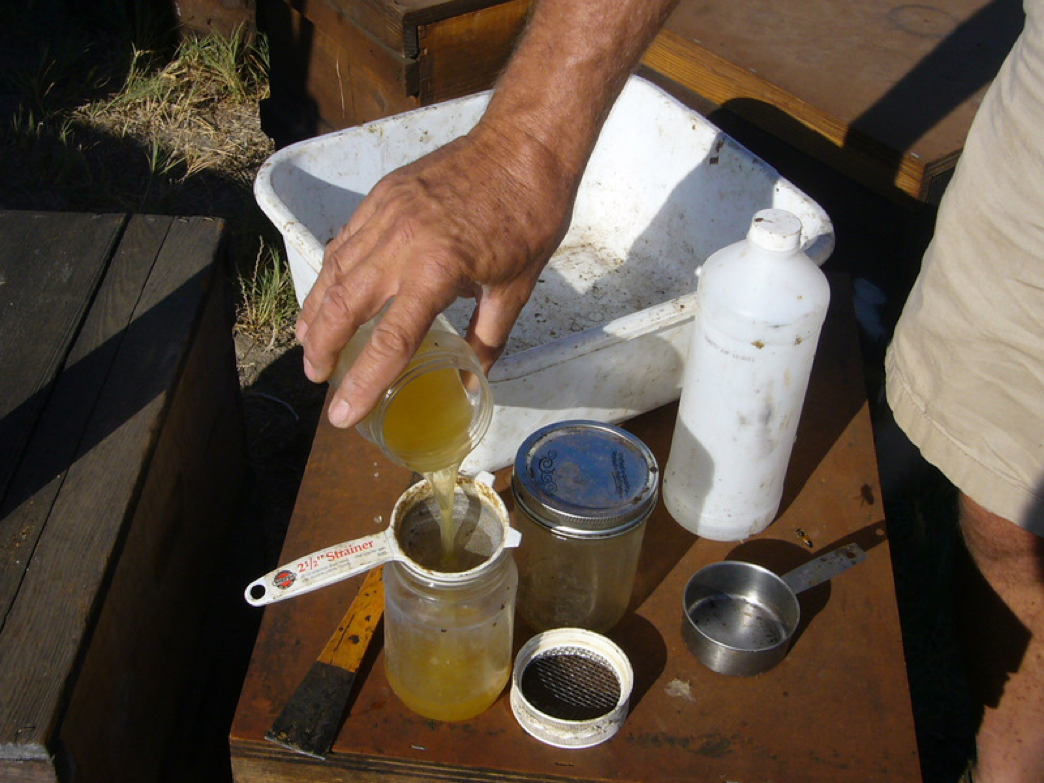
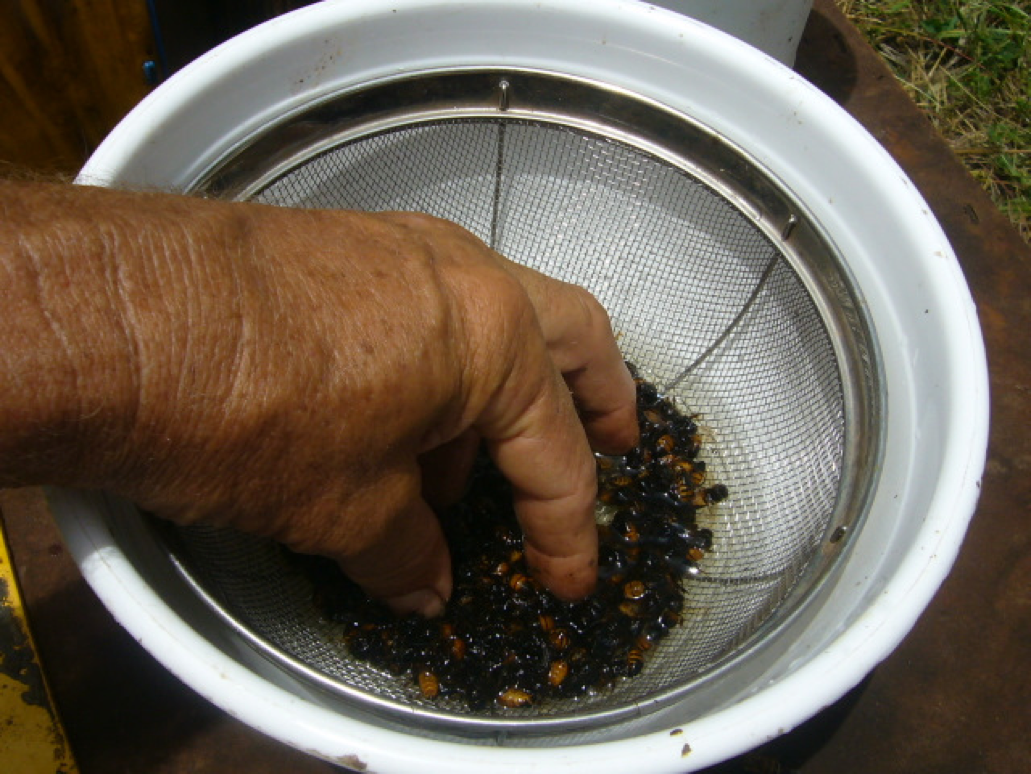 Step 7 (Option A) – Use a round bottom white bowl with a kitchen sieve that fits it closely. Fill the bowl with rubbing alcohol so that it is at least two inches deep in the sieve. Dump in the jar of bees and stir and shake them vigorously to dislodge the mites. Keep washing until no more mites fall off.
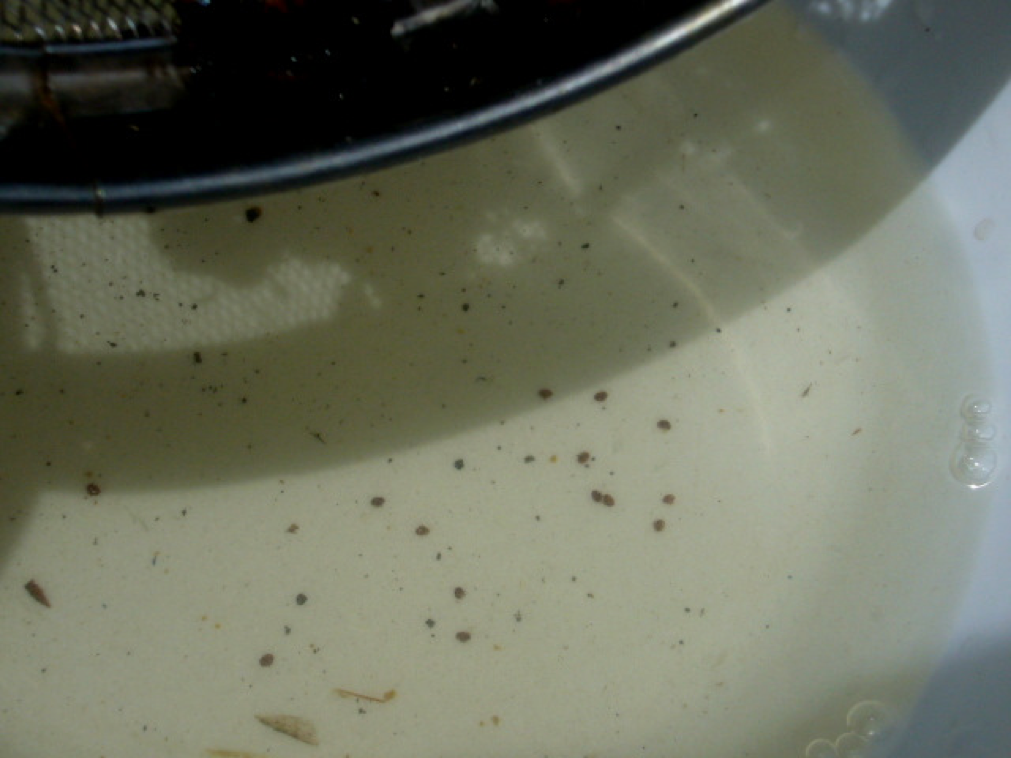 Step 8 – Lift the sieve and count the number of mites. It helps to pour off the excess alcohol for better visibility.
The sieve and bowl work fine, but for taking multiple samples in the field, a “mite shaker” jar is a big improvement. There’s a photo of my prototype at “Reconnaissance,” but Dr. Medhat Nasr designed one that is a great improvement. It is available for purchase in Canada, but I have not yet seen it offered in the U.S. So I’ll show you how to fabricate one yourself!

Take two plastic peanut butter jars (plastic jars are much lighter weight for shaking). Make sure that the bottoms are molded smoothly so that it will be easy to view mites. Empty the jars. Tip: I was eating peanut butter and honey sandwiches until I thought that I was going to puke, when my wife suggested that I simply transfer the peanut butter to another container! Soak off the labels and carefully scrape the safety seal off of the jar rims so that you get an alcohol-tight seal against the lids. Update: not all peanut butter jars (and lids) have the same threads. Be sure to use two jars with matching threads!
Use a tomato paste can with both ends removed, heated in a flame until red hot at the edge, to melt a hole through the center of each lid. Use a clamp to hold the can, and have a responsible adult help you, since there is an element of danger involved.
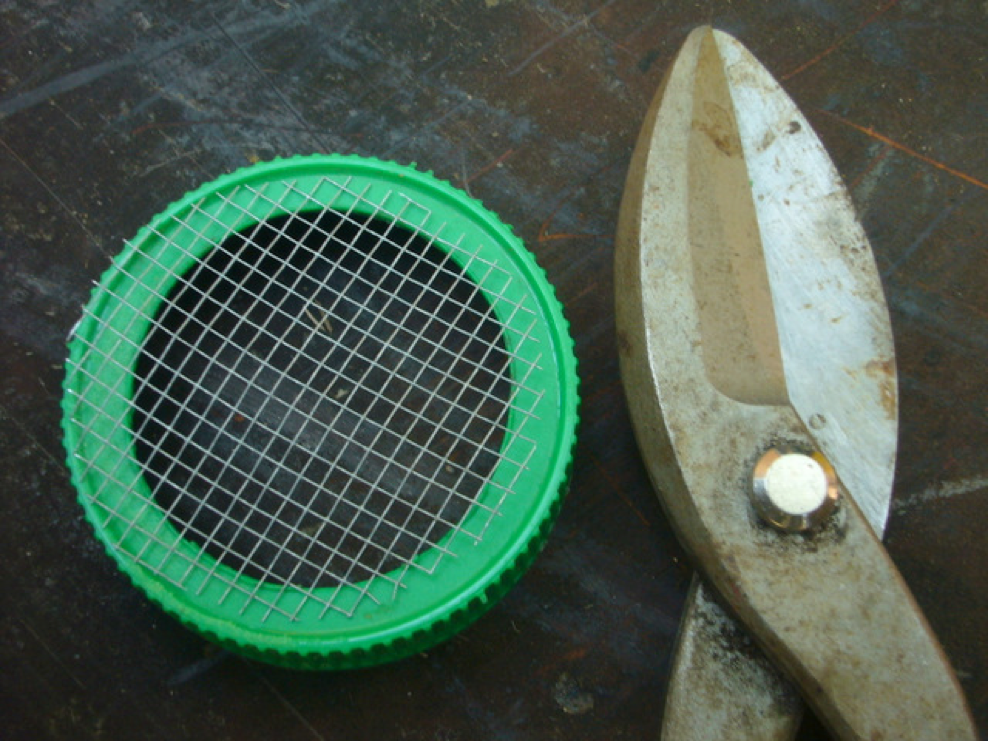
Cut out a circle of 1/8” hardware cloth to fit inside the rim.
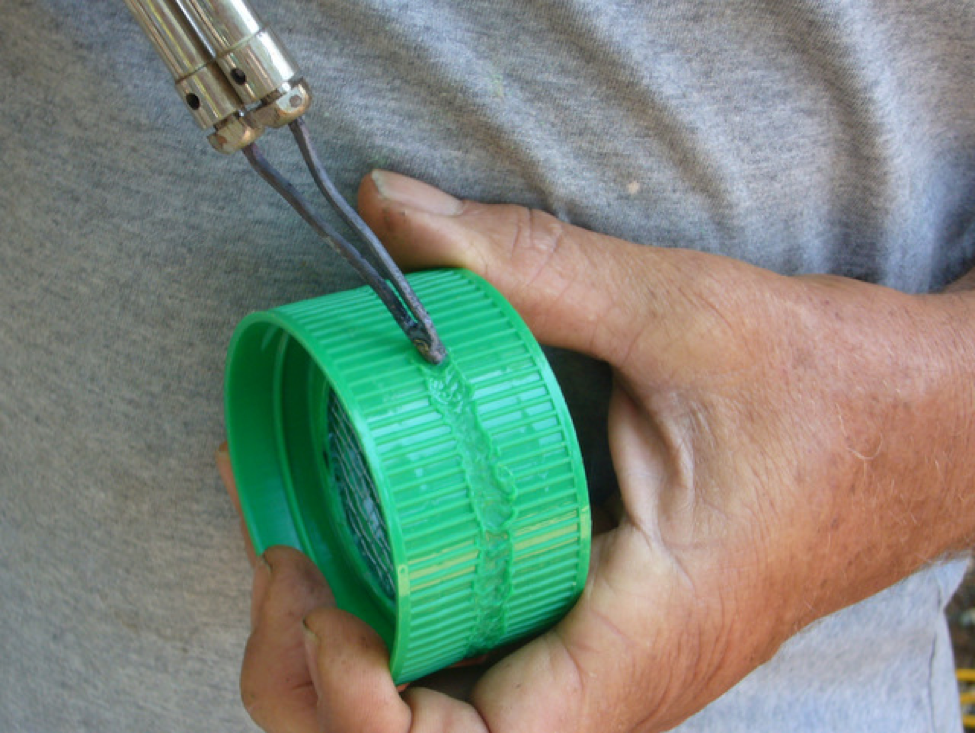
The lids are made from polypropylene, to which virtually no glue will stick (I tried several, including polyolefin hot glue—all failed when soaked in alcohol). Luckily, polypropylene can be easily heat welded with an ordinary soldering gun. Make sure that you get a good, deep weld, as the weld may crack with use (but is easily repaired by rewelding). You probably shouldn’t hold it against your belly as I am doing!

Here is the final mite monitoring kit – compact and field ready. It includes a fine kitchen sieve, so that the penny-pinching beekeeper (me) can reuse the alcohol. For additional savings, I cut the 70% alcohol in half with water (be sure to relabel the bottle). Some suggest using windshield washer fluid, but I find that it foams too much, and lacks the clarity of plain rubbing alcohol. In a pinch, you can also use water with granulated dishwashing detergent.
Update May 2020: I performed a test to compare mite recovery with granular vs. hand dishwashing liquid. The granular did not work well, so I do not recommend! Dawn Ultra, 2 Tbl/gal worked well.
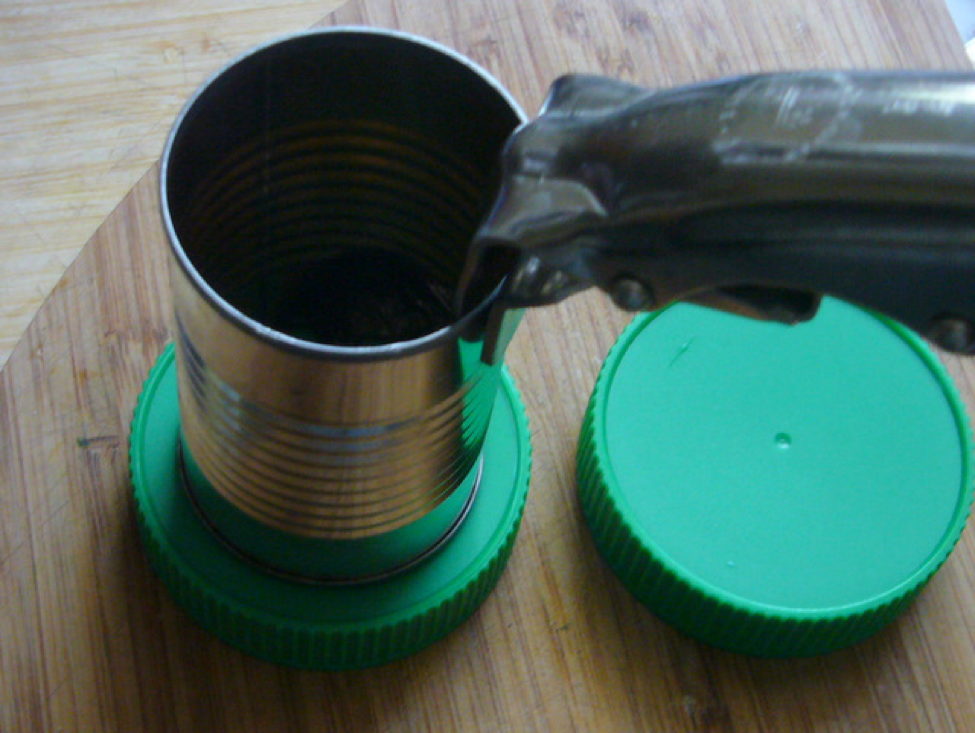
 Step 7 (Option B) – Fill one jar about 2/3rds full of alcohol, and pour the bees into it. (OK. I’m really pinching pennies here with reused alcohol).
 Step 8 – Screw the lid and upper jar on top.

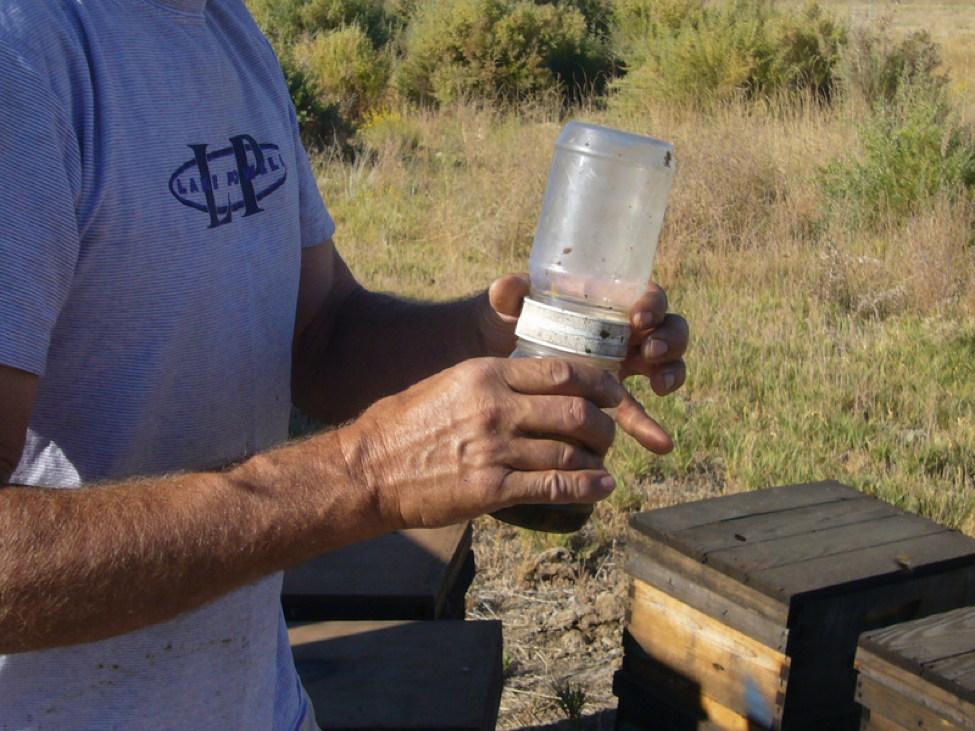
Step 9 – Invert the shaker so that the bees are in the upper jar. Shake vigorously for twenty seconds, then after the last up shake jiggle the jar as the alcohol drains through the bees. If you don’t jiggle, some of the mites get stuck in the bees from time to time (I’ve tested).
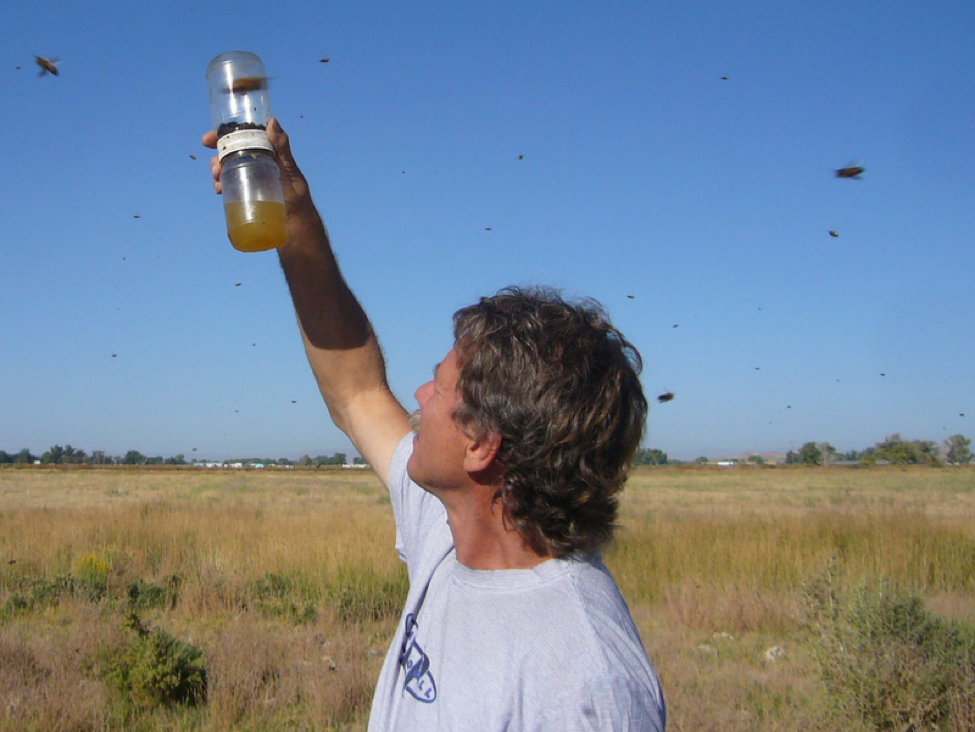 Step 10 – Look up through the bottom of the jar. It takes about 30 seconds for all the mites to sink to the bottom, depending upon the swirl. Adjust the view so that the sun illuminates the mites clearly. If you’ve shaken vigorously enough, you will generally see a dislodged bee stinger or two. Test the efficiency of your initial shakes by repeating with fresh alcohol to see whether you recover any additional mites—you shouldn’t!
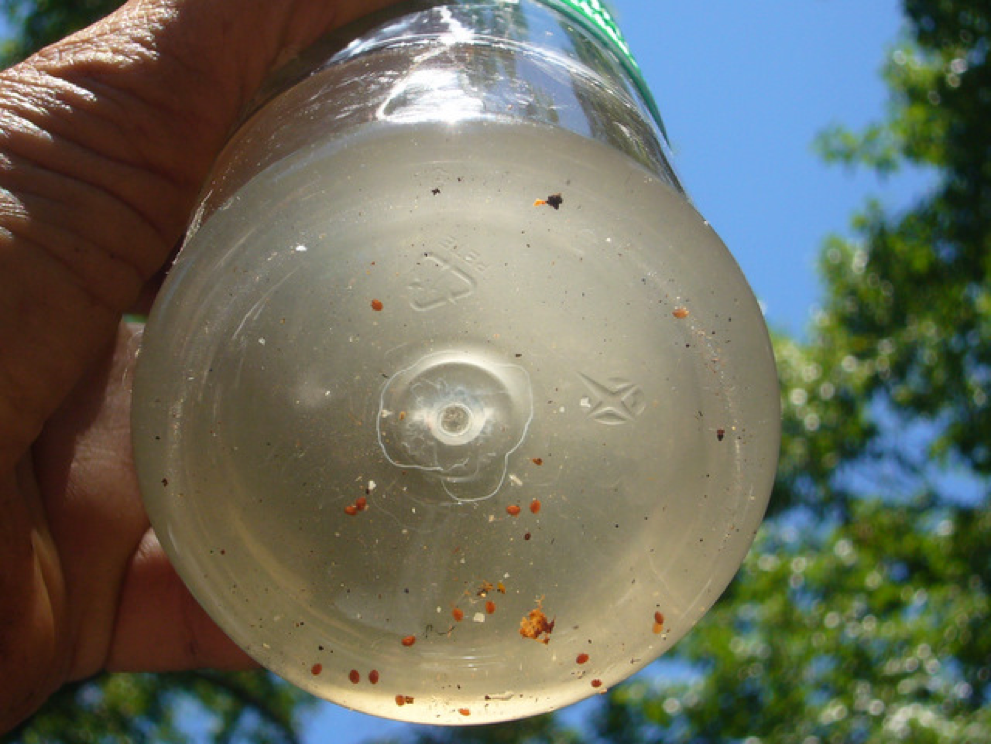 Step 11 – Count the mites. There are 16 in this sample of 300 bees, which you divide by 3 to get percent infestation (mites per 100 bees)—in this case, slightly over 5%. I treat at anything over 6 mites during summer (2%), so no need to count any higher. Surprisingly, I often see light-colored mites.
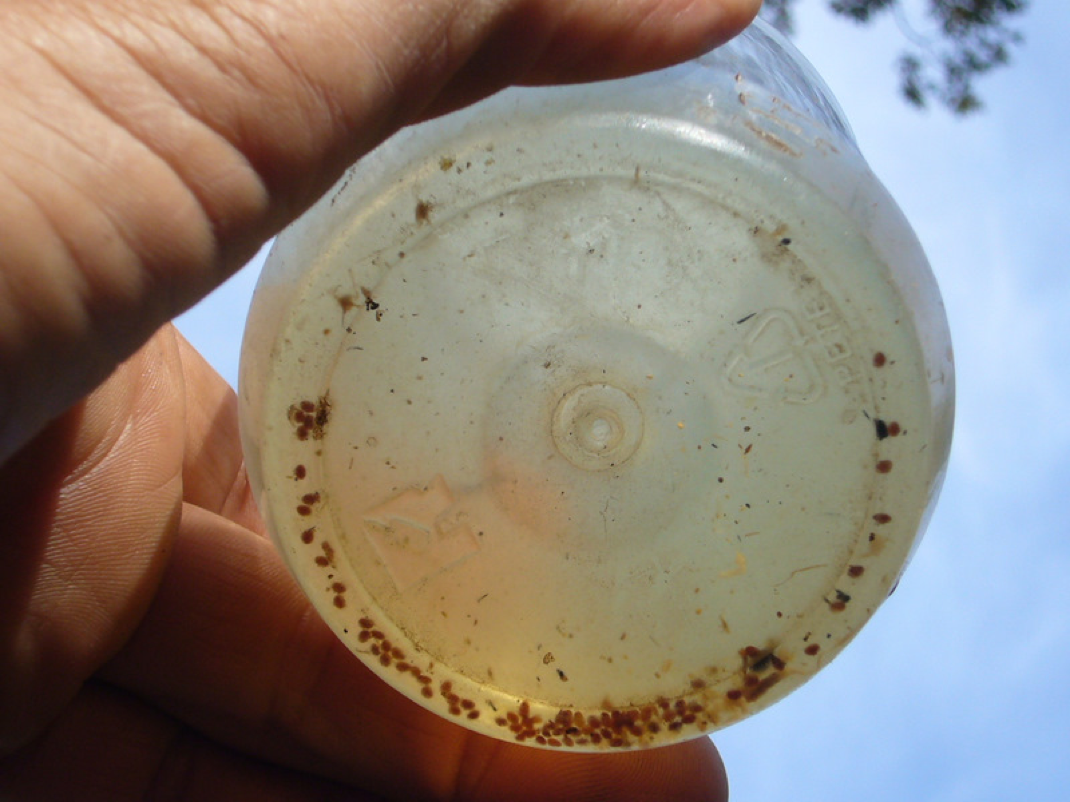
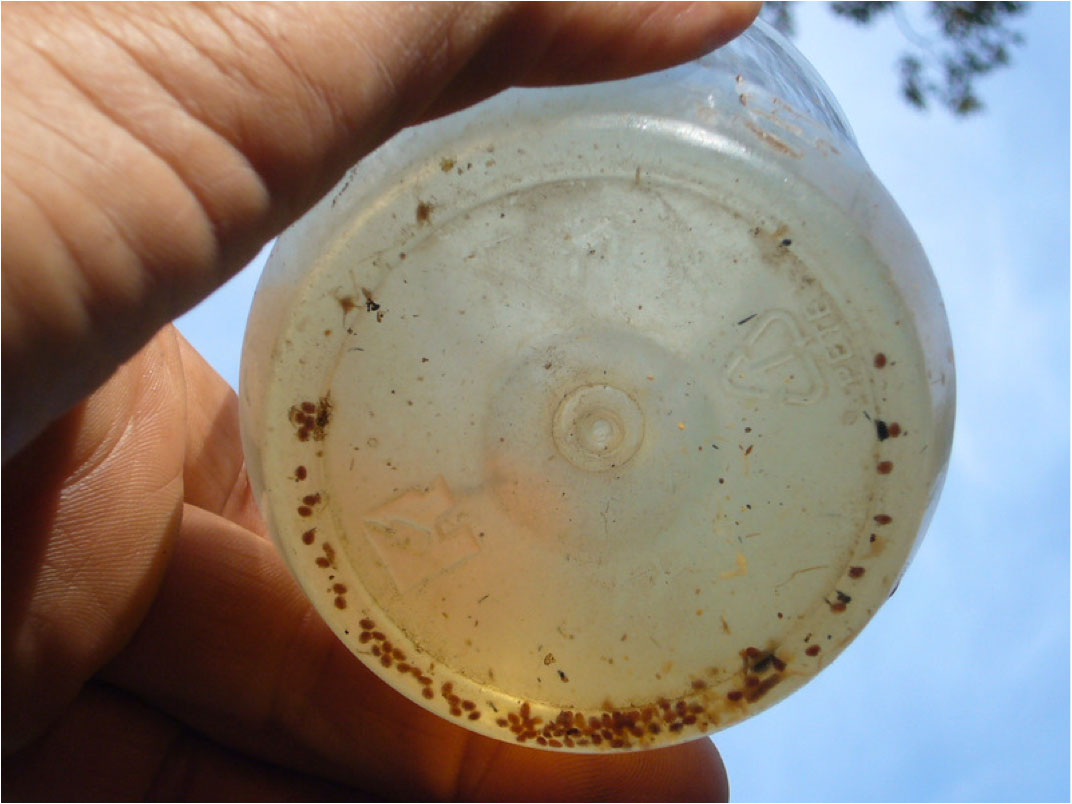
Holy cow! Too many mites–approximately 72, or a 24% infestation! This colony (not one of mine, thank God) is in the severe danger zone. (Note the stinger at the far upper left).
 Step 12 – Discard the bees and filter the alcohol for reuse. Make sure that you check the emptied jar for residual mites (I just pour a bit of alcohol back in, swirl, and dump). Tip for commercial beekeepers: Make two shaker jars, so that one can be settling on top of a hive while you start taking a sample in the next one!
Suggestions
Get into the habit of carrying the shaker kit with you all the time. Check a few hives in each yard throughout the season so that you always have a good idea as to how fast the mite infestation level is building up. Always having a handle on your mite levels will help to keep you from being surprised, and give you a heads up in advance of problems.
I will revisit treatment thresholds in my next article, but briefly, I’m concerned with more than 1 mite per sample after almonds, try to keep levels below 6 mites during the season, and lower in fall (I allow no more than one mite in a sample for a breeder queen).
If the first wash in a yard is above threshold, simply treat the yard. But if the first sample is low, then test more hives to confirm that the first one wasn’t a fluke. Katie Lee found that the mean mite infestation level of a yard could be estimated with reasonable accuracy by taking samples from eight different colonies, so probably no need to sample more than that many hives.
I will post this article to ScientificBeekeeping.com so that you can view the photos in more detail. Next month, Mite Management Strategies.
References
Lee, KV, RD Moon, EC Burkness, WD Hutchison and M. Spivak (2010) Practical sampling plans for Varroa destructor (Acari: Varroidae) in Apis mellifera (Hymenoptera: Apidae) colonies and apiaries. Journal Of Economic Entomology 103(4):1039-1050.
Pernal, S. F., D. S. Baird, A. L. Birmingham, H. A. Higo, K. N. Slessor, and M. L. Winston (2005) Semiochemicals influencing the host-finding behaviour of Varroa destructor. Exp. Appl. Acarol. 37: 1-26.

