
Refining the Mite Wash: Part 2 – Mite Release

October 24, 2020
Refining the Mite Wash- Part 2
Mite Release
Randy Oliver
ScientificBeekeeping.com
First Published in ABJ in August 2020
The high efficacy of hand dishwashing detergent at getting mites to release their grip on bees bestirred me to investigate this finding more deeply. What I’ve come to realize is that there are four steps involved between dumping the bee sample into the agitation vessel, and the counting of the mites.
Mite release, dislogement, precipitation, and separation
We use the term “mite wash,” but that “washing” actually involves four discrete steps:
Step 1: To cause the mites to release their grip on the bees.
Step 2: To then dislodge the mites from the bees’ bodies.
Step 3: To then agitate or wash the bee sample enough to allow for the precipitation of the mites through the tangle of bee bodies, and finally
Step 4: To separate the mite sample from the bee sample, typically by allowing the much-smaller mites to drop through a screen.
So let’s go through these four steps one at a time, since each is important.
Getting mites to release their grip
As pointed out by Dr. David de Jong back in 1982 [[1]], mites attached superficially to a host bee are relatively easy to remove by shaking the bees in a liquid, but mites that are embedded deeply in the intersegmental membranes for feeding may be more difficult to dislodge. Curious to determine exactly how varroa mites hold onto a bee, I spent some time looking closely at them under the ‘scope.
Mites moving on the surface of a bee’s “hairy” body are able to get a tight grip by inflating sticky pads called “empodia” at the ends of their feet (Figure 1).
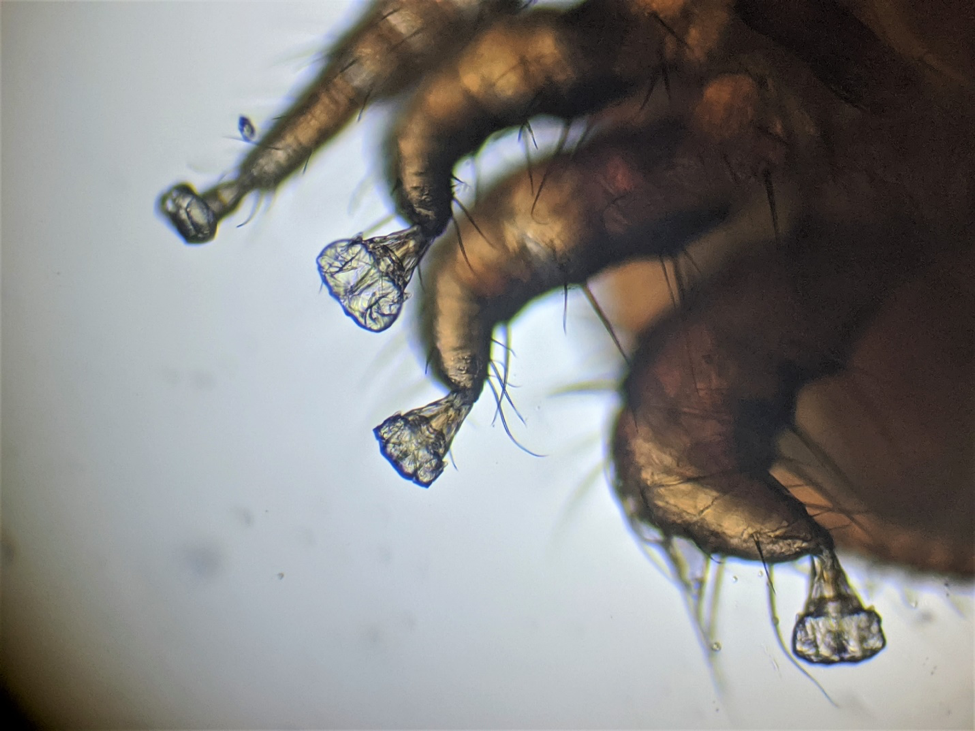
Figure 1. It’s fascinating to watch a mite walking across glass. At each step the mite inflates a sticky empodium. For the above photo I placed a live mite on its back on a microscope slide, and then dropped a thin glass cover slip over it. The mite will then walk upside down across the glass. The empodium of the uppermost leg in this photo is just starting to unfold; the next one down is fully extended on the glass.
The connection with oxalic acid treatments
I’m very much involved in experimentation on how best to use oxalic acid to control varroa. One poorly understood aspect is the exact mechanism by which the acid gets into the mites’ bodies. It appears that one main pathway is through their feet. The question then is, why would the feet be more permeable to the acid than the rest of the mite’s body? So I searched the literature for clues.
Of great interest is an important study by Peattie [[2]]. They found that arachnids (spiders, mites, and their kin) can secrete a thin film of sticky liquid on the surface of their empodia. I strongly suspect that it is this damp surface that allows the acid crystals to dissolve and thus make their way into the mite’s body tissue and/or hemolymph.
Practical application: the required stickiness of the empodia may be varroa’s Achille’s Heel, as far as oxalic acid is concerned. This is because in order for the mite to evolve resistance to the acid, it would need to come up with a new mechanism for getting a grip on the bee.
But I digress – let’s get back to mite washes.
Practical application: In order to break the adhesive force between the mites’ empodia and the bees’ exoskeletons, any mite wash fluid would need to act as a surfactant. Both detergents and high-proof alcohol act in this way. Powdered sugar also disrupts the grip, but requires the mite to first step on the sugar crystals to gob up its empodia [[3]].
It’s not just the feet
The empodia are clearly important to allow a mite to walk over the surface of a bee, but more often a mite is more firmly attached to a bee, with its head thrust deeply between the abdominal sclerites (the plates that cover the abdomen). To see this, you need to view bees from the underside (Figure 2).
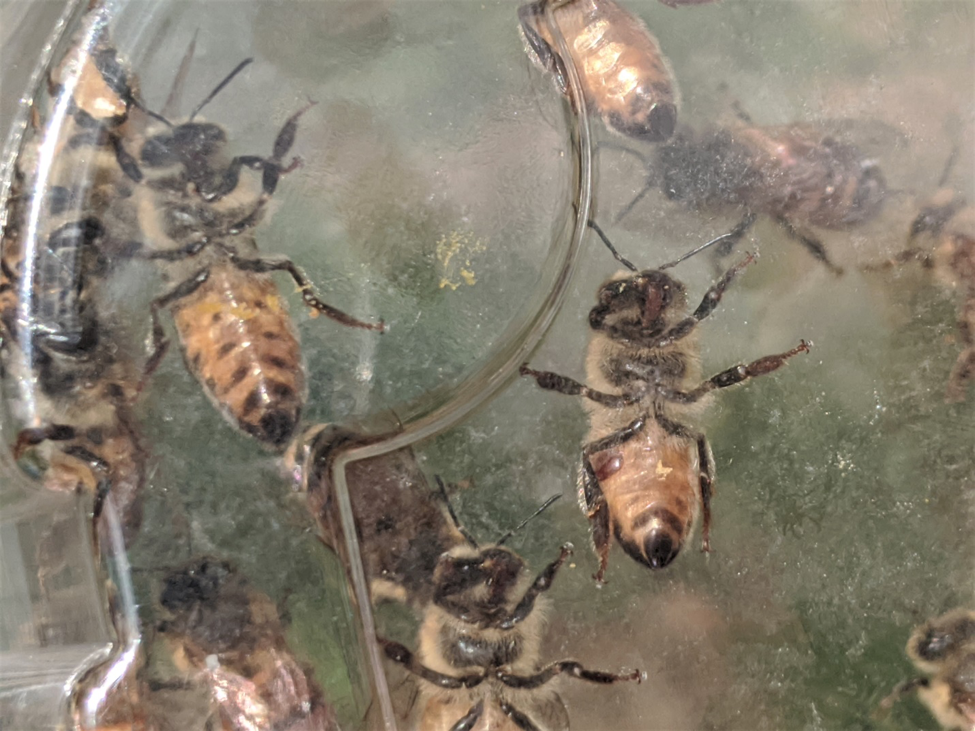
Figure 2. I shook some bees into a clear plastic clamshell food container so that I could view their bellies as they walked inside. Note the mite clearly visible on the underside of the bee to the right. I’ve gently lifted the sclerites on live bees, and am amazed at how deep a protective cavity they provide for a mite.
An alternative method for varroa monitoring?
While looking for attached mites, using the plastic clamshell food container, it occurred to me that this might actually be an alternative method of mite monitoring for those loathe to sacrifice bees in a mite wash (hey, I don’t like to kill bees either). While not as quick or accurate as a mite wash, this method certainly could be used for monitoring the infestation level of the adult bees.
Practical application: If you’ve got good eyesight and good light, you could dump a scoop of house bees into a clear plastic clamshell food container [[4]], and then scan the bellies of the bees to get a rough idea of the infestation rate. Allow any older bees fly off, close the lid, and give the remaining bees several seconds to calm down and spread out. I have no data as far as accuracy, but was easily able to differentiate an infested hive from a number of others in which I couldn’t find a single mite. As you’re likely used to hearing, more research is needed (any grad students listening?).
The anchoring of feeding mites
A bee clearly notices when a mite is walking over their body “hairs,” and generally responds by trying to groom it off. But once a mite gets its head under a sclerite, and appears to be firmly anchored in place, the bee seems to ignore it. My question then is, is there additional anchoring involved in addition to having sticky feet?
Ticks, which are related to mites, are often difficult to dislodge once they’ve drilled into your skin (personal observation). This is due to them having saw-like mouthparts (some photos worth viewing at [[5]]). Some ticks also secrete a bonding glue [[6]]. So I wondered what kinds of adaptations varroa has to anchor itself to a bee while feeding. I pulled out my microscopes and used my cell phone to take some crude photos. Figure 3 shows a ventral (bottom) view of a mite, showing its eight walking legs, and its sensory pedipalps between the front legs.
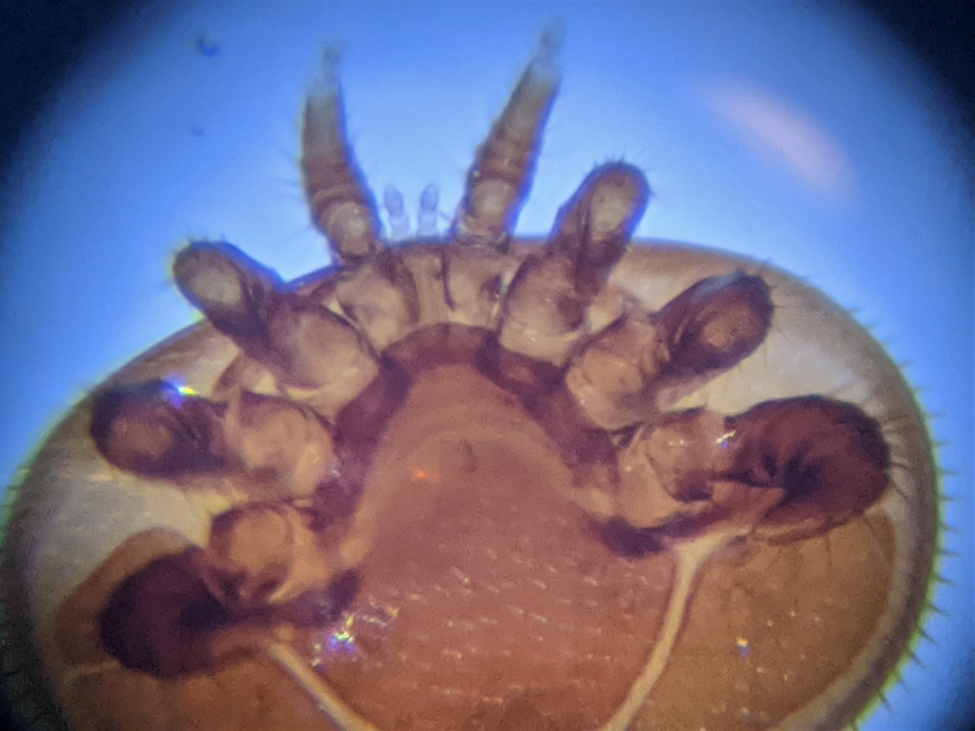
Figure 3. A ventral view of a female mite, with its pedipalps visible between the front legs. Between the pedipalps lie the chelicerae (mouthparts), not visible in this photo.
Let’s take a closer look at those palps, since they have curved, fanglike spikes near their tips (Figure 4).

Figure 4. A closer bottom view of the tips of the pedipalps, with the nasty-looking curved claws clearly visible. It’s apparently not yet completely clear just how the mites use those hooks. I wish to thank Dr. Samuel Ramsey for helping me with the identification of mite anatomy and function in these photos.
Between the pedipalps are the paired chelicerae – the mite’s mouthparts. There are also spines in the bottom of the chelicerae that appear to help anchor the mite into the feeding wound (Figure 5).
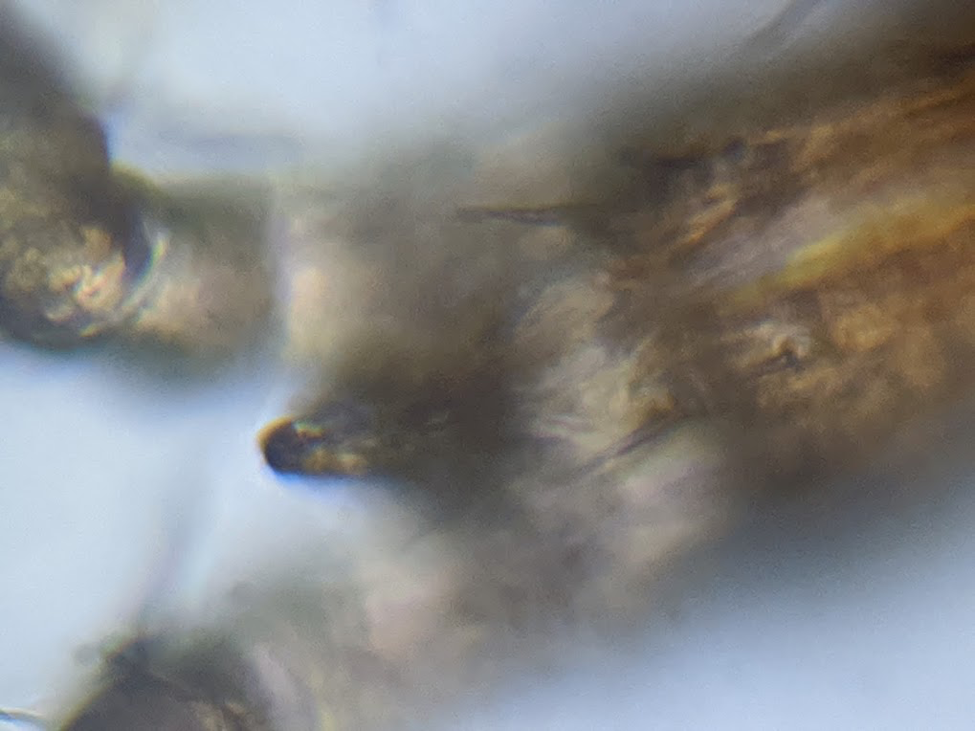
Figure 5. Note the two wicked-looking spines on this bottom view of a mite’s chelicerae (the dark pointed ends of the chelicerae are to the left). These spines appear to help to lock the mite’s chelicerae into the feeding wound.
I wanted to get a side view of the mouthparts, so I tried my hand at dissecting the pedipalps and chelicerae from some mites. I now have the greatest respect for Dr. Lilia De Guzman and other researchers who routinely dissect organs from a mite. My finest forceps and needles looked like blunt shovel handles under the ‘scope. But I was able to clumsily rip the mouthparts off an alcohol-killed mite and take a picture (Figure 6).
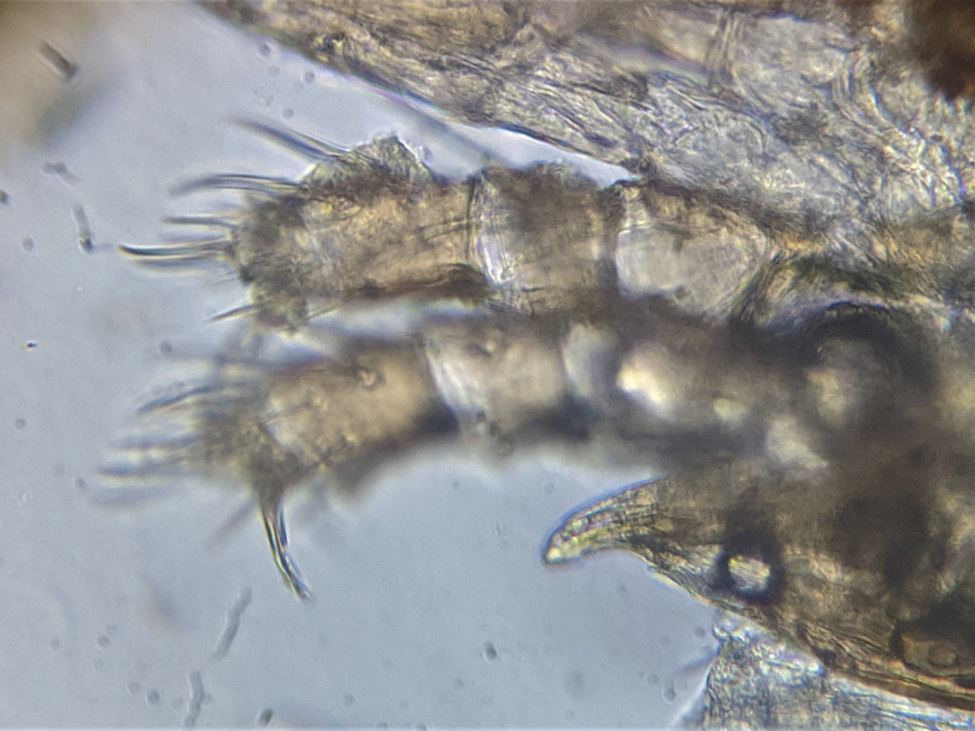
Figure 6. A side view of the feeding apparatus of a varroa mite. At the top are the two pedipalps, one with the curved spine partially in focus. Below is the blade-like end of one of the chelicerae (mouthparts) that penetrate the bee’s soft integument (the anchoring cheliceral spines are folded back in this image).
Ticks are able to alternately extend and retract their toothed cheliceral shafts to pull themselves into the feeding wound, analogous to how the reciprocating lancets of a bee’s stinger drives it through your skin. I’m not clear whether varroa does so, or to what extent it uses its hooks for anchoring.
It makes me cringe to think of having a parasite the size of a Dungeness Crab rip and stab its feeding apparatus between my ribs, but that’s what varroa does to the poor honey bee. So back to my question, how firmly are feeding mites anchored to the bee? To answer that, I needed to collect infested bees that had mites well-buried between their abdominal sclerites. Using the clamshell container described above, I identified some bees carrying mites. I then prodded, stroked, and tugged on several mites with forceps to see how firmly they were anchored (Figure 7).
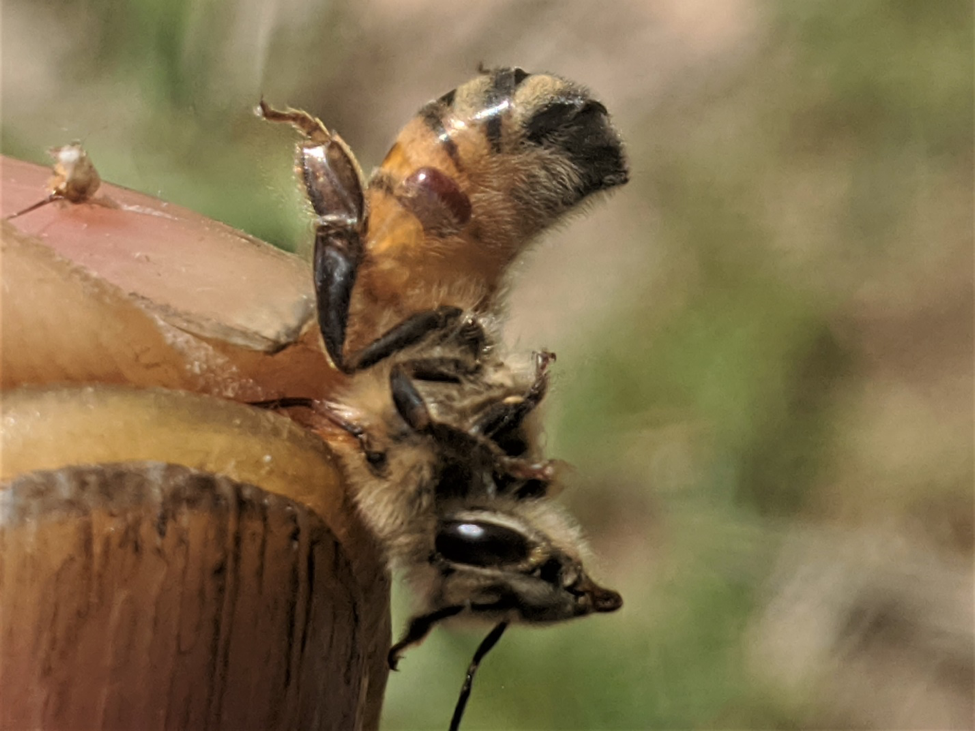
Figure 7. I’m holding a bee by the wings so that I determine how firmly the mite was attached (yes, the bees were uncooperative and some stingers were shed). Upon first touch, the mites, such as this one, responded by quickly wedging themselves even more deeply under the translucent sclerite. I couldn’t dislodge them by stroking them with forceps, but unlike as with a tick, I could easily pull them from the bee.
Result: mites are clearly not ticks, and although they strongly resisted being removed, their mouthparts did not appear to be locked in place, and they could be easily pulled from the bee.
Practical application: I’ve noticed that alcohol rapidly kills bees upon immersion, but not so with varroa – they can stand several minutes of immersion and walk away. Could it be that alcohol functions as an irritant that gets the mites to release their grip? Or on the other hand, could strong alcohol kill or paralyze the mites so quickly that they would remain locked in their feeding wounds? This question led me to bunch of additional tests.
How much agitation is necessary?
It’s commonly assumed that one must vigorously agitate the bees to separate the mites from them (Figure 8). But in order to “thresh” (to separate the grain from the chaff), do we really need to “thrash” (to beat mercilessly) the bee carcasses (or live bees in the case of sugar dusting) to do so?
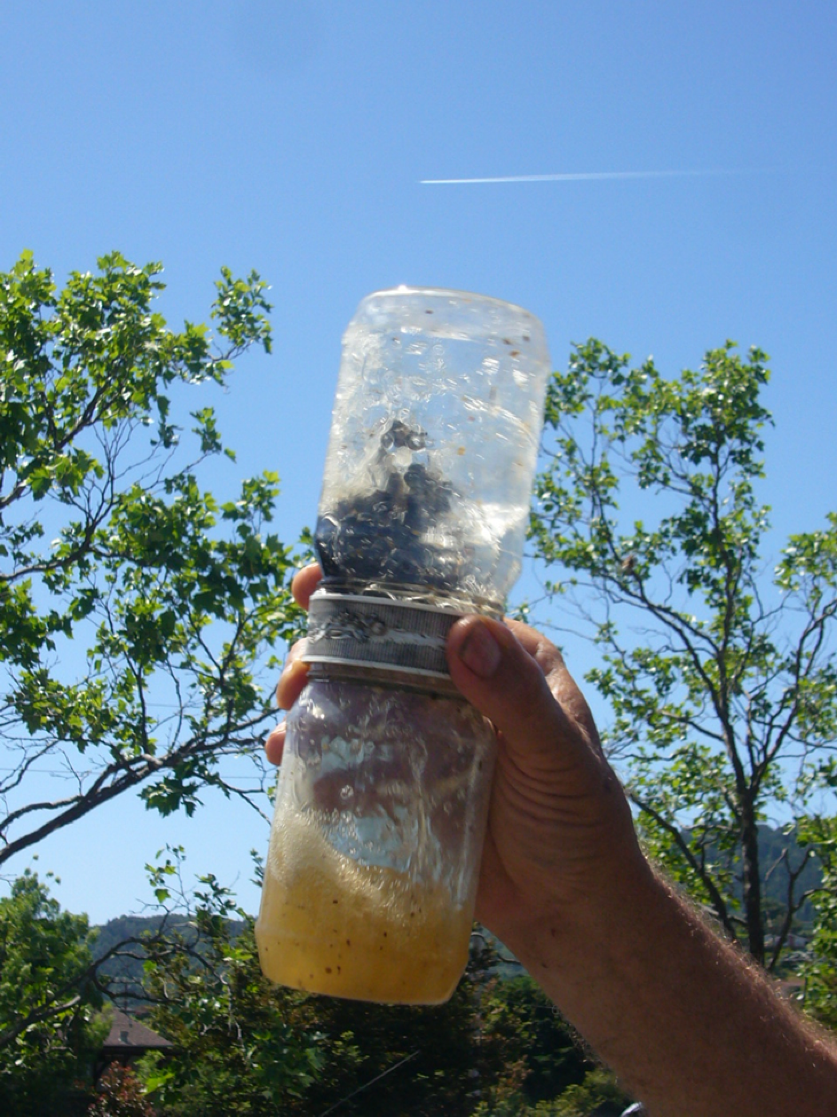
Figure 8. The standard recommendation is to vigorously shake the bees to dislodge the mites. My question is just how much agitation is actually necessary for dislodgement. Once dislodged, further up-and-down agitation just keeps stirring the mites back up into the bees. With the above style of hand agitator, I found that around 15% of the mites in a sample get stuck again in the bees’ bodies as the final shake filters back down.
I performed a small exploratory study to see whether and how quickly mites would release from bees if immersed in 91% isopropyl alcohol, without agitation. I set up a row of 6 cups of alcohol, placed a single-deep layer of bees in a cylinder with a screened bottom, and immersed the cylinder of bees sequentially in each cup for 10 seconds, giving a slight jiggle to allow any loosened mites to drop off as I moved the cylinder from cup to cup. After six 10-second immersions, I then mechanically agitated the bee sample to recover any remaining mites. In this small study of 15 samples, on average 83% of the mites dropped off by 60 seconds (Figure 9).
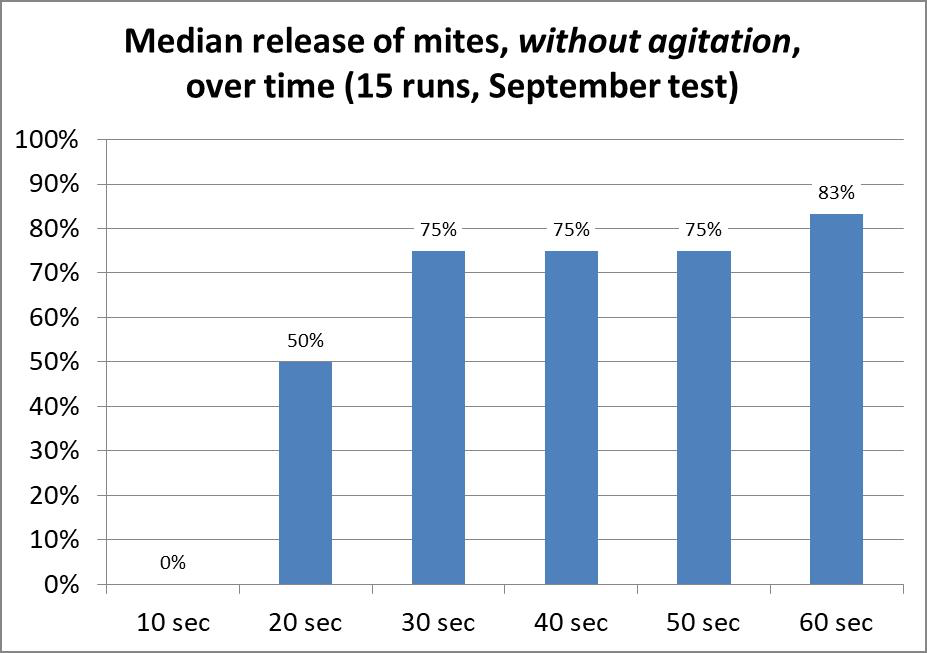
Figure 9. Mite release without appreciable agitation after seconds of immersion in 91% isopropyl alcohol. Although the median release by 60 seconds was 83%, please note that there was considerable variation (not shown), ranging from 20% – 100% (there were not enough mites per sample for anything other than suggestive findings).
The results of this preliminary mite-release data made me wonder how many mites would release of their own accord if I were to extend the immersion period to two minutes? So I fabricated a larger flat-bottom sieve that could hold up to 500 bees in a single layer. I placed the sieve in a white tub containing fresh 91% alcohol, and sampled bees from a collapsing high-mite hive. I first shook the bees from the frames into a dry tub, and then quickly sprinkled them a single layer deep into the alcohol in the sieve, at which point I started the stopwatch.
Sample size varied since these bees were very flighty and defensive; the first two samples were of about a half cup of bees (~300 bees), the third somewhat less, and the fourth of over a full cup (that final sample consisted largely of lower-mite bees that had previously returned to the hive).
It was amazing to observe how quickly the mites released from the bees and dropped through the screen of the sieve without any agitation at all. Within seconds there were dozens on the bottom of the tub (Figure 10). After two minutes were up, I very gently lifted the sieve up and down slightly to jiggle any released mites through the screen, and then dumped the bees into cups for final vigorous agitation to recover any remaining adhering mites (Table 1).
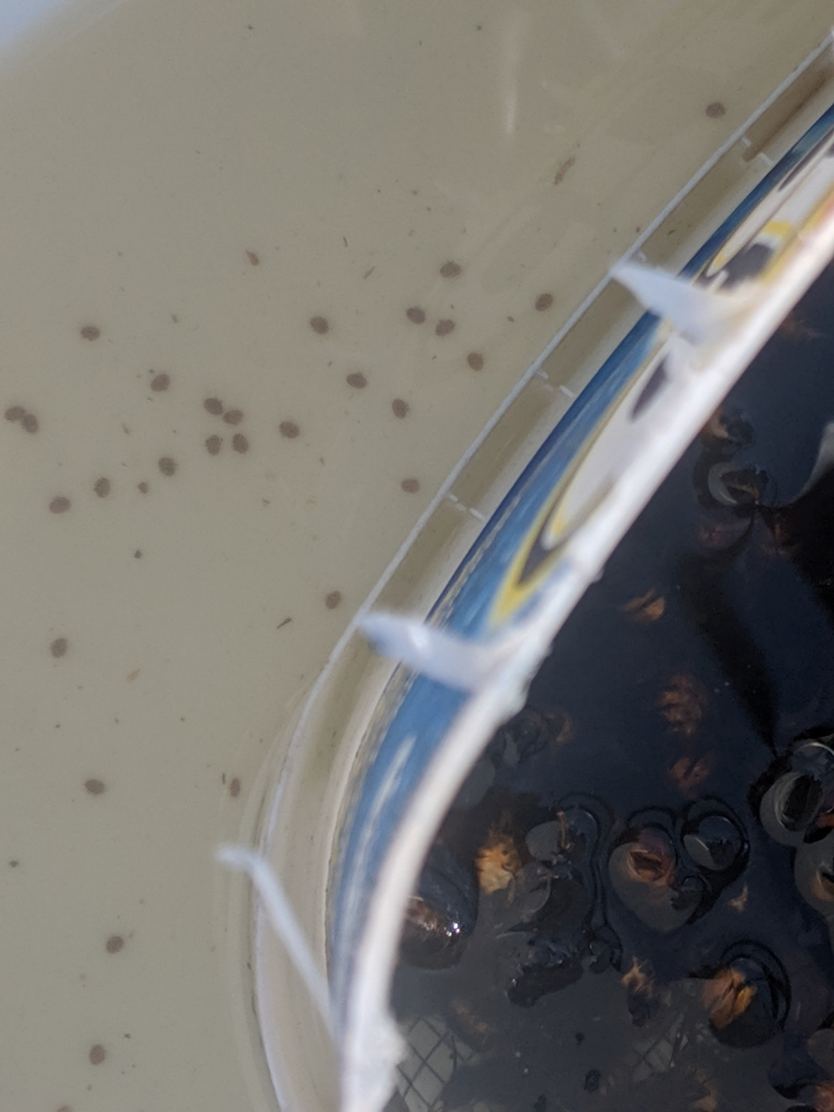
Figure 10. A view from the top. To the right is the sieve full of bees gently immersed in 91% alcohol. The mites begin dropping en masse several seconds after the bees hit the alcohol – without any agitation whatsoever.
Table 1 below shows the results. After 2 minutes immersion in 91% alcohol, most of the mites had already released of their own accord.

Practical application: Patience, patience, patience. In high-proof alcohol, nearly all of the mites released from the bees of their own accord within two minutes. By allowing the sample to set for a couple of minutes before beginning agitation, you can save your wrist. This does not mean that you don’t need to agitate – if the bees are deeper than one layer thick, not all mites drop to the bottom (more results to follow).
Next month
At this writing, alcohol is still in short supply, and lower proof alcohol doesn’t work very well, so let me jump ahead and present a follow up on last month’s findings re Dawn Ultra dishwashing liquid: the optimal dilution appears to be 2 tablespoons per gallon. More findings on using Dawn and other solutions and methods to follow.
Citations
[1] de Jong, D, et al (1982) A comparative analysis of shaking solutions for the detection of Varroa jacobsoni on adult honeybees. Apidologie 13(3): 297-306.
[2] Peattie AM, et al (2011) Arachnids secrete a fluid over their adhesive pads. PLoS ONE 6(5): e20485.
[3] Fakhimzadeh, K. (2001) Effectiveness of confectioner sugar dusting to knock down Varroa destructor from adult honey bees in laboratory trials. Apidologie 32 (2): 139-148.
[4] The Genpak AD16S works very nicely. And a headband magnifier.
[5] Richter, D, et al (2013) How ticks get under your skin: insertion mechanics of the feeding apparatus of Ixodes ricinus ticks. Proc Biol Sci. 280(1773): 20131758. Open access.
[6] Medical University of Vienna (2017) “Tick ‘cement’ as a potential bioadhesive for human tissue.” www.sciencedaily.com/releases/2017/02/170220085116.htm


