
The “Nosema Twins” – Part 2 Detection & Microscopy

March 30, 2011
The “Nosema Twins” – Part 2
Detection & Microscopy
© Randy Oliver
ScientificBeekeeping.com
First Published in ABJ in Jan. 2008
Last fall, getting wind of Nosema ceranae, I carefully collected a few bees from a dozen or so hives from each yard, and sent the whole pooled sample of 500 bees off to a lab for a nosema spore count. The results came back at less than a million spores per bee, so I assumed that my operation was “clean,” and that I was safe. Wrong I was. When I called the lab this summer to check their protocol, they said that they followed the “standard method”—checking a subsample of 10 bees out of the batch. I was shocked to learn that I had made a major management decision for my whole business extrapolated from only ten lousy bees!
This article is certainly not a criticism of any lab—they do a great job at reporting the level of nosemosis following the “standard method” of G.E. Cantwell (published in this journal in 1970 ). An excellent pictorial of a the method can be viewed at Rogers (2002). In “the method,” the abdomens of ten bees are macerated, then diluted in 10cc of water. (In some variations, the mashed abdomens are then strained and rinsed, the slurry centrifuged at 800 g’s for 8 minutes, the supernatant discarded, and the spores resuspended in an exact amount of distilled water). Then a sterile loop is used to transfer a minuscule (0.01 ml) subsample to a hemacytometer (blood cell counting chamber) for the counting of yet another subsample of the spores above a minutely etched grid. That count is then divided by the number of grids counted, and then multiplied by 4 x 10⁶ to estimate the average number of spores per bee. The accuracy of this method is to the nearest 50,000 spores per bee—that is, each spore counted is extrapolated to represent 50,000 spores. In order to arrive at the “treatment threshold” count of a million (1 x 10⁶) spores per bee, the technician would have counted only 20 spores total!
Once you’ve got that exact number, it means…well, little. It just gives you a ballpark figure with no firm treatment threshold to refer to! As Rogers states in the above webpage, “Spore loads per bee can be highly variable, and there is no established threshold for initiating treatments. Infections are normally lowest in September and October ranging from 0 to 1 million spores per bee. Higher counts during these months are certain to result in major problems. Spores are normally most abundant in the spring months. Counts higher than 12 million spores per bee have been recorded. The magnitude of the counts is probably more important than the exact counts. For example, counts that are a few thousand, or even tens of thousands, apart can probably be considered to be similar. Counts that are a few million apart are more likely to be different.”
So late this summer, when I wondered why some yards were not building up as expected, I tried Shimanuki and Knox’s (2000) method of pulling out bee guts with a pair of tweezers, and looking to see if any midguts were white and swollen. Let me tell you, eviscerating random bees in a fruitless search for white guts gets tiresome really fast! I cannot recommend this method. So I was back to either sending in multiple samples to the lab, learning how to perform microscopic examinations myself. Being a cheapskate, I perused a number of variations of Cantwell’s procedure (Shimanuki and Knox, Anon 2004, and the ever helpful Dr. Eric Mussen).
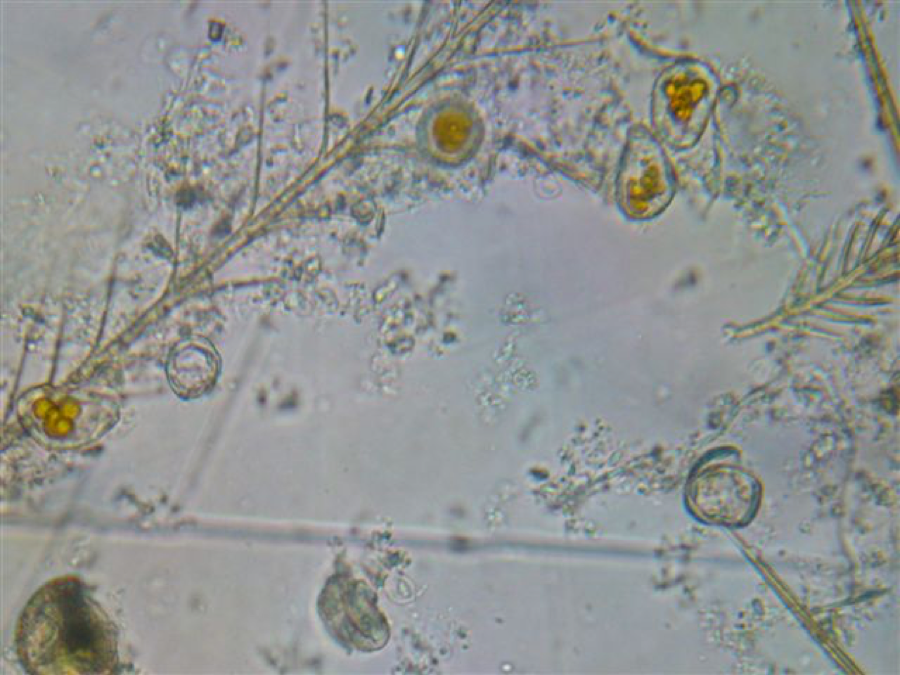
Armed with “book knowledge,” I grabbed a microscope and went out and picked up a “crawler” bee in front of a hive. Crawlers are typical nosema-infested bees that are too weak to fly. I squashed its guts on a slide, and bingo!—nosema spores, very distinctive even to the uninitiated. Luckily for me, I scored on the first shot, which was very fortuitous, since I couldn’t find any spores in the next dozen or so bees that I inspected! This is an important point—you want to have early success in identifying spores, or it will be frustrating looking fruitlessly at slide after slide of bees’ guts, wondering if you’re missing them. Therefore, I’ve included a number of photos that I took with my cheap digital camera simply held against microscope eyepieces. Try to get a feeling from these photos as to the relative size, shape, and distinctive “glow within the rim” of nosema spores.
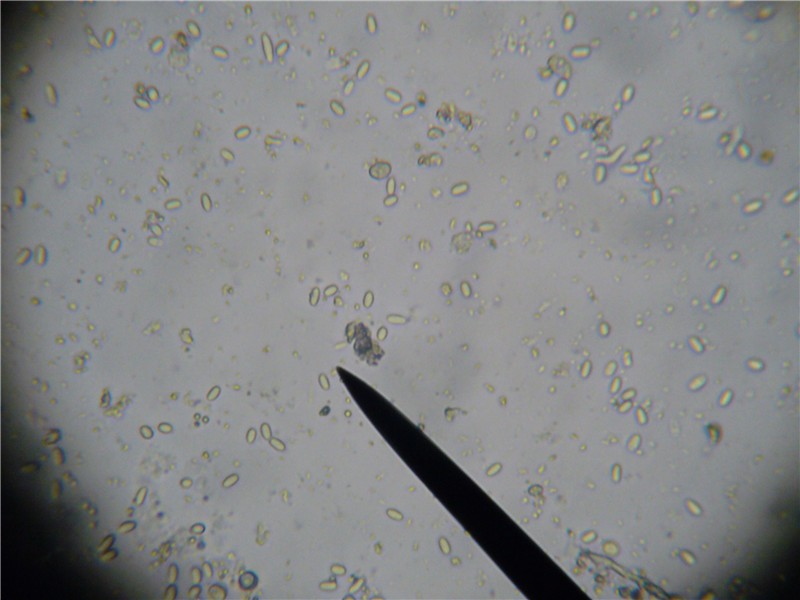
Gut sample macerated in ½ cc of water. Circle of darkness in corners indicates field of view at 400x. Pointer is not indicating anything. So what would this level of infection mean to me?
OK, so now I found spores, but how would I translate the number that I saw into an official standardized “spore count” without going through the daunting “standard method”? Luckily, I came across a commonsense paper by Topolska and Hartwig (2005). These scientists realized that since spore counts were really ballpark figures, a semiquantitative (approximation) method of ranking spore levels would be close enough for management decisions. Eureka! I could modify their method for a quick “triage” sorting, the same as I do with mite “counts.” All I needed to do was to calibrate the number of spores that I saw in a “field of vision” of the scope in relation to the million spores per bee figure.
Topolska and Hartwig considered seeing one to a few spores in some fields of view (as you moved the slide around) to indicate a “slight infection.” They termed a single to few spores in every field of vision as “moderate”, and numerous spores in every field as “heavily infested.” Of course, as you might have guessed, I needed to check their math (and find out what exactly they meant by “numerous)! The whole point of a quantitative count is that you distribute the spores in a bee sample evenly in a measured amount of water, then count all the spores in a submeasure of the slurry, and multiply that figure by the whole volume of slurry.
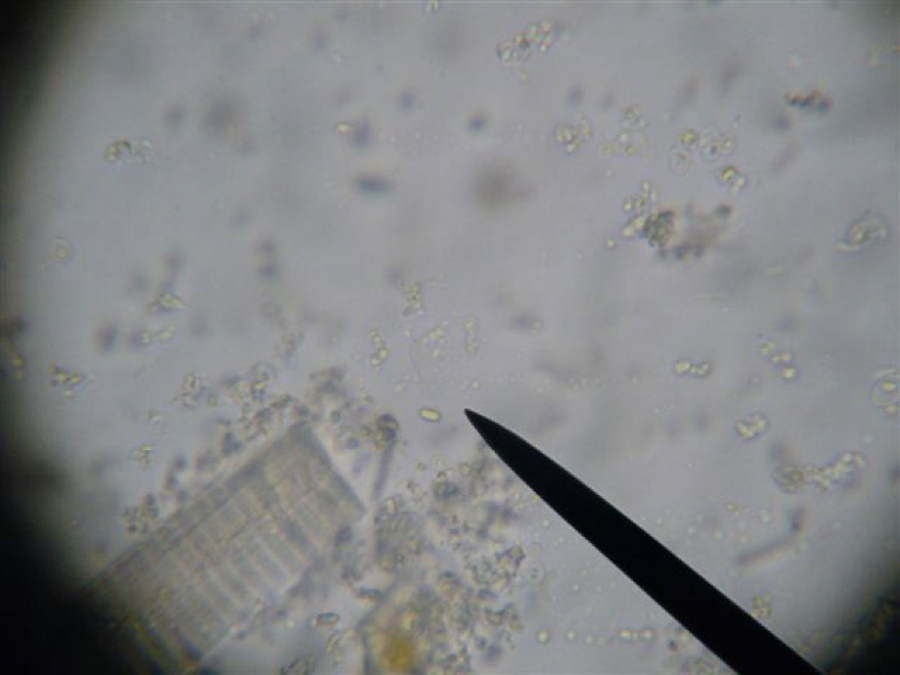
Here’s an example of a very low infection. Only one spore (at tip of pointer) in this field. The banded object is a tracheal tube.
I purchased a hemacytometer, and counted the number of grid squares in a field of view (I checked three different microscopes—they were similar). From that figure, I could convert the standardized spore count to a “field of view” count, allowing for the double concentration of spores in the Topolska method. The figure I arrived at was that if your bees were infected to the tune of 1 million (1 x 10⁶) spores per bee, that you would see 29 spores per field of view (this figure quantifies Topolska’s rating of “numerous”). Update, I’ve correlated more accurately: for every 10 spores per field of view (diluted with 0.5ml of water per bee), the standard Cantwell count would be 2.9M spores per bee.
Curious as to my own colonies, I went out and started grinding bees in various yards bee by bee, and colony by colony, and checking their spore counts. What I found was that most healthy colonies in September fell into the zero to a few spores per field category. However, when I checked struggling colonies, I’d more often see spores in the 50 – 100 range. When I sampled “crawler” bees, they could have up to 300 spore per field—the equivalent of about 12 million spores per bee (I’ve heard recent reports of averages of up to 30 million spores per bee in collapsing colonies)! I also found that nosema levels varied tremendously from bee to bee in the same colony, and from colony to colony in the same yard!
Therefore, the best that I can tell to date is that in a slurry at the dilution rate of ½ ml of water per bee, if you only see no more than one or two spores in every view, you’re probably fine. However, if counts start approaching 25 spores per field, you’d better be treating. At higher levels, your bees have a serious problem. Update: many of my colonies appear to be thriving at counts of 15-20 spores per field of view.
Luckily, you don’t really have to actually count spores—either you see them or you don’t. After checking a dozen samples, you can judge the infection level at a glance.
So what’s a beekeeper to do? A single test in the fall isn’t going to cut it what with Nosema ceranae being active all summer, and the great yard to yard variation in infection levels! Remember that nosema infections are “invisible” until the colony is really sick. What I’m guessing is that sampling for nosema is going to become as commonplace as taking ether rolls or stickyboard counts—at least until we breed bees resistant to the buggers. Looks like we’ve got yet another danged thing that we need to monitor to keep our bees healthy! Looks like you’re either gonna spend a small fortune sending samples off to labs (I’ll list a few at the end of this article), or get yerself a ‘scope.
Buying a microscope
One noted writer stated that beekeepers could use a child’s microscope for nosema testing. Not a good idea—if we start taking microscopes from children, it will really give beekeepers a bad name! Besides, the microscopes sold for children are a surefire way to turn anyone off to microscopy, since their quality is so poor. With microscopes, you generally get what you pay for—notably the quality of the objective (lower) lenses. You’re unlikely to find anything you’ll be happy with for less than $150, but you certainly don’t need to pay thousands for a phase contrast professional scope, either.
I’ve done some scope shopping in scientific supply catalogs and on the internet, and it is just about impossible for a nonmicroscopist to make sense of all the options! I’ve sampled a number of them. I don’t claim to be a microscope expert by any means, but I may be able to help you with a few suggestions in making a purchase. Shop for a “high school-” or “college-level” compound scope that goes to 400x magnification. Look for widefield eyepieces (10X W), Abbe condenser, iris diaphragm (vertical adjustability is a helpful addition), parfocal and parcentered objectives (40x retractable) at the minimum. Achromatic lenses, coaxial focusing, and a mechanical stage are very worthwhile upgrades. I prefer fluorescent, halogen, or LED illuminators over tungsten, which gets hot. Any scope with the above will allow you to identify nosema spores easily. There are jillions new or used (make sure there’s an easy return policy) on the internet, or go to your local high school science teacher or community college to play with some. With any scope (especially used), make sure that you can get a sharp image, and that the controls work smoothly.
A line of microscopes that I’m impressed with are the Omano series, available from www.microscope.com (or simply click the link at the top of this page to go straight to the scope I recommend) . These scopes have surprisingly good optics and features for the money. The OM136C is a great deal on a monocular (one eyepiece) scope for $199. Or, if you have a little cash to spare, feeble vision, or really want to enjoy microscopy, then take a step up to the OM36 for $399. This is a binocular scope (so you can view with both eyes), plus it has a very handy mechanical stage. I highly recommend the scope I recently purchased—the Omano OM36L for $449. The view through this scope is clear and crisp, and the well-placed controls operate very smoothly. It has rechargeable LED illumination and is completely portable for field use—a really valuable feature for sampling in outyards! Once you try this scope, it will spoil you! I’d spring for the eyecups ($8.95) for sure, and the aluminum case ($59) if you plan to take it along in the bee truck. The above scopes are all you need for seeing spores clearly, but the next step up would be the OM100 for $459, which has the next better grade of semi-plan objectives (the objectives are the heart of a scope, and there are several grades). Professional biologists use phase contrast illumination, which is yet another $600 upgrade. The sky’s the limit with microscopy, depending upon your budget.
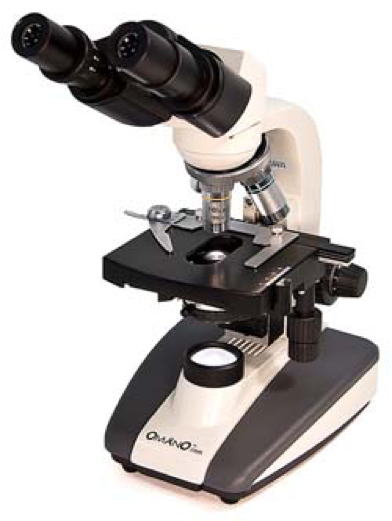
The Omano 36. A moderately-priced binocular compound scope that makes nosema testing a breeze! The portable 36L version can be taken right to the beeyards for quick field testing. Note that the Omano scopes have rear-facing turrets normally only found on high-end microscopes—this feature makes slide handling more convenient. Photo courtesy The Microscope Store.
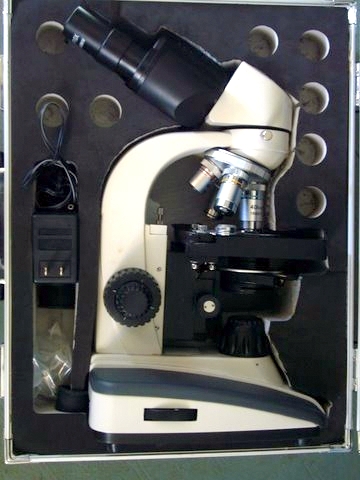
If you order the case for your Omano scope. I suggest that you modify it as shown. Lay the scope, with the head rotated backwards, over the existing cutout. Then take a sharp knife and trace the silhouette. Remove the scope, and cut out the foam, then enlarge the entire cutout so that the scope goes in and out easily.
Welcome to the world of microscopy! You’re going to see all kinds of bee parts—brushy setae (hairs), pollen grains (full and digested), fat globules, pieces of tracheal and Malpighian tubes, etc. If anyone knows what the “fried eggs” are, please let me know! Soon you’ll learn to see past all the junk, and spot spores (one is at the very bottom center, glowing, and out of focus). Omano scope, 400x, LED illumination, intermediate focus.
Microscope viewing tips
Unpack your scope, read the manual, and then play with all the knobs and levers to see what they do. Set the scope on a table in a dimly-lit room, and adjust a chair for comfortable viewing. Then grind up a bee in a little water and dab some of the slurry on a plain glass slide. Cover the drop with a “cover slip”—a thin glass or plastic square. You’ve now made a “wet mount.” Glass cover slips are premium, but the plastic slips are easier to handle, clean, and reuse. I find that I can reuse the plastic slips dozens of times before they get too scratched up (they only cost 2½¢ each, but I’m a skinflint beekeeper).
Now turn the lower objective turret until the shortest (red) 4x lens locks into place. Place the wet mount slide onto the stage so that a spot of light hits a part with “junk’ in it. Put your eye to the eyepiece and use the coarse focus wheel to bring the guts, pollen, hair, etc. into view. Then carefully rotate the (blue) 40x objective into place (there is not much clearance between the 400x lens and the cover slip, so make sure that there’s no liquid on top of the slide!). Adjust the fine focus slightly if necessary to make the little globs crisp. Now have fun adjusting the light intensity, iris opening, and iris height adjustment (if present) to get a clear view that is not too bright—close the diaphram until the objects slightly darken, and the globs have sharp, clear edges. All this twiddling will soon become second nature to you. If you are dexterous enough to load hives with a forklift, you’ll be able to operate a microscope just fine!
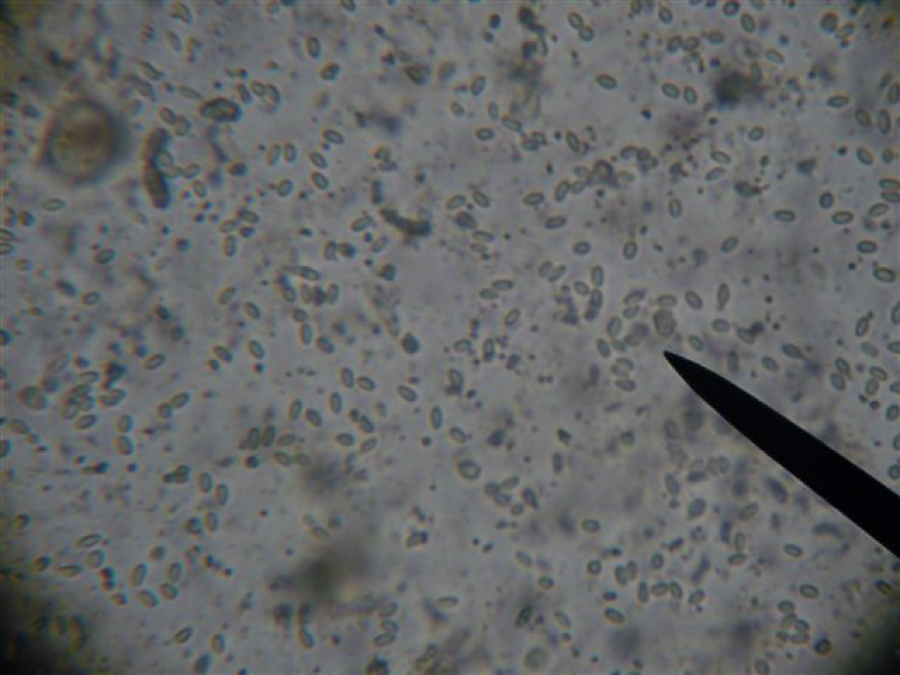
High nosema infection, lighting needs to be adjusted to “illuminate” the centers of the spores.
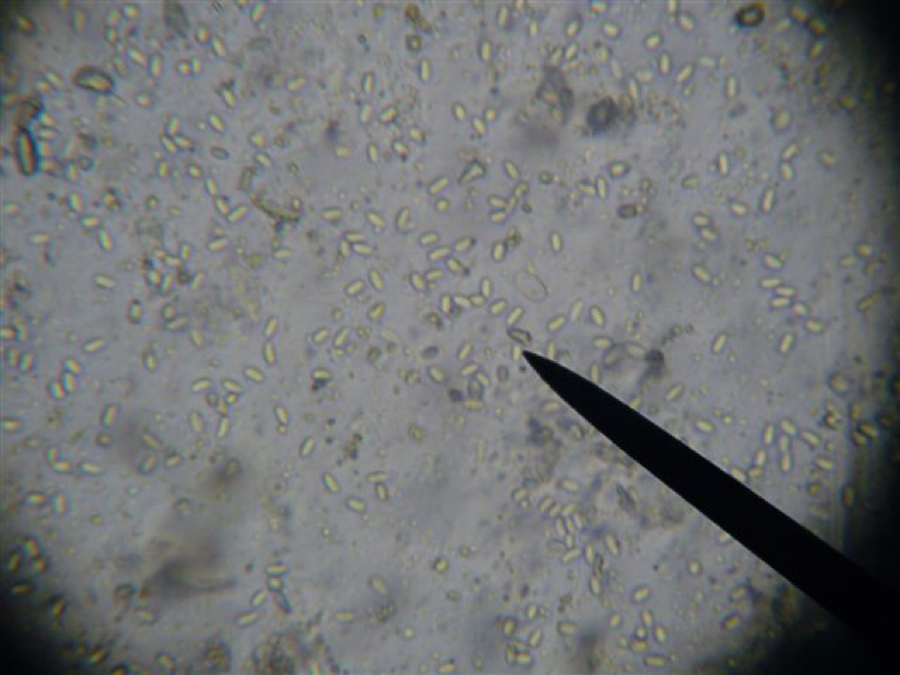
Similar slide, with lighting adjusted to that spores “glow.” How many spores can you count? Answer at end of article.
Then shift the slide around by hand or mechanical stage to look for spores. They will be randomly strewn about the wet mount, but if there is any appreciable infection, you will see some in every field of view. See the photos. I tried to include some “bee trash” for scale. Nosema spores will all be approximately the same size and shape. They are distinctively oval, with a dark edge, and a bright, clear center. The brightness will change as you adjust the fine focus up and down slightly. Once you spot some, adjust the iris and light settings further to make the spores stand out. Then leave all the settings where they are! All you’ll ever need to change for each new slide is to slightly adjust the fine focus, and to move the slide around.
With fresh bee specimens in a water mount, you’ll see tiny protozoans swimming around, and the nosema spores may jiggle (I don’t know why). But most important to know is that nosema spores sink like rocks!
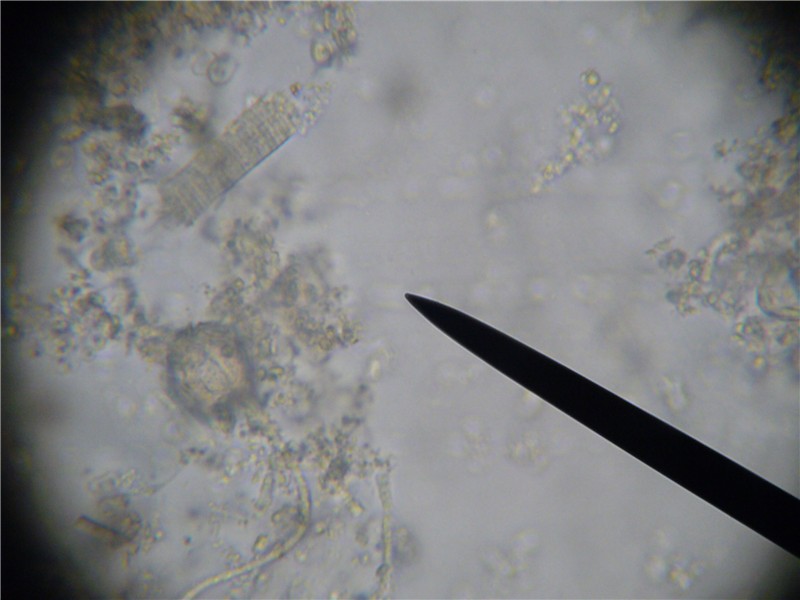
Illustration of depth of field. At 400x magnification, you can focus on about four different layers of objects in the thin film of slurry. Note the tracheal tube in the top left corner. I have brought it into focus. Everyhing further toward you or away from you is out of focus. There is a nosema spore resting on top of the tube that is so out of focus that it is invisible, and several spores to the far right that are resting at a deeper level, and are also out of focus. In this view, you would see zero spores.

Same slide, same view, but focused slightly down such that the tracheal tube is now out of focus. Note that several nosema spores are now in focus to the far right. It is important to allow spores to settle for a minute, then to focus to the bottom of the liquid. This slide would indicate a slight infection level.
You will have much better luck at spotting spores if you allow the wet mount to settle for a minute or two. Then use the fine focus knob to focus down to the bottom of the mount. Most spores will come to rest at that level—settled lying on their sides right on top of the upper surface of the glass slide. Spore spotting comes with practice—like looking for the queen. After a few slides, they will jump out at you in a split second! After a few dozen slides, you’ve only got to glance at a sample for a few seconds to approximate a count.
After viewing, rinse off the slide and cover slip, dry with a soft cloth, and reuse again and again. It’s handy to rotate a few slides if you’re processing a bunch of samples, so that you don’t get the microscope stage wet.
Microscope Care
Now that you’ve forked over your hard-earned cash for a shiny new microscope, treat it well for a long life. A microscope is a precision tool full of delicate parts. Don’t ever bang or drop a scope—those tubes may contain 15-20 lenses that can be jarred loose! The rule for students is to always carry a scope with two hands. Keep the scope covered or in a case when not in use. Dust, moisture, skin oils, and bee guts are the scope’s enemies! Wipe off any liquids with a soft cloth moistened in isopropyl alcohol. Never touch the lens surfaces with your fingers or regular tissue paper. Use only microscope lens paper or a Q-Tip, moistened in lens cleaner or alcohol. Use camera-cleaning compressed air to blow dust out of hard to reach areas, or inside the scope if necessary.
To be continued:
Where in the hive to collect the best bee sample.
Sampling math—how many bees, and how many samples to take?
And a photo series on three sample preparation techniques.
Oh, the answer to how many spores there were in that photo? C’mon, get real—do you really think that I have the time to count ’em all? That bee was sick—that’s all that I need to know.
Acknowledgments
This research was funded by the California State Beekeepers Association—I greatly appreciate their generosity. Once again, I am indebted to Dr. Eric Mussen, for his knowledge and advice. My recommendations, however, may not necessarily reflect his opinions. Dr. Raquel Martin-Hernandez, and several other unnamed researchers have also been most helpful. I appreciate the encouragement that I have received from both the research community, and by beekeepers worldwide. Thank you!
References
Anon (2004) Nosemosis of Bees in Manual of Diagnostic Tests and Vaccines for Terrestrial Animals, 5th Ed. World Organisation for Animal Health http://www.oie.int/eng/Normes/mmanual/A_00123.htm
Cantwell GE (1970) Standard methods for counting nosema spores. American Bee Journal 110(6), 222–223.
Rogers, REL et al. (2002) Nosema Detection. Great website with instructions for counting spores http://www.wildwoodlabs.com/viewer.php?article_id=84
Shimanuki, H and D Knox (2000) Diagnosis of Honey Bee Diseases. Agricultural Handbook 690
Wilson, C.A., and L.L. Ellis. 1966. A new technique for the detection of nosema in apiaries. American Bee Journal 106:131.


