


The Suck-a-Bee
The Suck-a-Bee
Randy Oliver
ScientificBeekeeping.com
First Published in ABJ in Aug. 2008
This sleek sucker makes nosema sampling a breeze! And you can build it yourself for about $40.
Randy Oliver
[ ** Suck-a-Bee update: Dirt Devil makes a nearly identical, but more expensive, vac that operates with a 15v battery and has greater battery life. It may have enough power to avoid the external power supply. If you try one, let me know how it works! ]
With the discovery of the widespread presence of the intestinal parasite Nosema ceranae, many beekeepers are sampling to detect infection levels in their operations. In previous articles, I have noted that in order to obtain meaningful counts, the bee sample must meet three criteria:
1. The sample must be composed of older bees—foragers taken from the entrance.
2. The sample should be taken near mid day, since that is when infected bees fly.
3. The sample size should be at least 25 bees.
It quickly becomes apparent to anyone who attempts to collect multiple samples of bees from the entrance, that it can be difficult and time consuming. A number of researchers over the years have used a modified portable vacuum for the purpose (Bromeshenk 1978, Gary & Lorenzen 1987).
I’ve received numerous requests for plans for the vacuum shown in a previous article. That model was a prototype, which was given the frivolous moniker “The Suck-a-Bee” by beekeeper Mike Montgomery the first time we used it. The name stuck like glue! However, the original design called for improvement. In this article I will describe a relatively simple design for a field sampling vacuum that can be built cheaply with off-the-shelf components, by any handyperson with common tools.
The Suck-a-Bee is made from a modified Dirt Devil M0886 Scorpion Cordless Handheld Vacuum.
The first decision is whether one wants to be tethered to a power source. My first prototype was a 12V car vac that ran off the car battery. However, lugging the battery around was cumbersome when only a few samples were needed. So my son Ian and I checked a number of cordless vacuums for suitability for easy modification. The Dirt Devil Scorpion® fit the bill, due its balance, low price, the handy clear crevice snout, and its amenability to conversion to divert bees into a jar of alcohol. The ability to collect bees directly into alcohol is a huge plus.
The materials that you will need are:
1- Scorpion vacuum
1- 1-1/2” plastic plumbing p-trap
1- plastic large mason lid
1- scrap of 1/8” wire hardware cloth
4- #6×1/2” self tapping screws
1- can low expansion urethane foam sealant
Plumbers Goop or silicone sealant
Hacksaw, drill, sander, scraps of 1-1/2” chrome tailpiece (from any plumber or hardware store) and ¾” copper pipe.
For the external power modification, you will also need a 6-ft two-wire extension cord, a 2-slot polarized plug to match, two battery-sized alligator clamps, and a soldering gun.
Building the Suck-a-Bee
Step 1. Cut the tailpiece off at 60° as shown with a fine-toothed hand saw.

Step 2. Reach inside and rip the small rubber flap off the intake of the vacuum, then check the tube for fit. The 60º end should match the rectangular intake. If necessary, adjust the hole by melting with the tailpiece—don’t worry, any slop will be covered by the lid. Use a knife to clean the burrs from the cut tube ends.
Step 3. Heat a piece of scrap 1-1/2” chrome tailpiece to melt a hold the size of the plastic tube.
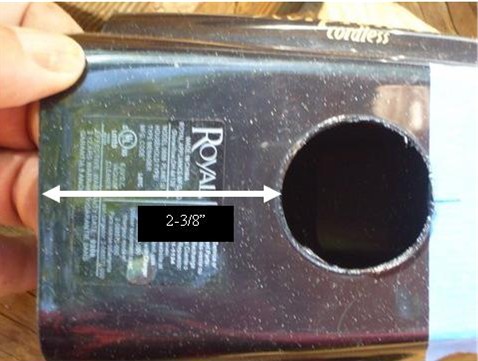
Step 4. Melt a hole as shown, centered sideways, 2-3/8” from the back edge of the nosepiece to the edge of the hole.
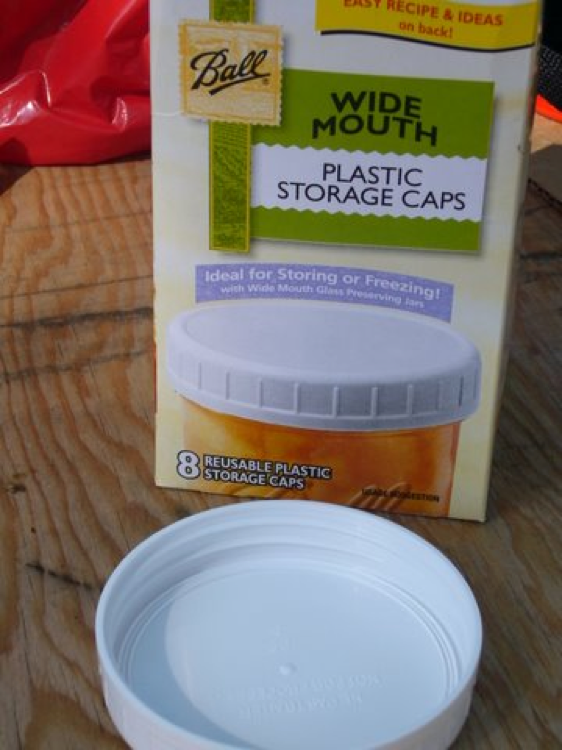
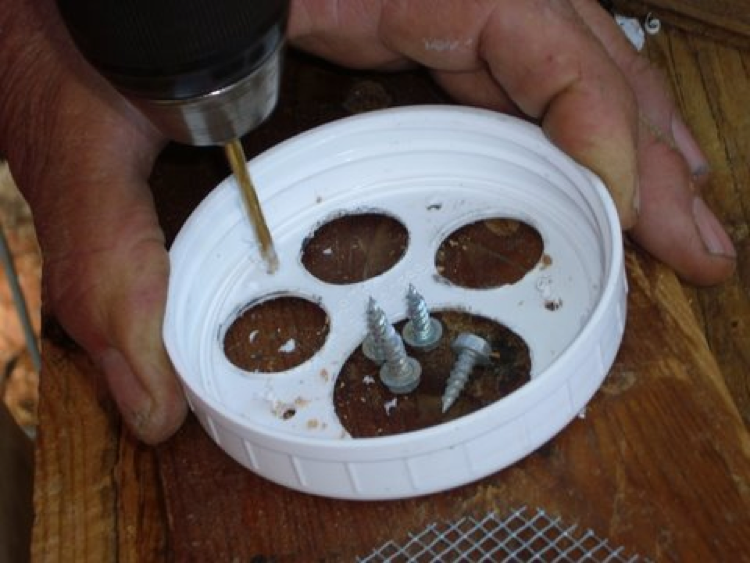
I used a plastic wide mouth mason lid from the hardware store.

Step 5. Melt a 1-1/2” hole very close to, but not touching, the sealing bands inside the lid.
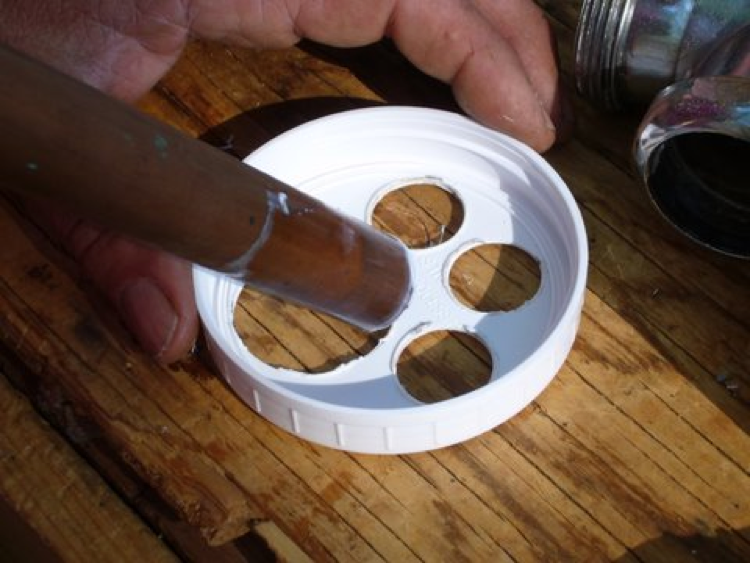
Step 6. Use a piece of ¾” copper pipe to melt three additional vent holes.

Step 7. Now set the punched lid on the bottom of the Suck-a-Bee nose, lining up the large hole (insert the elbow temporarily). The smaller holes go toward the wide end. Firmly hold or tape the lid in place, and melt out the three small holes in the nosepiece.

Step 8. Sand off any raised rims at the melted holes.
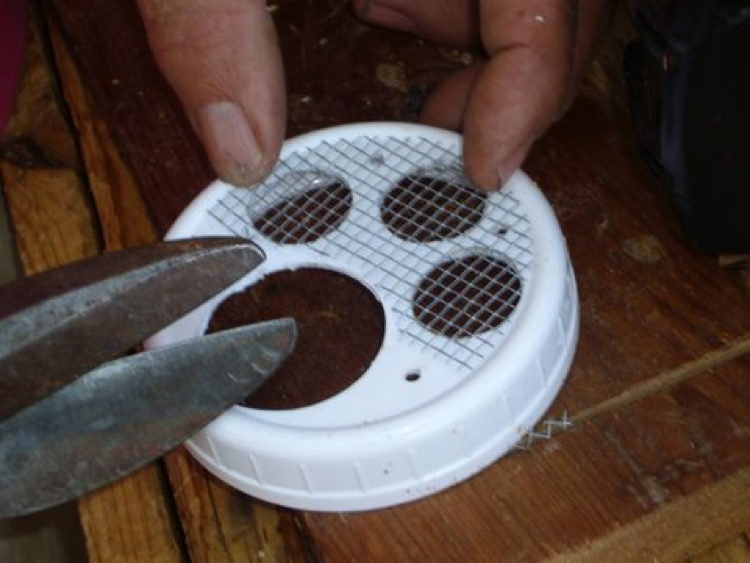
Step 9. Cut a piece of 1/8” hardware cloth to fit over the small holes.
Step 10. Drill four clearance holes through the lid for the attachment screws.
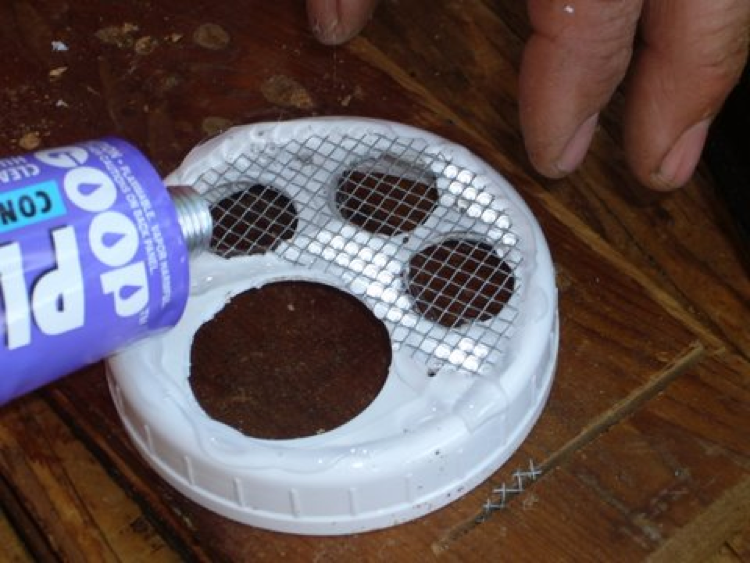
Step 11. Use a small amount of Goop or silicone to hold the screen in place, and around the edge to seal the lid airtight to the nosepiece.
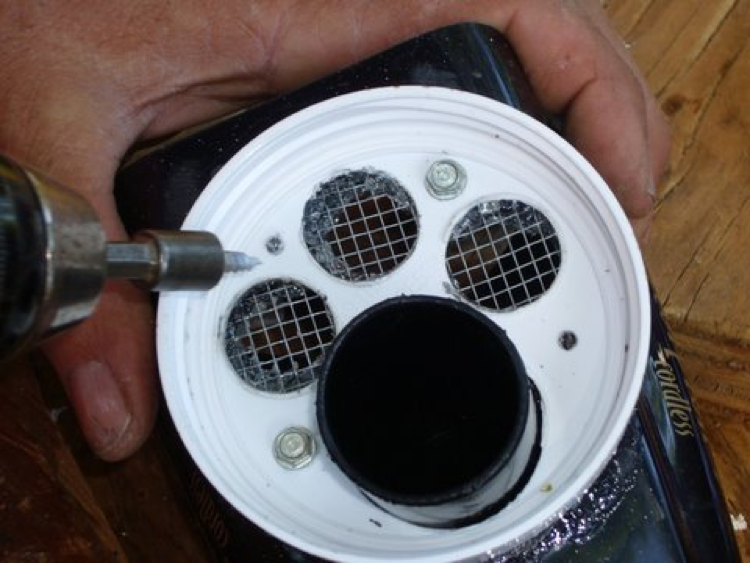
Step 11b. Insert the 1-1/2” elbow, and screw the assembly to the nosepiece. Note that I used too much glue around the screen, and had to clean it out later (Goop is much easier to remove than silicone).

Step 12. Lock the clear snout into the extended position, and position the black elbow against the intake. It may be prudent to tape over the screen. Then use low expansion urethane foam to lock the elbow in place and seal any air leaks. The amount of foam shown is more foam than you will need, as it expands. After an hour, any excess foam can be easily removed.
Step 13. (Optional) The lid that you screwed on will prevent the Suck-a-Bee to fit the charger without removing the nosepiece. If you don’t wish to remove the nosepiece each time you recharge, you must remove part of the charger base. (Note that this step is not necessary if you are going to add the auxiliary power input for the Suck-a-Bee Pro, as detailed below). Remove the screws from the charger base, move the wires out of the way, and bend the tabs. Then use the hot metal tailpiece to melt the plastic away. Check for fit, then reassemble, and sand smooth.
The finished product, ready for action!
Suck-a-Bee Pro–Modification for external 6v power supply.
The main limitation of the Suck-a-Bee at this point is its limited rechargeable battery. The new battery pack is good for about 10 minutes of sucking, or about 10 -15 samples. However, if you have a soldering gun, it is easy to modify the device to accept an auxiliary 6V input from an external 6V automotive battery for extended use.
At this point, you are going to surely void the warranty (up ‘til now, you haven’t messed with the power unit)!

Step 14: Adding power
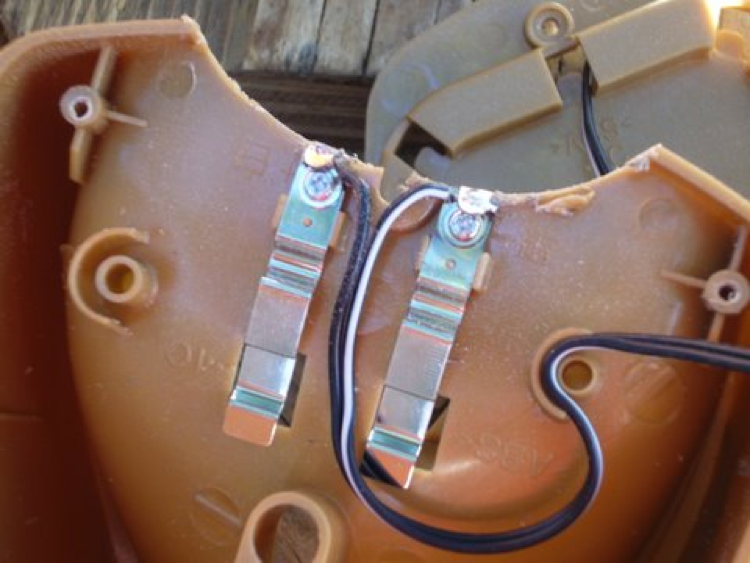
Wire a round power cord into a female polarized (slots of different sizes) connector. Drill a hole to fit the cord into the end of the handle, noting the position of the screw to avoid. Then lay the vacuum on its side, and remove and retain the 5 screws holding the sides together. WARNING! Do not turn the lower case containing the motor upside down! All kinds of parts will fall out (including the motor), and it is dang tricky to get the motor back in and aligned properly. Strip the jacket off the power cord and tie an underwriter’s knot around the handle screw holder as a strain relief. Then connect the two conductors as shown. Check polarity as you go—the fan impeller spins so that air is thrown out the sides.
DANGER: Be aware that the possibility exists that some dang fool might hook up the alligator clips to his ears, and plug the other end of the cord into a 120V wall outlet! Seriously, this is a real potential hazard for children, and must be kept away from them.
The Suck-a-Bee is now ready for use. It can be powered by any 6-volt automotive type battery. I find that a small motorcycle battery is handy to carry, and provides plenty of power for multiple samples. This modification also allows you to recharge your Suck-a-Bee’s internal batteries with either the factory charger, or from the 6V automotive battery charger that you use to recharge the external battery.
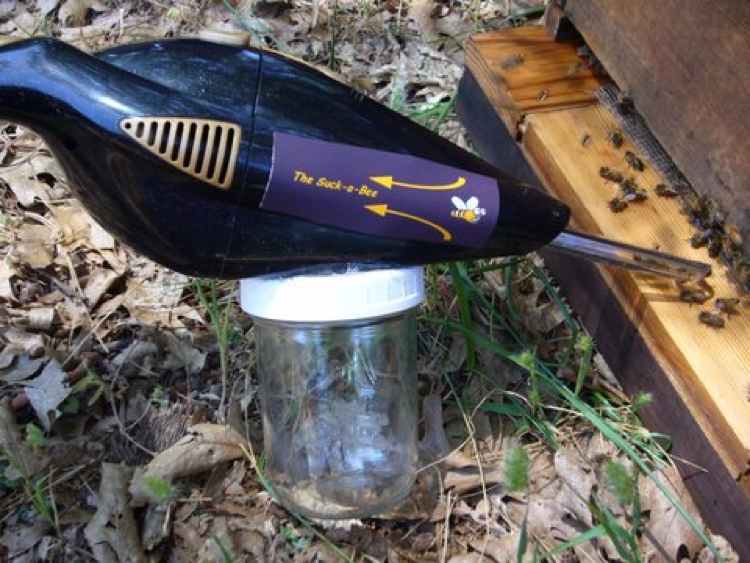
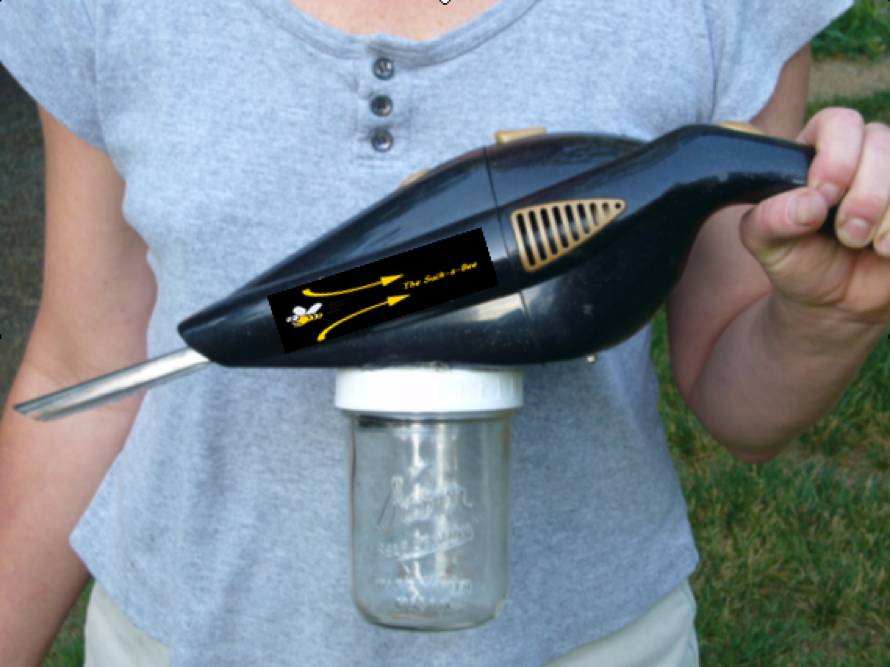
The Suck-a-Bee in action.
To use the Suck-a-bee, I add about ½” of 70% rubbing alcohol to the jar. This amount of liquid will not get into the machine if you lay it on its side, yet is enough to quickly kill the bees. In order to recruit enough “volunteer” bees, I place a wooden block or corrugated cardboard “V” to seal the entrance, wait several minutes for returning foragers to pile up, then vacuum them all up at once. Be sure to use something that the bees can push out of the way, or chew through, in case you forget to remove the plug!
Once you have your sample, process it for viewing under a microscope as described in my previous articles, also at www.scientificbeekeeping.com.
Update
Now that you’re all concerned about Nosema ceranae, let me tell you that I am seeing research (Pajuelo 2008), and indications from my own test yards, that N. ceranae alone, at spore counts in the range of 1 million spores per bee may not affect colony performance greatly unless there are contributing factors, such as susceptible bee stock, poor nutrition, or other diseases present. I will be writing more about this, as well as reporting on my trials of various nosema treatments.
Updates
Dirt Devil makes a nearly identical, but more expensive vac, that operates with a 15v battery and has greater battery life. It may have enough power to avoid the external power supply. If you try one, let me know how it works!
4/29/09
Randy, I made a simple bee vac from the 15 volt Dirt Devil “Accucharge”and it works great. The measurements are just slightly different and I used “DAP/TEX” foam product. The Dap foam is water clean up, but I found that the fumes from the Alcohol (at least I am assuming) softened the foam and allowed it to run just a little. I made a thin cardboard (shirt board) shield to fit inside the housing up against the foam and it is working out OK. Also I did not modify the charger base. I just remove the “nozzle” end and put the motor end in the charger. I get maybe 40 to 50 samples per charge. Which makes it great for working a small bee yard. A small DC/AC converter that plugs into the truck might be all that is needed for bigger jobs. Merril Holden
References
Bromenshenk, J (1978) Investigation of the impact of coal-fired power plant emissions upon insects…Section 5 U.S. Environmental Protection Agency Rpt. 600/3-78-021.
Gary, N and K Lorenzen (1987) Vacuum device for collecting and dispensing honey bees (Hymenoptera: Apidae) and other insects into small cages. Annals of Ent. Soc. of Am. 80(5): 664-666.
Pajuelo, AG, C Torres and FJ Orantes Bermejo (2008) Colony losses: a double blind trial on the influence of supplementary protein nutrition and preventative treatment with fumagillin against Nosema ceranae. Journal of Apicultural Research 47(1): 84-86.