
An Improved, But Not Yet Perfect, Varroa Mite Washer

January 14, 2014
An Improved, but Not Yet Perfect, Varroa Mite Washer
Randy Oliver
ScientificBeekeeping.com
Originally published in ABJ in Oct 2013
Update 4 July 2022 for the benefit of Aussie beekeepers.
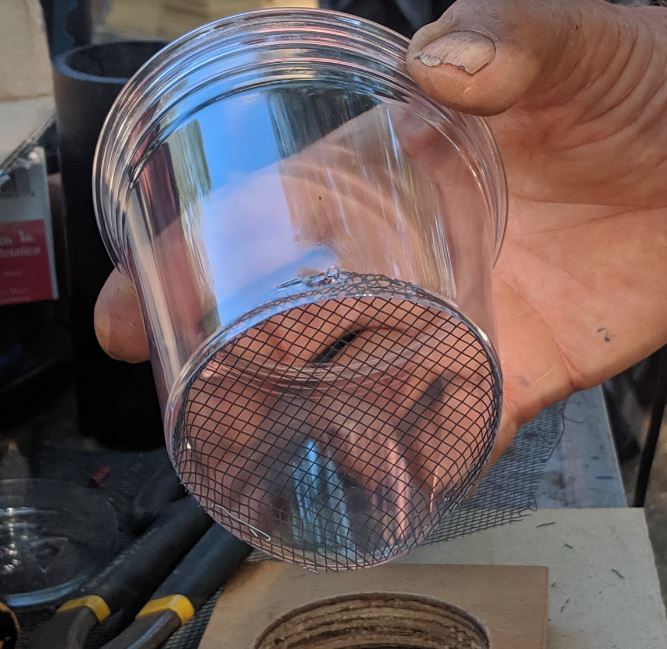
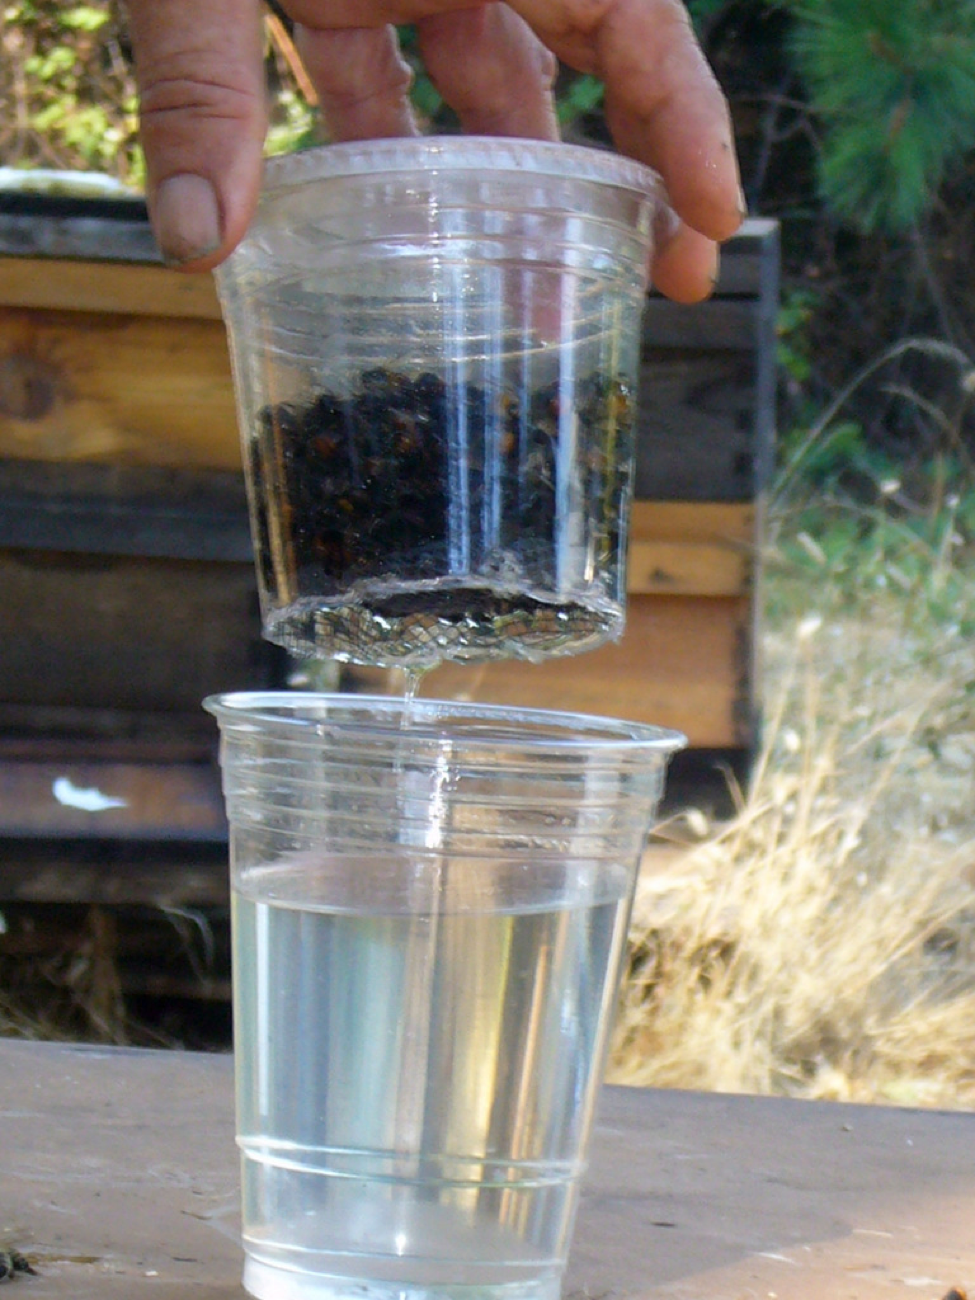
The simplest version of a mite wash cup is with two 16-oz clear plastic cups and a piece of tulle fabric:

Figure 1. Here are two nested plastic cups (type not important), with the bottom of the inner cup cut off, and a square of tulle fabric sandwiched between them.
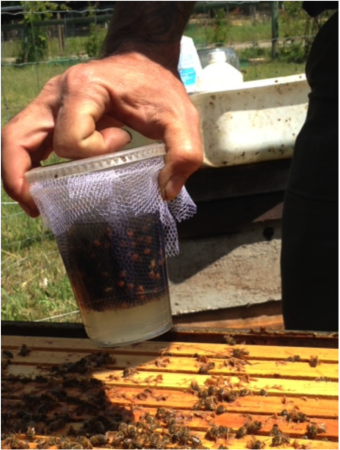
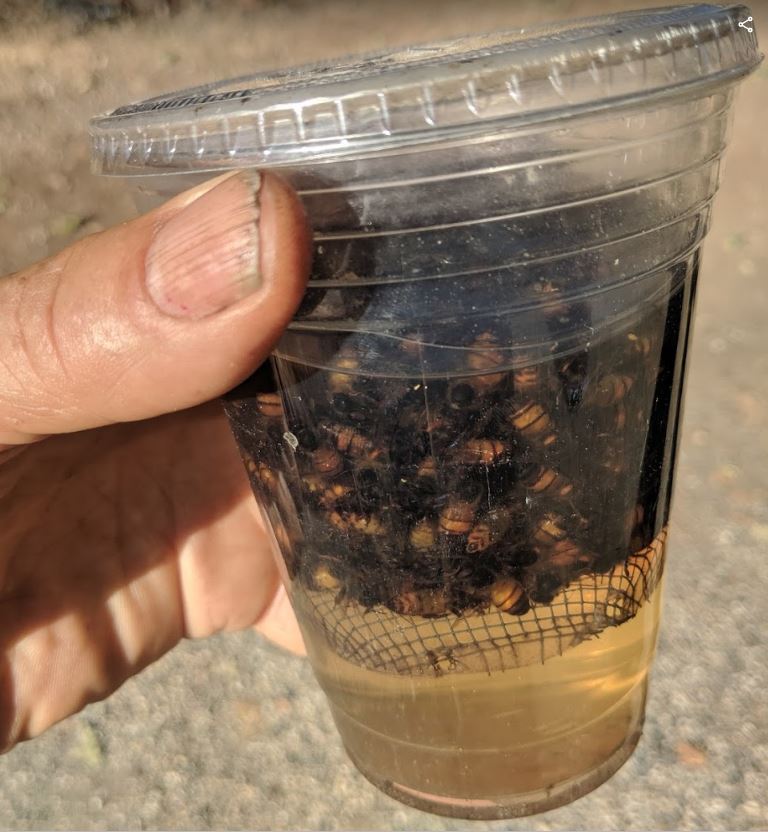
Figure 2. The mite washer in action. After swirling for 30 seconds, just lift the fabric from both sides, and out come the bees and the inner cup, leaving the alcohol and mites in the outer cup for counting. Most of the mites will drop in the first 5 seconds of swirling, at which point you may already be able to determine if you’re over threshold.
We no longer use alcohol. Dawn Ultra hand dishwashing detergent works even better (other tested detergents did not work nearly as well). Dilute the Dawn at the rate of 1 Tbl per half gallon of water (8-10mL per liter).
With Dawn (or 90% alcohol) only a small amount of agitation is needed (see the link below). Dump the bees into the Dawn solution, and leave them alone for a full minute — by which time rougly 2/3 of the mites will have dropped on their own. Then swirl (don’t shake) the bees in the liquid to allow the remainder of the mites to precipitate. It doesn’t take much action to do so.
Use a 10x magnification by 6″ diameter makeup mirror, held 4″ below the cup for easy viewing of the mites. Photos at Refining the Mite Wash: Part 3 – Dislodgement, Precipitation and Separation – Scientific Beekeeping
Update 16 December 2019
Ethical note: yes, one sacrifices around 300 bees when performing an alcohol wash. But that’s what worker bees do — they sacrifice themselves for the good of the colony. Losing a small number of workers in order to prevent a colony from dying an ugly death due to the varroa/DWV Monster is a price that any colony would gladly pay.
OK, I’ve been making and using mite wash cups for some time now. Although there could certainly be improvements, I’m quite happy with the plastic (either PETE or polypropylene, but don’t mix the two, as they don’t fit together) 16 oz Solo cups. Here’s how I quickly make them. With a bit of care, the screened cup will last for hundreds of washes, so long as you place it inside an outer cup when you toss out the washed bees, so that it doesn’t flex from the motion and stress the staples. The outer cups and lids can be replaced at will.
Tip: when finished washing mites, don’t stack the screened cup within the outer cup — it will stick like glue after the alcohol dries! Instead, always store the outer cup inside the screened inner cup.
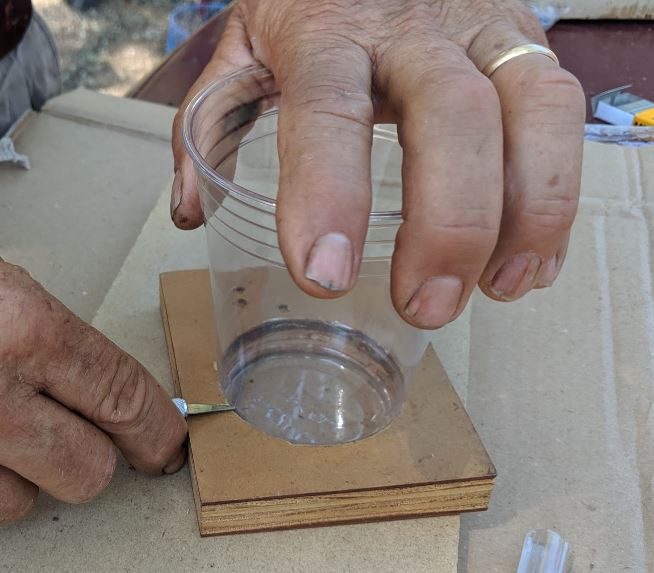
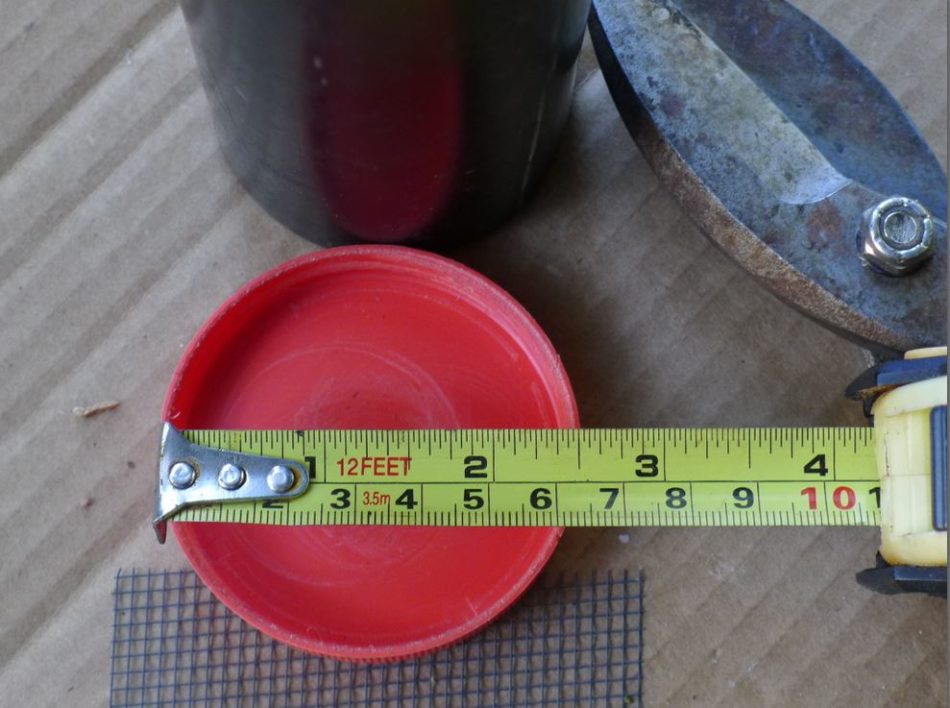
Start by taking a 2 ½” (two and a half inch; 67 mm) hole saw and drilling a hole in a 3/4″ piece of board. Place a cup into the hole, and cut around it with a razor blade or razor knife, removing 3/4″ from the bottom of the cup.
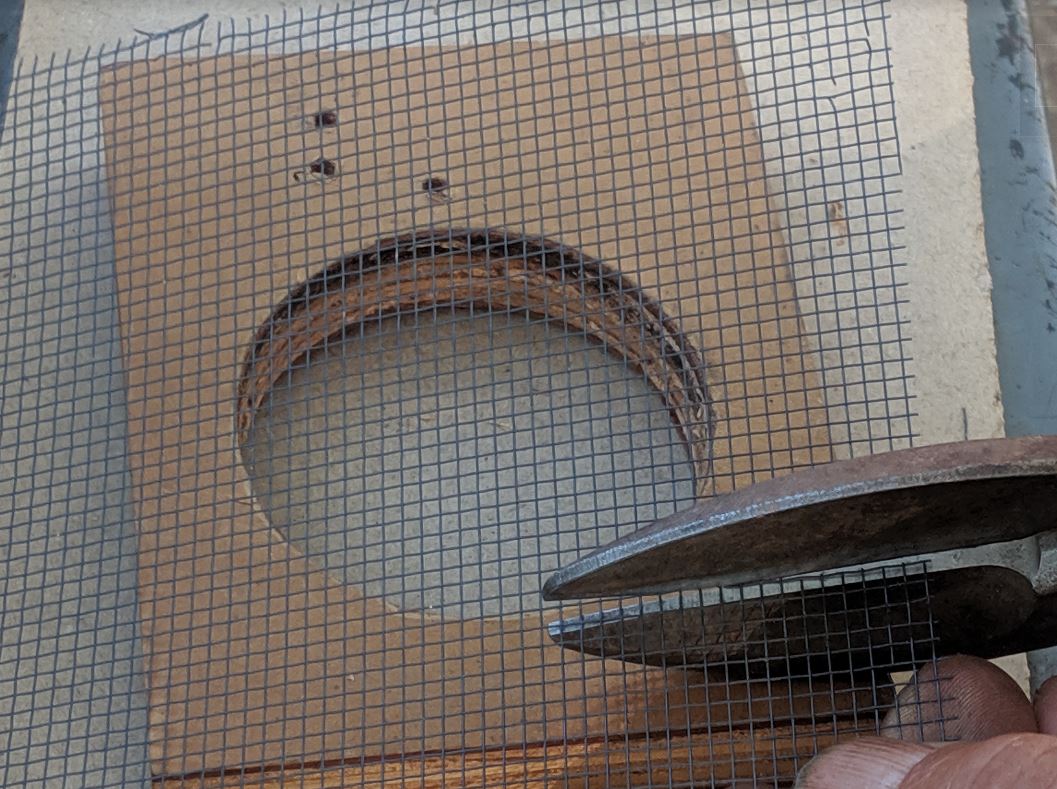
Cut a 4″ x 4″ piece of thin black screen from a package bee cage (10×10 mesh; this screen works WAY better than hardware cloth).
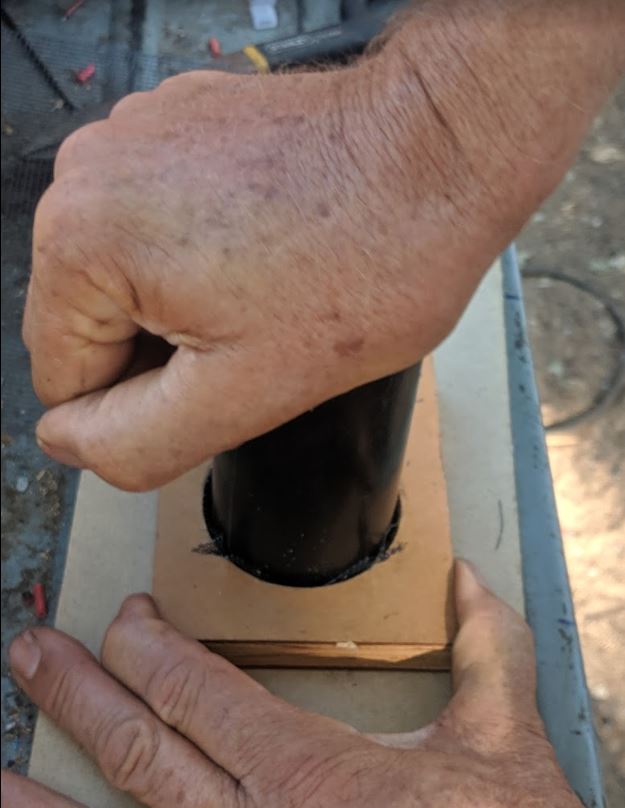
Use a piece of 1½” plastic pipe cut to 3½” to press down hard — bending the screen to fit. Wiggle the pipe around to get a firm 90° bend in the screen, and to make the sides parallel to the hole in the wood.
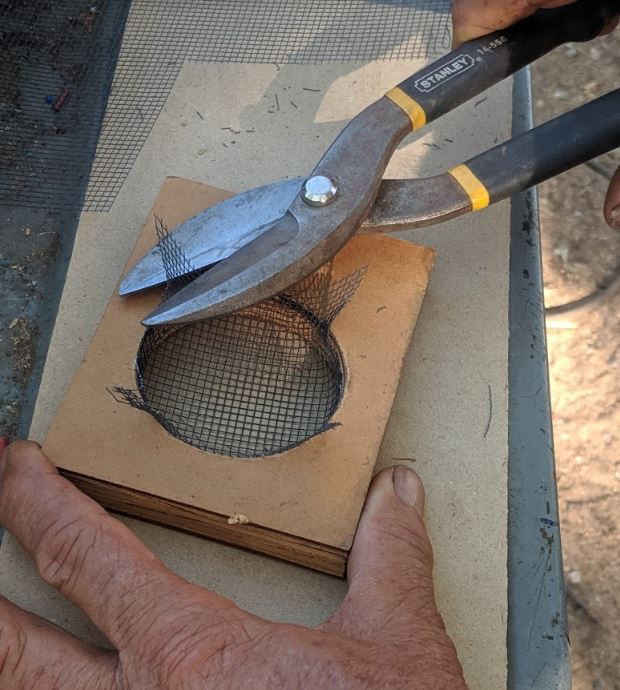
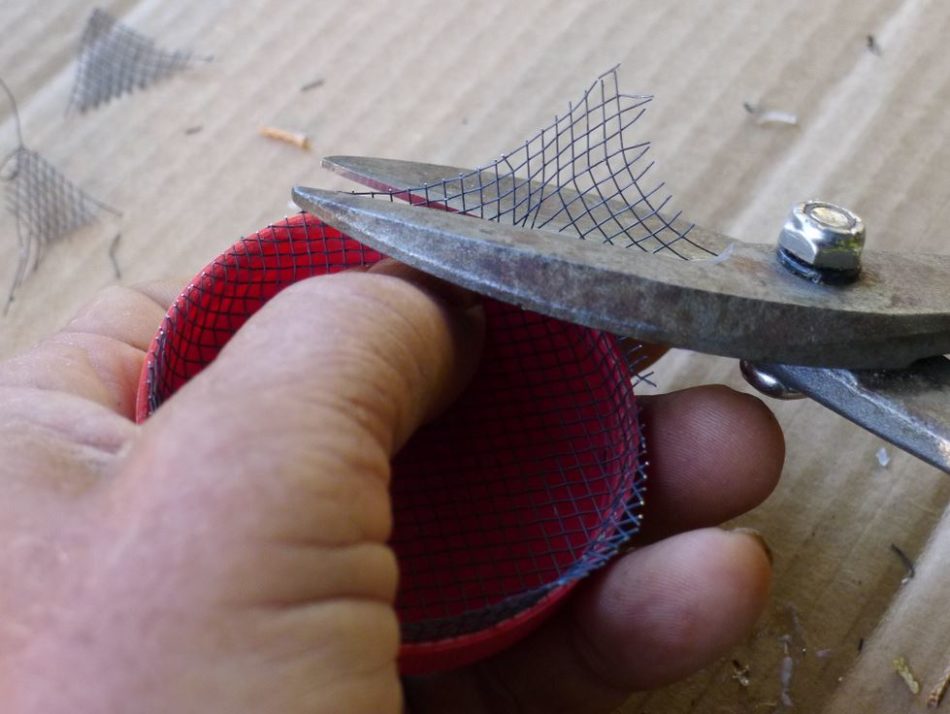
Update: Do NOT cut off the four excess “ears” of screen at this time — it’s much easier to do after you’ve stapled the screen into the cup!
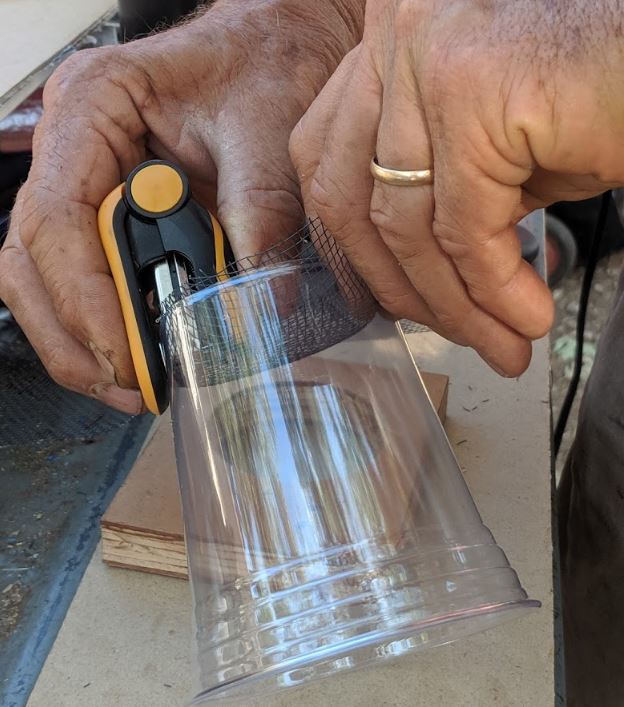
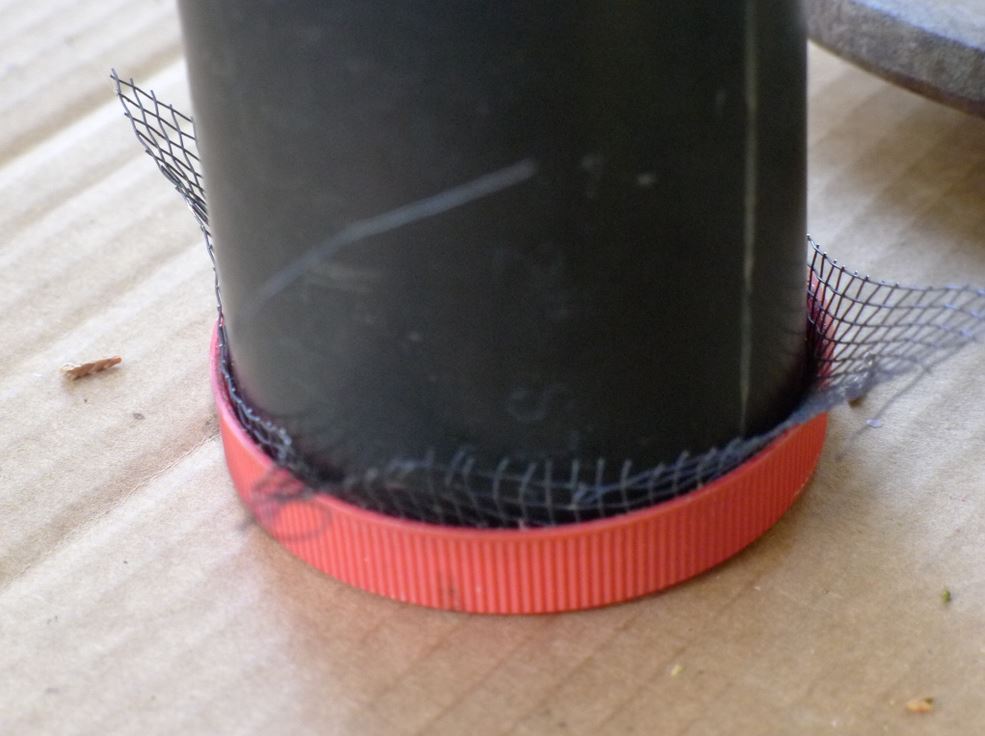
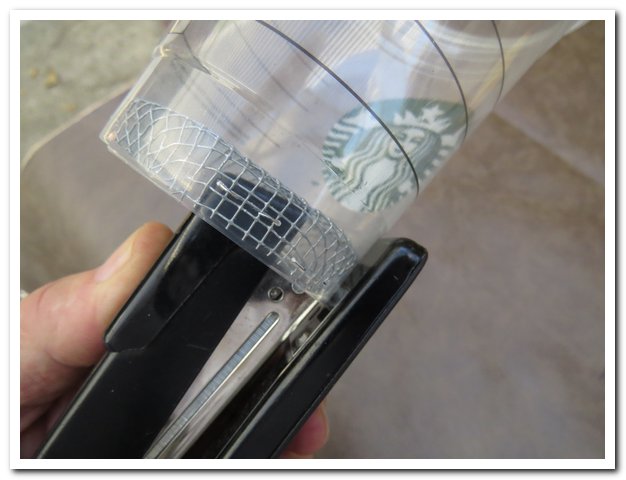
Place the screen, cut side towards the bottom of the cup, into the cup bottom. Tip: use the piece of plastic pipe to hold the screen up in the inverted cup. Then use a Swingline mini stapler (with part of the top front edge cut off) to staple the screen to the cup in at least four places. Face the staple legs out, so that the staples lock well to the screen.
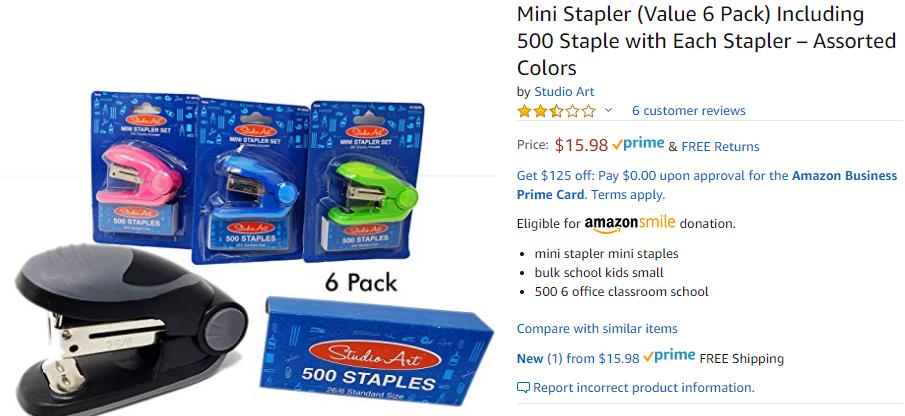
I’ve had trouble with some Swingline minis. The brand of stapler above works well.
Update: I found that the best stapler that I’ve tested so far is a Bostich B440 standard desk stapler. Note that you want to staple with the bottom of the stapler to the outside of the cup, so that the legs of the staple are on the outside.

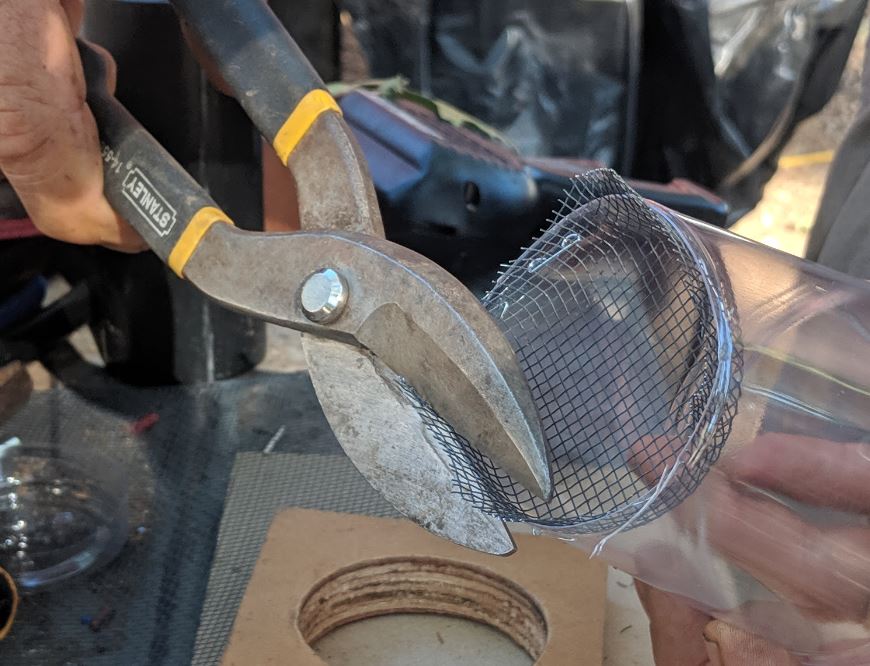
Trim the edges smooth.
The finished cup will have the screen securely fastened, sticking about 1/2″ up into the cup. This alignment prevents bees from getting stuck on any screen edges.
Final cup, assembled with lid snapped on. Fill with alcohol to the first ridge (between my middle and ring finger).
A half cup of bees suspended in a wash cup. Be sure to agitate with a small, quick swirling motion — just enough that the bees touching the screen slowly tumble around. Hold the cup with your hand above it, fingers pointing down. Keep your arm and wrist very loose. Do a slight circular motion with your hand, just enough to cause the bees at the screen to slowly tumble over.
We now use portable motorized agitators to get the motion — contact me if interested.
Live varroa mites are less dense than water, so will float in water. They are more dense than alcohol, and will thus sink. The agitator works best with solutions of not less than 50% alcohol (isopropyl or ethanol work well).
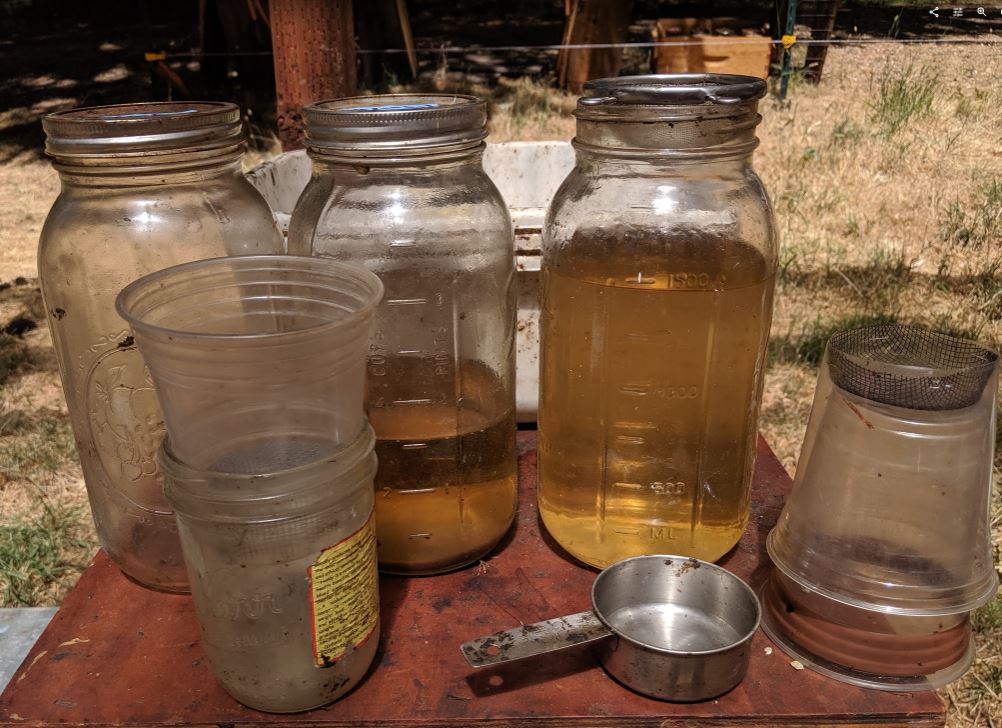
The above photo shows alcohol equipment. Details count! Three wide-mouth half gallon jars (labeled “alcohol”), and one wide mouth pint. The wide mouth jars hold the plastic cups well, and the pint jar is used for draining the remaining alcohol from the bees in the screened cup (at left). The right-hand half-gallon jar has a tea strainer on top to catch mites. The screened cup at right is inverted over its outer cup to avoid sticking when dried. The half cup measuring cup is a “Good Cook” brand from Ace Hardware, which I prefer due to its smaller cross section (which allows me to take more consistent bee samples). The tubs below are Rubbermaid, which have curves that match the stainless steel cup.
We use 50 or 70% isopropyl alcohol from a dollar store. We keep it in three half-gallon jars — one always empty, one with clean alcohol, one with dirty alcohol. Note in the above photo the center dirty alcohol jar — the precipitate falls overnight, and each morning I decant both the dirty jar, and yesterday’s previously clean jar into the empty jar for today’s clean alcohol. I then combine the precipitates into one dirty jar, leaving me an empty clean jar for the next morning.
Refer to my article Smokin’ Hot Mite Washin’ to see how we use these cups in the field; also my video of how to perform an alcohol wash.
Updated 11 August 2018
I keep looking for a quick, easy, and accurate way to monitor mite infestation rates. I’ve happily used the mite shaker bottle for some years, but it has its shortcomings. I’d like to ask my readers to help me improve the design.
As I detailed in the July issue, the shaker bottle gives only about 87% recovery of mites. The vigorous shaking also tires my arm when I’m sampling from a number of hives. Since in some of the field trials that I run I need to repeatedly collect mite data for entire yards of bees, I decided to build a shaker table that could wash the mites from a dozen bee samples at a time.
In designing the table (by trial and error after error), in order to determine the best sort of container and agitation, I carefully studied the motion necessary to wash the mites from the bees (using small pieces of white paper mixed with the bees to track their movement). My first discovery was that vigorous shaking was entirely unnecessary! The problem with the shaker bottle is not that the mites don’t get dislodged—it is that they get caught up in the bees’ bodies above the screen as the alcohol drains down.
I found that mites immediately release their hold on the bees when they are immersed in alcohol, and can be dislodged by relatively gentle agitation. The trick is to make sure that all the bees get agitated, and that once a mite is shaken loose, that it can drop free of the bees into a reservoir below. This requires that the bees are constantly and loosely suspended in the alcohol, and that the fallen mites are not stirred back up into the bees again.
I found that the right circular motion in a tapered container kept all the bees suspended in motion above a screen, and that the alcohol reservoir below remained relatively calm. The second thing was how to recover the mites from the reservoir—when I tried a drain at the bottom, there was too much splashing of alcohol when I drained off the mites for counting. So I worked on a design with a nested filter that I could use to lift the bee sample free of the washed mites.
My “final” design is able to quickly obtain 100% percent recovery of the mites (confirmed by vigorously shaking and rewashing over 25,000 bees)! The design worked so well that I now use the new wash cups in the field. No more sore arms, and nearly 100% mite recovery in less than 30 seconds.
The wash cups are simple, cheap, and easy to build. Unfortunately, they are a bit too flimsy and heat-sensitive for rough and tumble field use (they can warp in direct sunlight on a hot day), but I have been unable to find better alternatives. So I decided to share what I’ve learned to date, and hope that someone more innovative than me can come up with a better design. Until then, the current design would be perfectly adequate for taking repeated samples so long as one handles the cups reasonably gently. So I sweet-talked my wife Stephanie into snapping some photos of me building and using the Improved Mite Wash Cup.
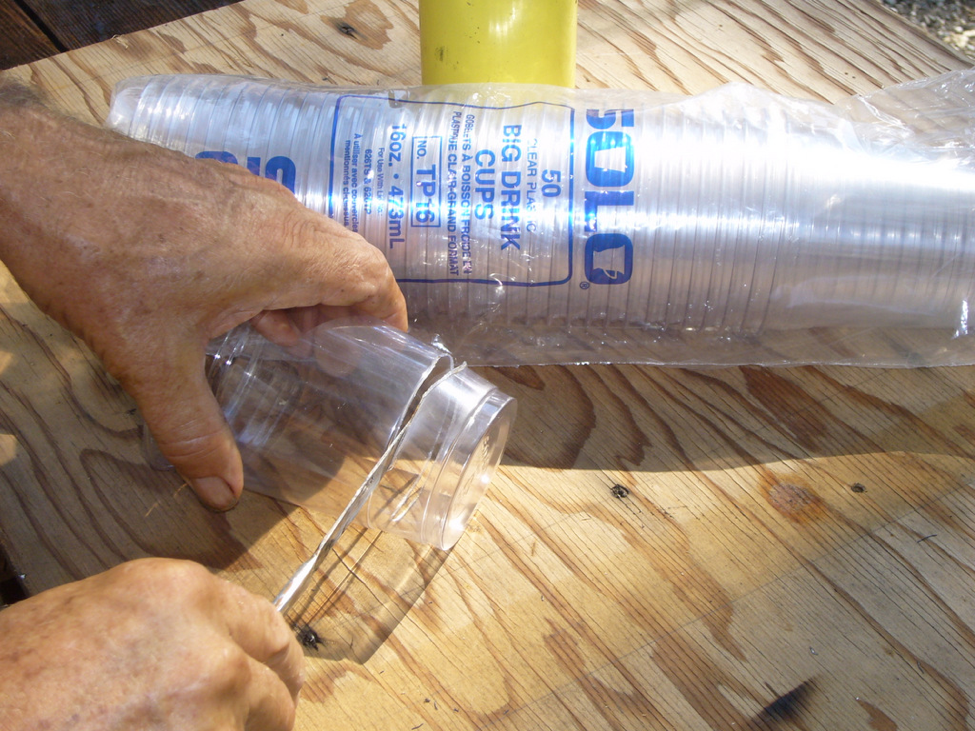
The mite washer uses two Solo (TP-16) 16-oz drink cups and one snap-on lid. You could probably scam a couple from a local restaurant, or order 50 online for about $10. Use a heated blade to cut off the lower portion of the cup at the existing indent.
Update: the TP16 are a polyethylene cup, and work fine, but do not heat weld well. If you plan to heat weld (see updates further down on this page for gluing, etc), use the slightly less clear (but stronger) PX16 polypropylene cups. Note that the two cups are not interchangeable, and are slightly different in size, and cannot be used together, or they will leak when swirled. The 626 series plastic lids work for either type cup. Also note that the cups should never be left in hot direct sun, as they may warp.
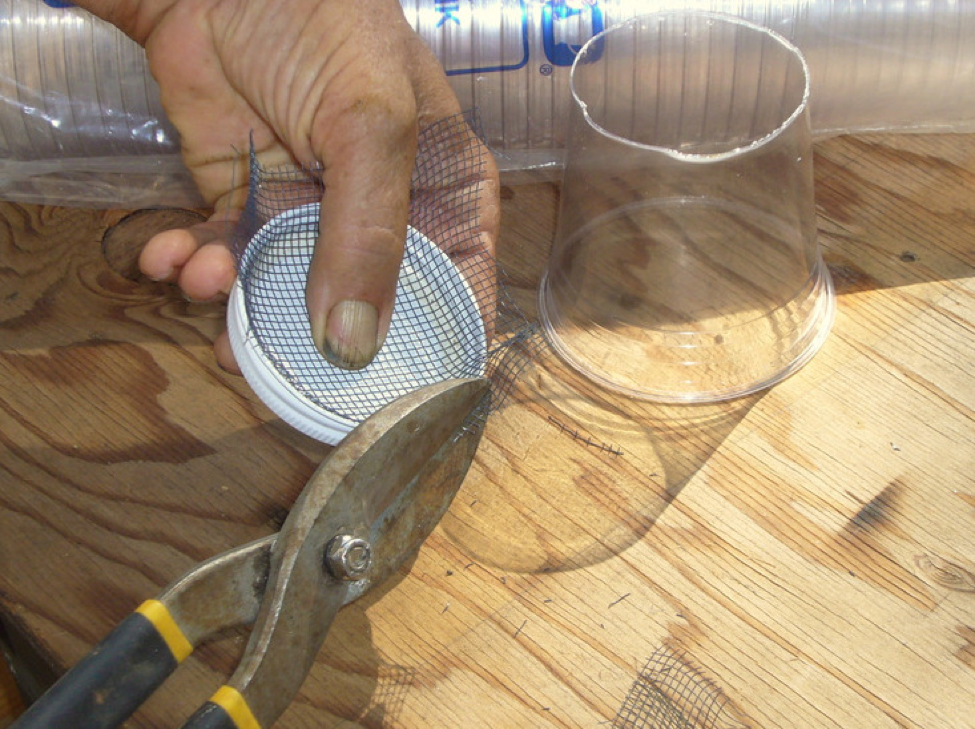
Now take some bee package cage screen (which has a mesh size large enough for mites to pass through), and press it into a 70mm lid (regular Mason size), pushing it hard into the “corner.” Then cut off the excess around the rim of the lid.

Now flip the screen over and press the center down. Then use something with a point to lift it out.
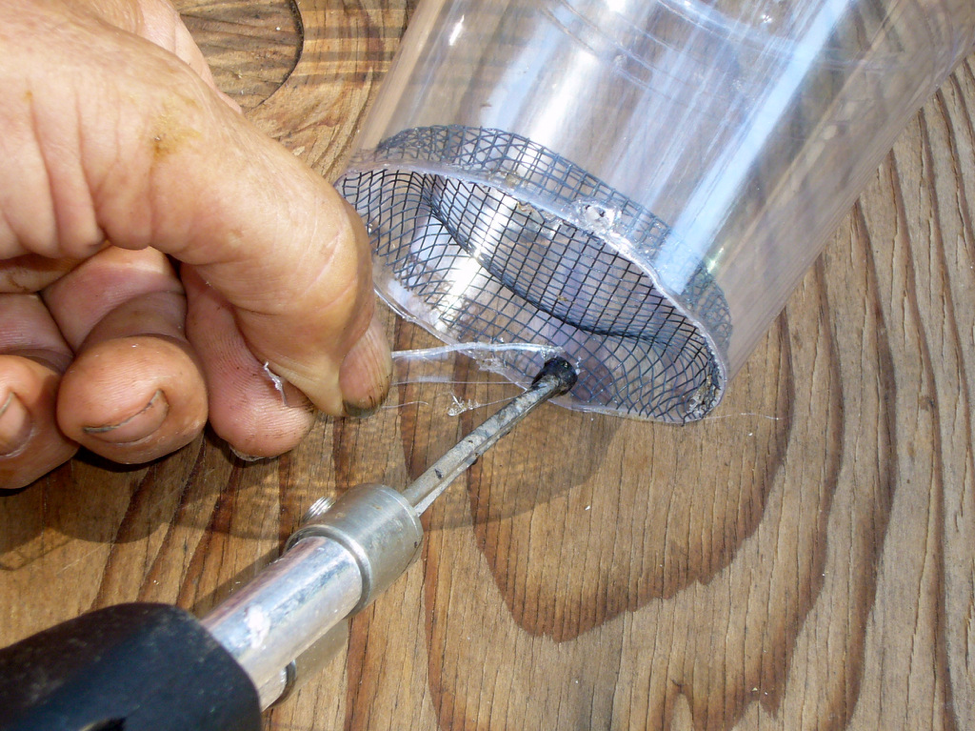
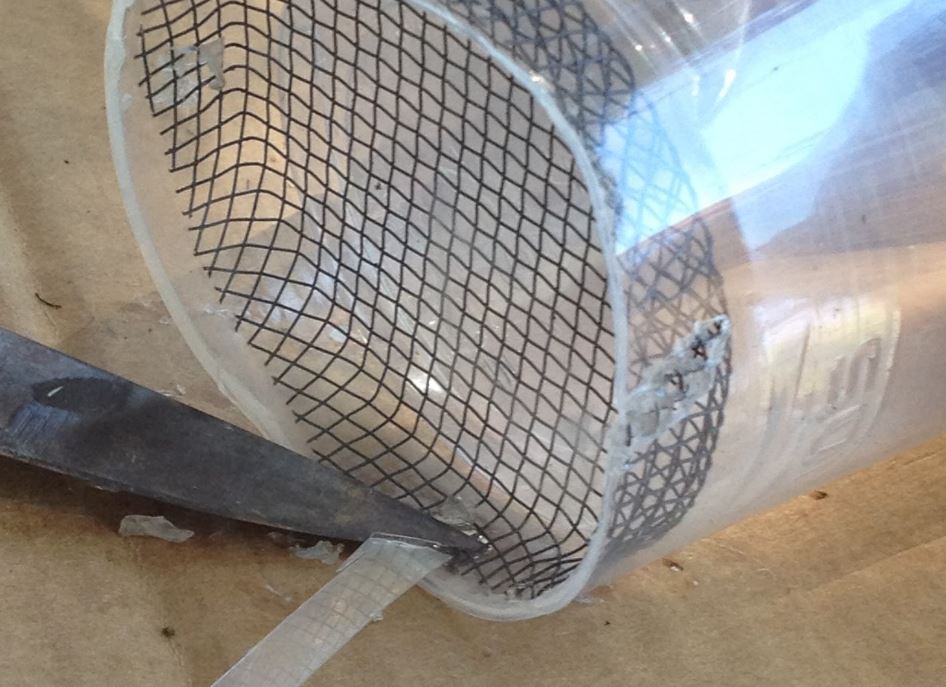
Insert the screen into the bottom of the cup this way (cut edge down). Use a soldering gun and a strip of the cut-off portion of the cup to weld the screen to the cup in several places (this is the trickiest, but most crucial, step in the entire process). I have yet to find a glue (hot or cold) that holds well enough).
Update: Update: I now use a slightly smaller plastic jar lid that just fits a piece of 2″ plastic pipe (after sanding out the threads in the lid). Use the 2″ pipe to press the wire screen into the lid. when using the PX16 cups. I’ve also come up with a big improvement for heat welding:
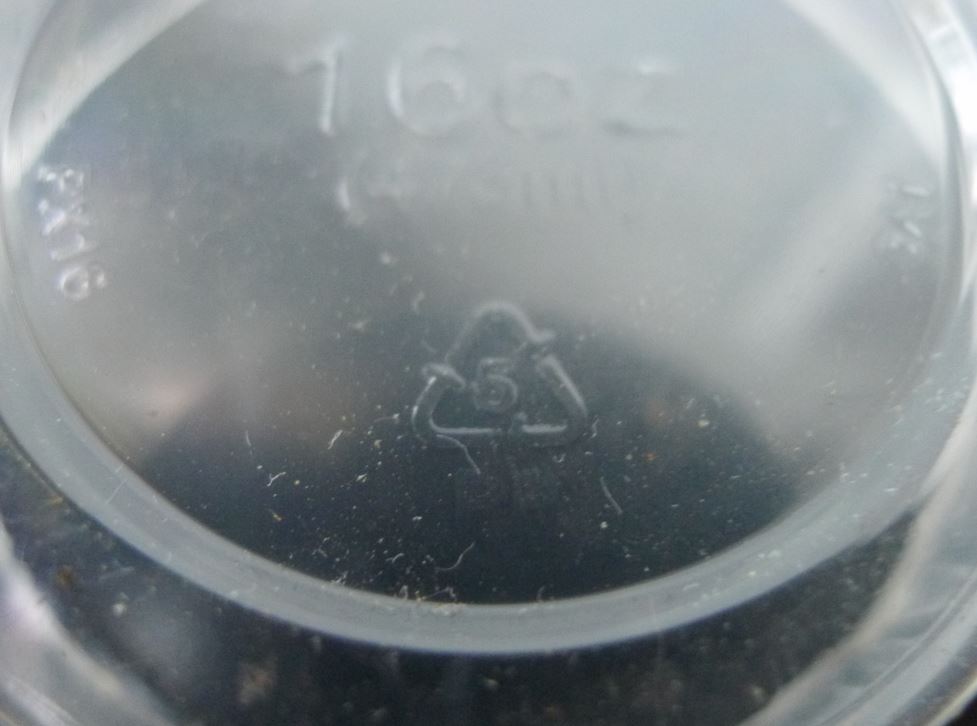
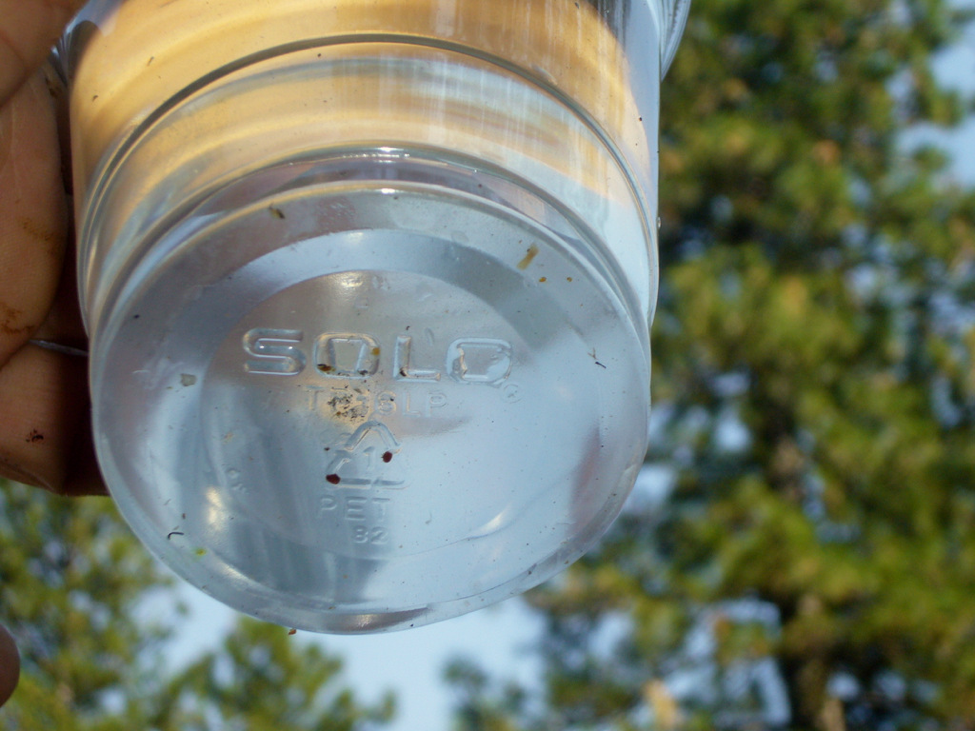
Check the recyling number on the bottom of the cup. The polypropylene PX16 have recycling number 5 (the TP16 is number 1).
I used a small drum sander to remove the threads from a jar lid that fits a piece of 2″ plastic pipe. Note that I cut the screen about 1″ wider overall.
I use the plastic pipe to press down to bend the screen to the proper shape.
I then hold the screen down firmly in the lid as I trim off the excess.

I have much better welding success if I use a thin steel knife tip, with the tip heated red hot in a torch. I use an uncut cup to hold the screen squarely in the cut cup (above). Quickly press the hot tip of the knife into the strip of plastic cut from the same cup type (#5) as above–the knife tip applies just the right amount of heat to weld the wire screen in place.
The knife tip heats to red hot in seconds in a torch, making for quick welding–far better than the soldering gun. I do 4-5 welds around the edge.
End update.
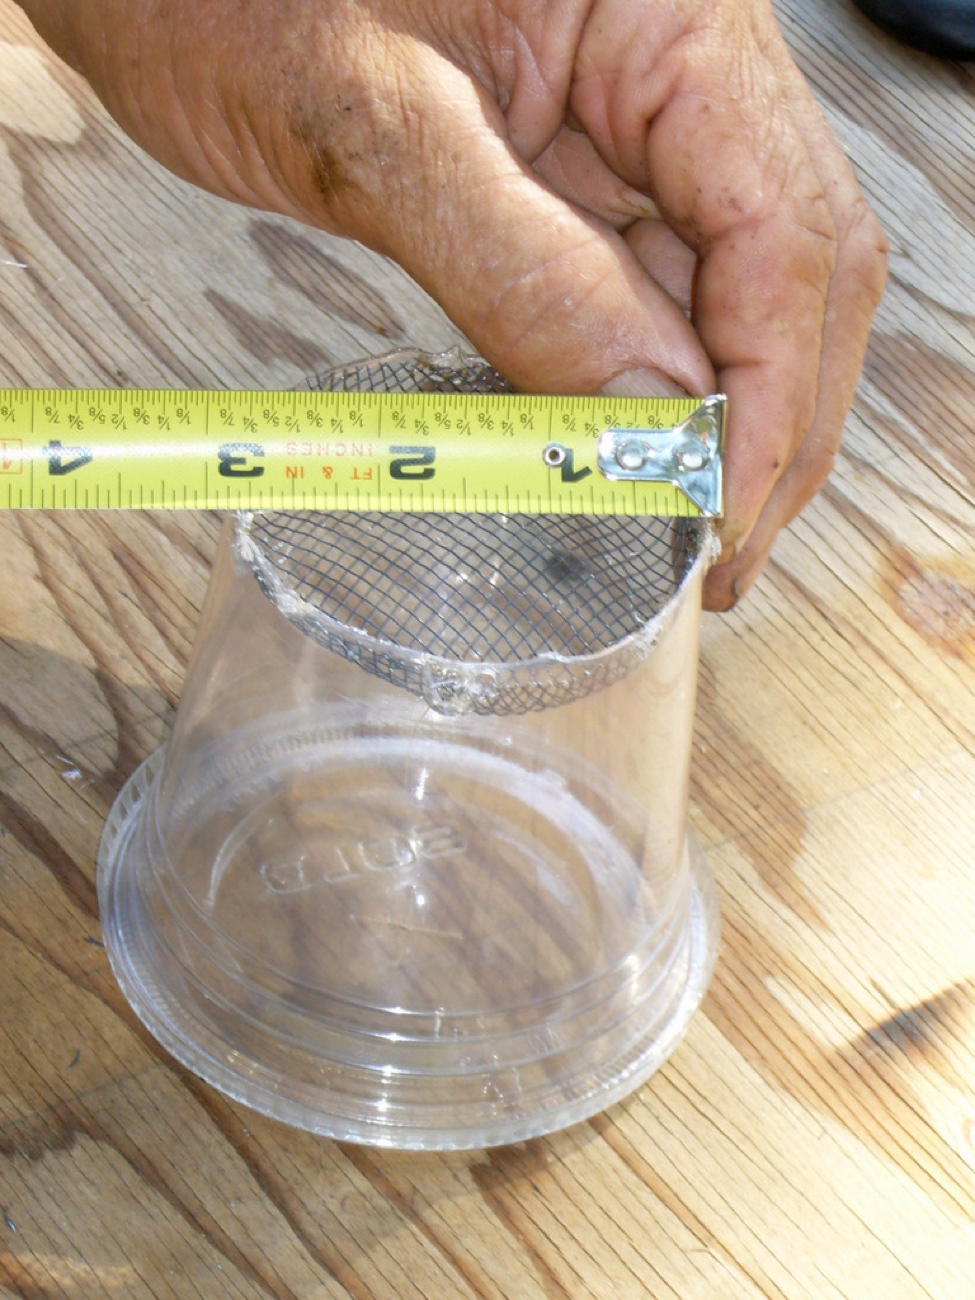
I found that the dimension across the top of the screen must be at least 2¾”– 2½” is too narrow (the bees won’t tumble properly). Also, the screen cannot project up on the inside of the cup too much, or again the bees don’t tumble. For this photo I flipped the screen upside down from the design that I’ve been using, in order to make it easier to weld. In my original design, the bottom of the screen was even with the cut edge of the cup, which lowers the screen slightly, and perhaps performs even better. Please experiment and let me know!
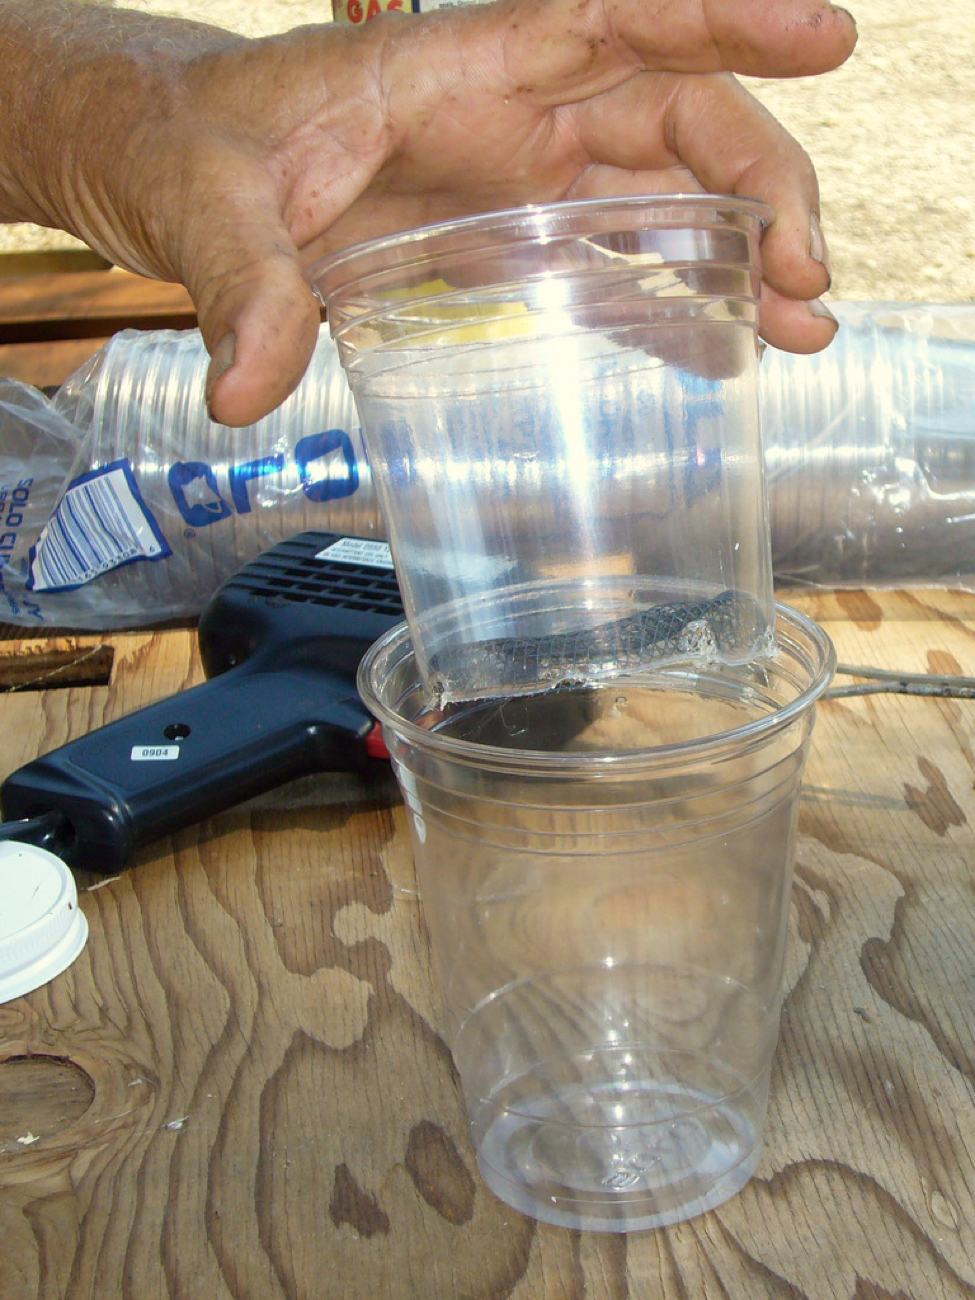
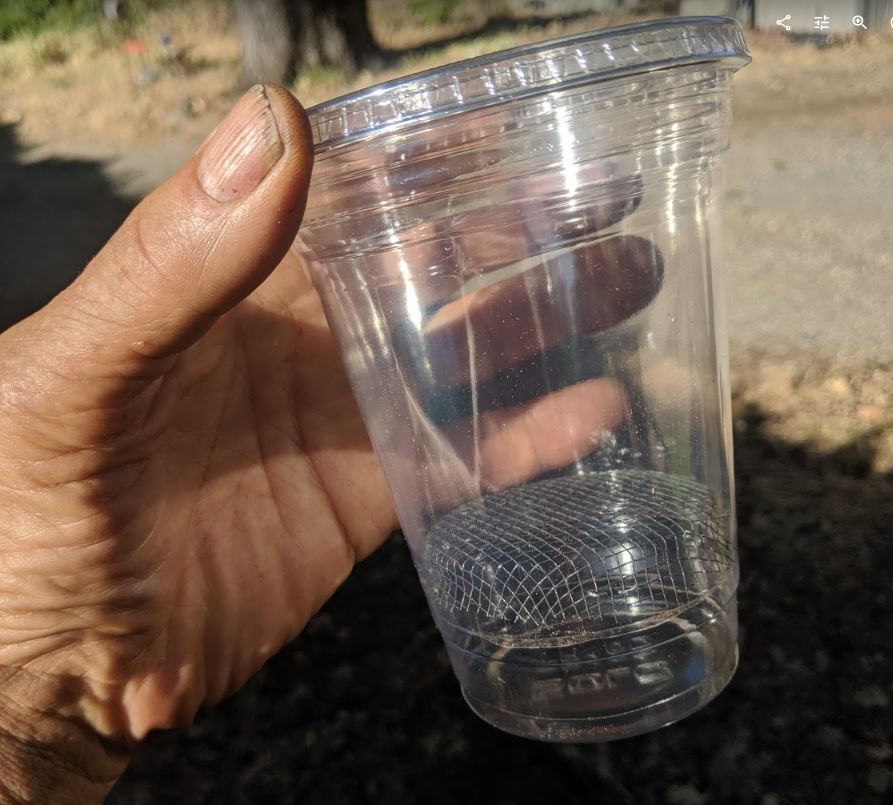
The screen cup now drops right into an unmodified cup. You can see the cutoff guide that I used near the bottom of the lower (uncut) cup (the horizontal line cast around the cup base).
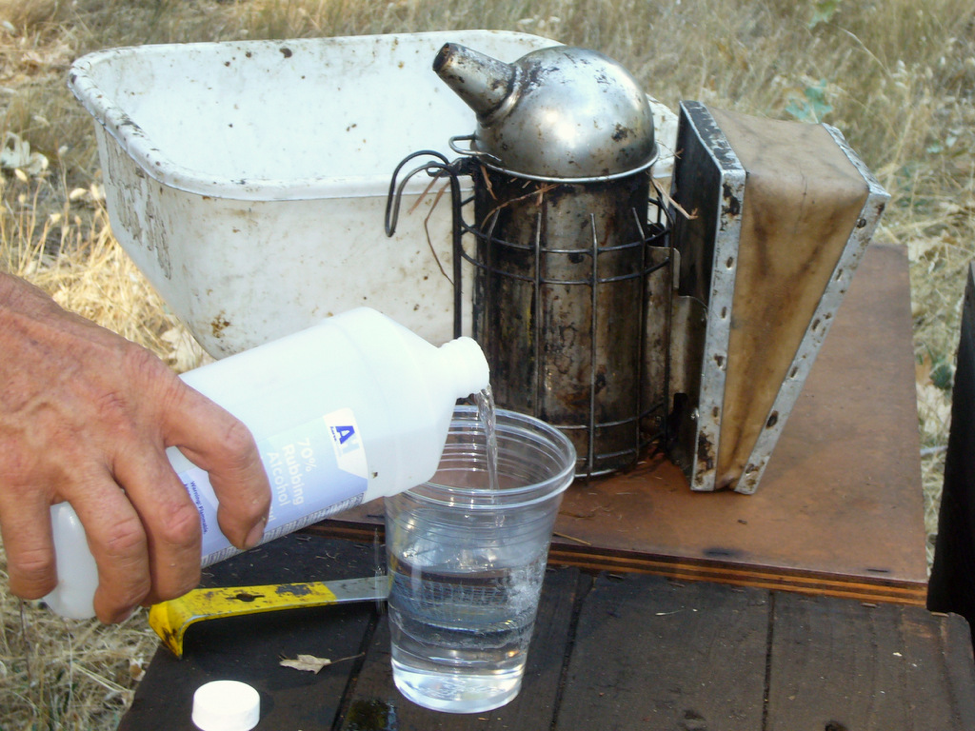
In the apiary, pour some rubbing alcohol into the cup assembly. Ultimately, you will need at least ½” of alcohol above the bees. This cup works for a 1/2-cup (~300-bee) sample, but even better with a 1/3rd cup sample (about 200 bees). See https://scientificbeekeeping.com/sick-bees-part-11-mite-monitoring-methods/ for details on how to take a bee sample.
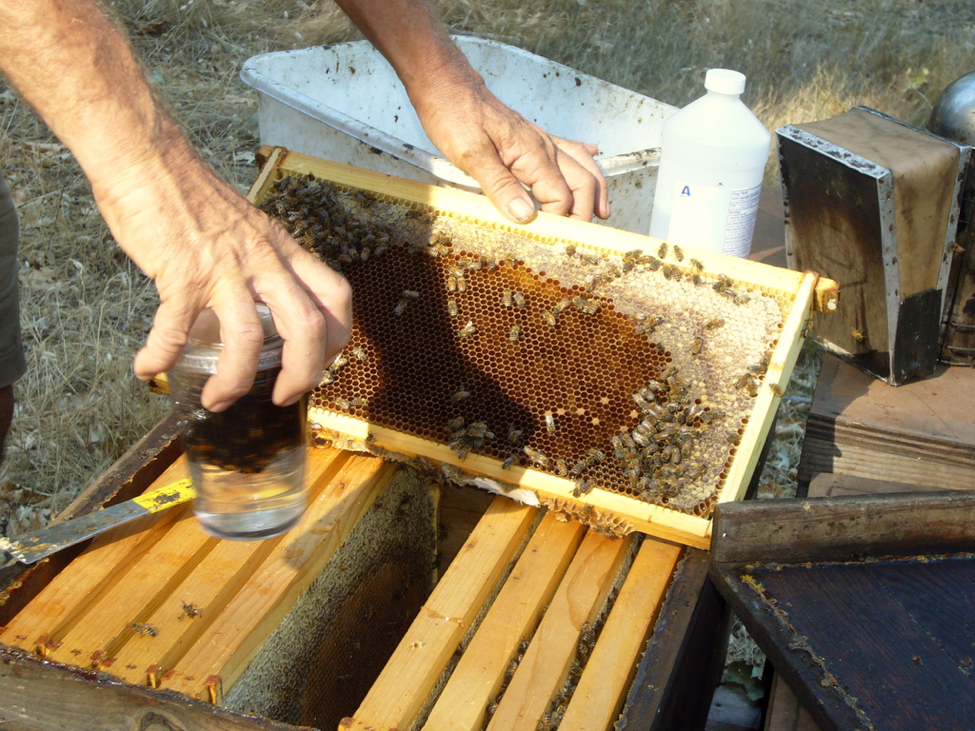
After you’ve dumped in the bee sample from a brood frame into the cup assembly, check to make sure that there is at least a half inch of free alcohol above the bees, snap on the lid, and then hold the cup loosely at arm’s length, with your arm hanging straight down. Swirl the cup in a small circular motion with a loose wrist. Watch the bees to make sure that you’ve got the motion right—that all the bees are tumbling.
The free alcohol above the bees, the tapered sides of the cup, and the friction of the screen at the bottom all seem to be necessary for a good tumbling action. The mites drop like rocks into the relatively still alcohol in the bee-free space below.
Swirl for 30 seconds (that’s exactly the amount of time that it takes to hum the “I wish I were an Oscar Mayer wiener” jingle twice through). I tested the recovery rate by washing 8 samples (averaging 30 mites each, counting the number of dropped mites every 5 seconds. I averaged 90% mite recovery in the first 10 seconds!
After swirling, simply lift out the screen cup containing the washed bees–the mites will all be in the cup below. It then takes about 15 seconds for all the mites to settle to the bottom (I prepare the next cup during this time). You don’t need to use this much alcohol for a 200-bee sample (which I’ve come to prefer for quick and dirty mite monitoring).
You can easily see the two mites from this sample. Since there were about 300 bees, divide by 3, indicating an infestation rate of less than 1% (one mite per hundred bees). For a 200-bee (1/3rd cup) sample, simply divide the number of mites by 2 to get your mite rate.
If you carry an extra outer cup and a teacup strainer, it’s quick and easy to filter and reuse the alcohol for the next wash.
I WANT TO HEAR FROM YOU
OK, it’s your turn! Please help me to figure out how to improve this design for a field-sturdy mite washer. I thought I had it with the clear acrylic Stir ‘n Sip cups that come with a plastic straw—but couldn’t make them work due to their narrowness. For now, I just carry a few of these cups in the truck. They make mite monitoring a breeze!
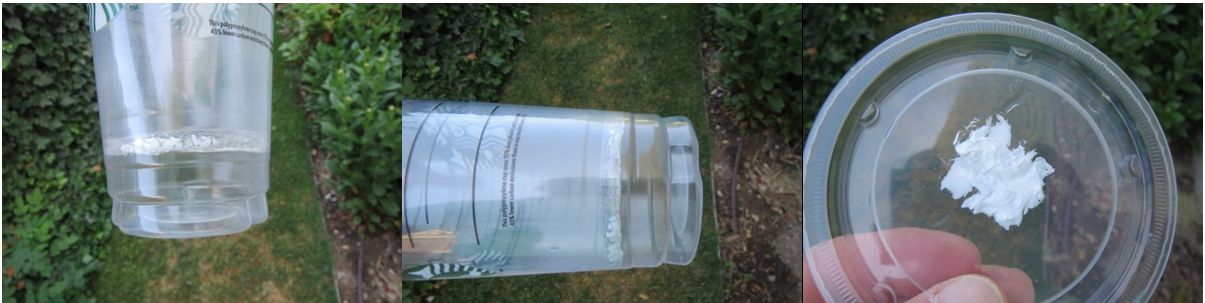
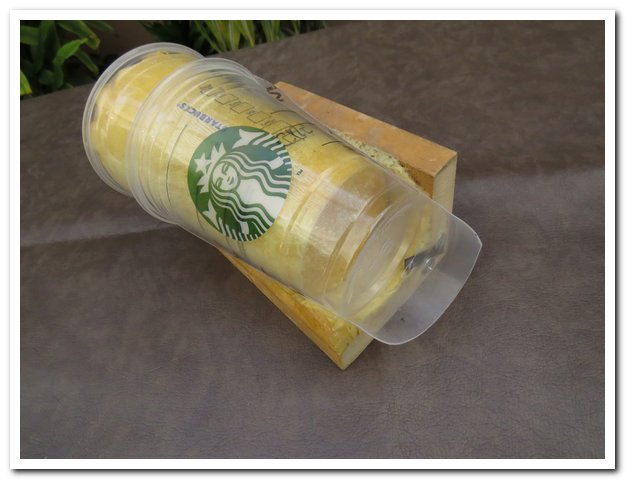
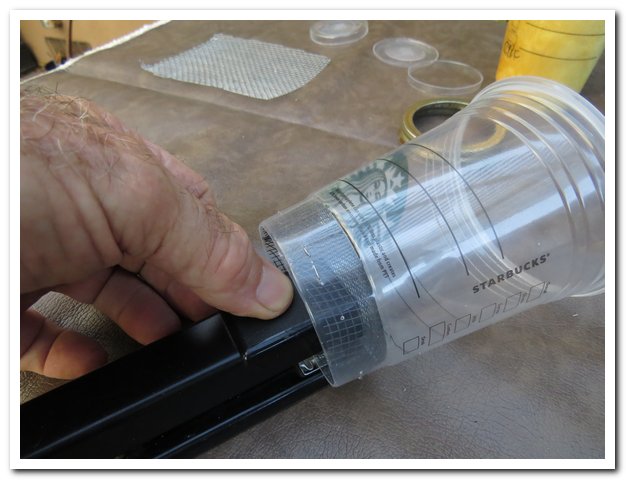
Update Dec 2013 I’ve now found similar clear cups made from polypropylene (e.g., Starbucks cold drinks). The recycling number on the bottom is “5.” These cups are stronger and much easier to heat weld with a soldering iron (and could be glued with MEK).
Update June 20, 2014 from beekeeper Veldon Sorenson, Utah.
As requested in “An Improved, but Not Yet Perfect Varroa Mite Washer,” article by Randy Oliver, American Bee Journal, October 2013, pages 1055-1057, I decided to accept the challenge and see if I could improve the washer.
Like Randy, I tried several cups and sizes. Finally, while sitting in an airport, I noticed Starbucks had several very interesting cups that appeared more durable than my previous failed test subjects. I was never able to find a cup that felt durable, especially after taking the time to weld the screen to the bottom. Like Randy, I had problems getting the screen to fit and when it did, the cup didn’t hold up to my welding or just didn’t pass the durability test. I started with the Starbuck’s 8 oz, which by the way, Starbuck’s was not willing to donate to my experiment – so there was a nominal charge for the cups. Because of their lack of cooperation, I was reluctant to give them credit for the cups, but their names are on the side, so I must give them credit for making durable cups.
The 8 oz cup did not work well. Randy appeared to use 8 oz size in his article, but I was not able to get the screen to be larger than 2.5 inches unless I cut much higher on the cup, which left a large gap between the cup insert and required lots of alcohol to cover the bees (actually I used Prestone bug wash as mite dislodging seemed to benefit from the additional soapy formulation, which worked better for me). On my next trip I found a Starbucks and got the next larger cup, which happened to be the 24 oz caffeine buster size. Since I had to pay for the cups, I also ask for lids – it just seemed to make the cost of the cup more acceptable as I was doing this for the good of humanity and science.
The 24 oz cup at first seemed way too large, but once I started, I found it gave me several advantages: I could cut the cup near the bottom for decreased amount of fluid, I could get more swirling action with less wrist motion and my screen was able to be much larger – 2 ¾ inches without cutting the cup too high and the cups came with fairly substantial lids.
Here are my steps:
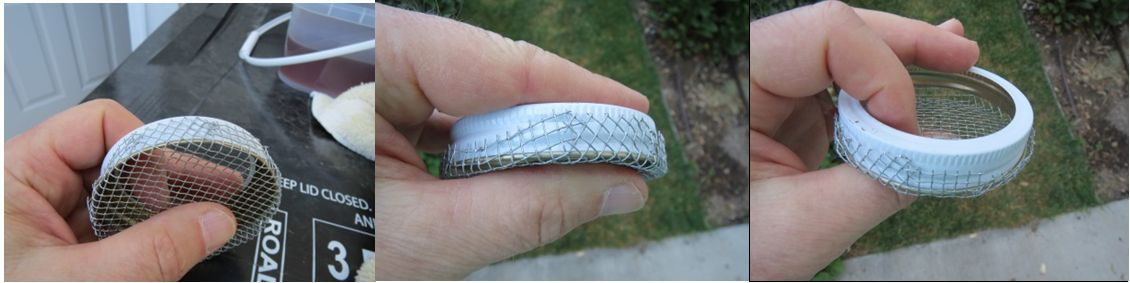
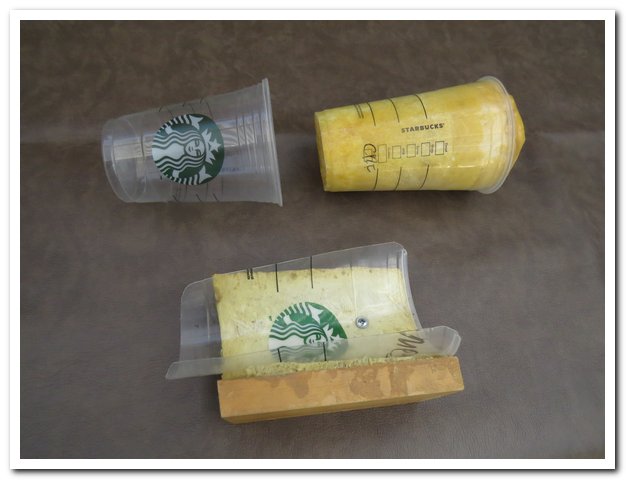
- The screen – Randy used the inside of a lid, but I found folding the screen on the outside of a Kerr lid was easier and allowed me to keep the larger screen size (2 ¾ inch). I cut several slits in the screen as I folded it around the lid, to help the lid fit cleanly in the cup bottom and made the weld much easier – if welding cup bottoms is ever easy.
Photos: 1. I used a Kerr jar lid as the template; 2. Cuts are required as you bend the screen around the template so the screen has a relatively flat bottom; 3. I trimmed the edges so the screen was basically the same size all around the template.
- Screen in the cup – this was the most time consuming step. Learning to weld the cup bottom took some effort and several cups to learn how to get the screen to stay without burning a hole in the cup. However, after several cups, it actually became much easier, but the welds were never as smooth as I would like, but aesthetics were not part of the experiment. I tried to weld the straw hole in the lid, but was not successful, so I applied a small daub of silicon to the straw slits in the lid to hold them shut and it worked so well, I added a bead of silicon around the base of the screen. I think the silicon bead around the base was more for my preference to cover my welding than functionality or value.

Photos: 1. My poor welding job, but important was to get the screen evenly in the bottom of the cup and I found that spot welding the screen in 4 areas would hold the screen solidly and allowed me to make any small adjustments needed to ensure the screen was level. My screen still had a slight convex regardless of how I tried to push it down.
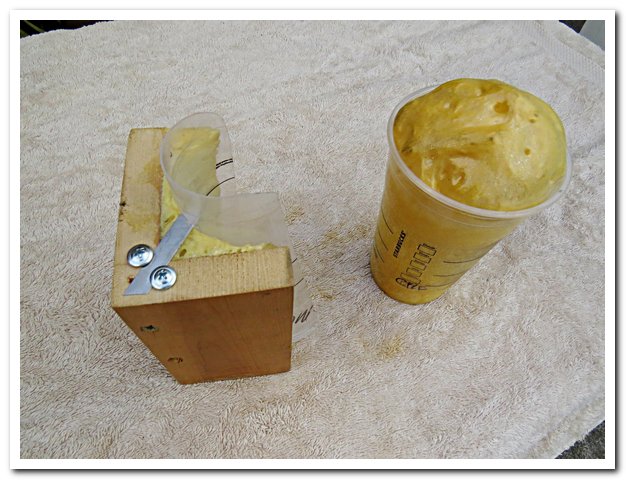
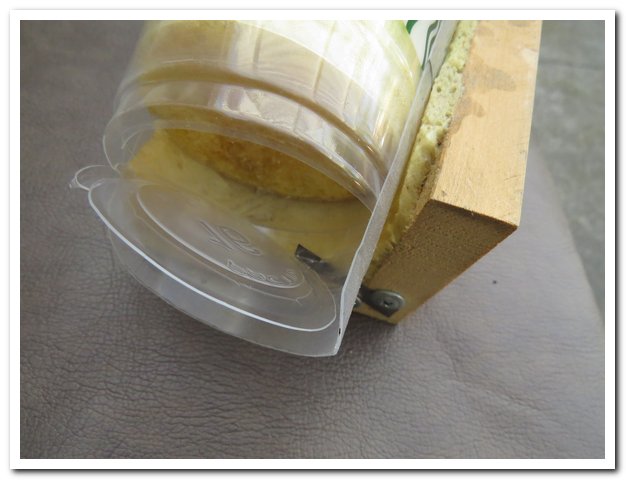
- The finished product – once the cup was inserted in the other 24 oz cup, I had about 1 inch clearance at the bottom, which is plenty of room for mites. Also I used the handy lid to keep the bees in cup after collection and to avoid any spillage during the swirling process.
Photos: 1 & 2. Cup inside of cup ready for the bees, 3. The lid with the small daub of silicon to cover the straw slit.
- The Test – I collected ½ cup of bees from brood frames and shook them into a plastic tub and from the tub removed the ½ cup of bees. The lid was helpful as I was working alone and the lid allowed me more time to get everything prepared. I used 6 – 8 oz of the alcohol wash. I didn’t find that adding more liquid was beneficial as most of the action and tumbling took place just above the screen and as long as I had enough liquid to cover the bees, it seemed to work well. I found using a bit more liquid helped to cover the bees quickly. As Randy noted, the number of mites that fell, happened in about the first 20 seconds of swirling. I tried swirling the cup faster, slower and moving the cup up and down within each other and still dislodged no more mites than fell in the first 20 seconds in every instance. Even though I have never found any more mites after the initial shaking, I still do an up and down action and swirl one extra time for each mite wash. I probably will eventually trust my shaking ability, but at present I am still in test mode.
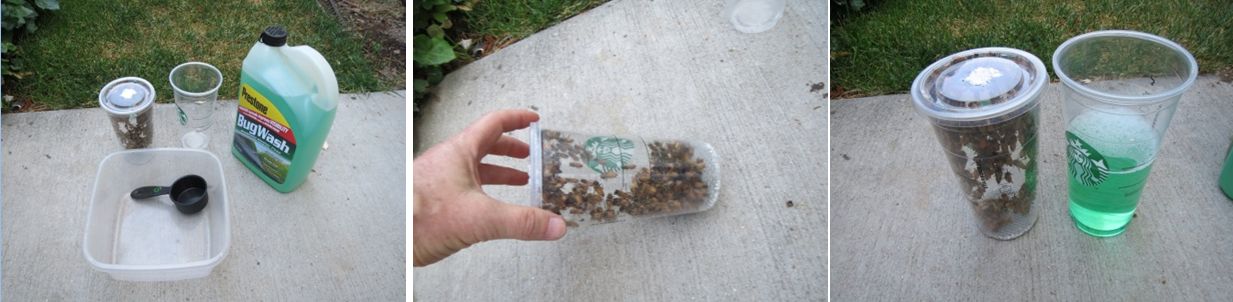
Photo: 1. The set up with ½ cup measurer, my two cups and the bug wash/alcohol; 2. The ½ cup of bees in the collection cup with screen bottom; 3. The amount of wash and the bees to be tested. I tapped the bees to the bottom, before putting them in the wash to they were covered immediately. I also found that several of the bees would attach to the screen and it took a bit of swirling to get them to release from the screen.
Randy’s note: I first put the strainer cup into the unmodified cup and add the alcohol prior to dumping in the bees. The bees then immediately go into the alcohol and don’t tend to stick to the screen. I also find that windshield washer fluid is more messy to use than plain rubbing alcohol, or rubbing alcohol cut 50% with water.
- The Results – I could see and count the mites in the bottom of the cup easily, I still set up a towel and poured the alcohol through the towel to capture the mites. I did this for two reasons: 1. The mite numbers are easily confirmed on a white background and 2. This allowed for quick way to clean the alcohol for the next wash. I could easily label to towel with the hive number if I wanted to do several mite tests quickly and then come back later and make future investigations.
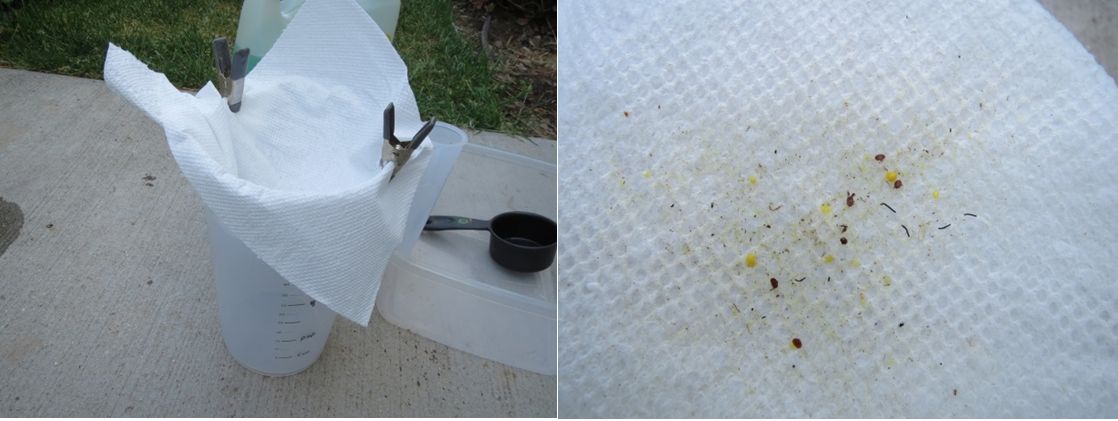
Photos: 1. The set up to catch the mites and clean the alcohol using a normal paper towel; 2. The mites easily seen on the paper towel to confirm number noted in the glass.
I am not sure if I really improved on the washer. I didn’t change the fundamental design that Randy had advanced. The biggest change was the larger cup and using the outside of the Kerr jar lid as a template. At the end of the day, the most important part of the washer is the simplicity and ease, which should make testing for mites a very simple and easy part of hive management.
Thanks to Randy for the challenge, which motivated me to try to improve the system and in the process brought me to a sampling process that works efficiently, easily and simply.
Veldon
Randy’s note: Thanks, Veldon. You and I both discovered the Starbucks cups (I must have smiled more nicely to the Starbucks cutie behind the counter, since I got mine for free). The Starbucks cups are made form polypropylene, rather than PETE, and thus stronger and much easier to weld with a soldering iron (cut a narrow strip of the cup to use as a “welding rod”).
Since I don’t patronize Starbucks enough for my cup needs (despite the cutie behind the counter), I ordered Solo PX16-0090 16 oz Clear Polypropylene Reveal Ultra Clear Cold Cups from Amazon, and have made a number of mite washers with good results. I use a lighter-gage screen, cut from package bee cages, that is more easily workable.
Update Sept 2015
Beekeeper Robin Theron offered the following:
I found it tedious cutting the bottoms off cup after cup to make varroa testing kits for our bee club (Beekeepers Association of Southern California, BASC) so I made a jig to do it quickly. Fasten a couple of boards together to make a right angled jig and use the blade from a small box cutter to screw on one end, as per the illustration. Screw a sliced third of the side of largest cup you think you’ll need to the bottom and squirt some expanding insulation foam behind it to support it. Trim the foam and you have a jig. Go easy with the foam so that you don’t distort the whole thing.
As you cut off the bottom for the screen, the walls of the cup will get more and more floppy so it is also a good idea to make a plunger to go into the cup you are cutting to support it. To do this simply fill a cup with foam then cut it to size on your jig. Actually, it is not so simple, because if you fill the cup completely, all at once, the foam deep inside will not cure, even if you wet it down while you are doing it, therefore, do it a little at a time, allowing each squirt to harden. Put a screw into the end of your foam nozzle so it will not harden and clog before you finish the job.
Welding the wire to the bottom of the cup is a non-trivial ordeal. However, fastening the sieve can be trivial if you invert it and staple it.
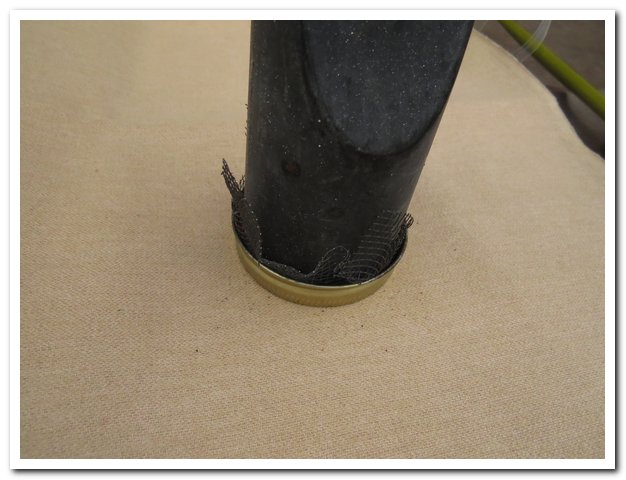
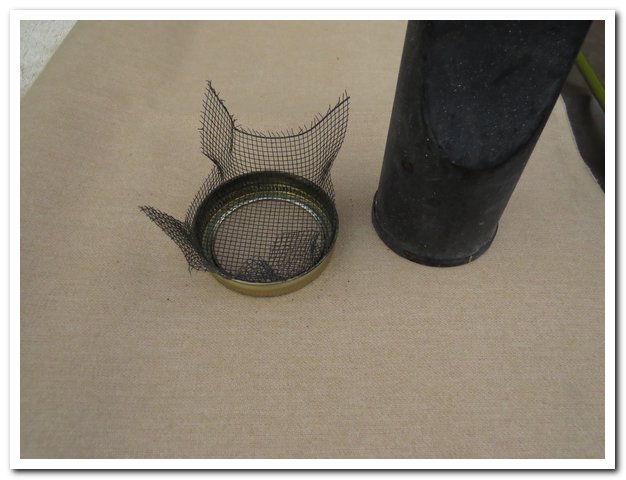
A screw-on top for a Ball jar with a 2.5 inch neck is the perfect size for my cups. I press the #8 hardware cloth, or metal fly-screen, into it with the back of one of my vacuum cleaner nozzles to form the sieve. Trim the wire, leaving about 5/8 inch (2 cm) so that you have enough material to staple it to the bottom of the prepared cup. Push this sieve into the cup from the top, with the ragged edges down or you will not be able to easily staple it to the cup. Put in a single staple as soon as the first piece of the screen is level with the bottom, before the whole thing is in place, so that it is anchored, and then shoving the rest dawn is easy. I only use four staples, and three would probably do.


Thanks Robin! I find that the old Swingline Jot mini stapler works very well for the stapling job. Be sure to apply the staple from the inside, so that it gets a good grip on the screen. Again, the thin black screen from bee package cages is the easiest to use.
Update Aug 2018
Beekeeper John Gaut is using a “Variable Speed Oscillator Orbital Shaker” available at EBay for just under $100.

In short order, two other beekeepers recommended a more durable plastic cup:
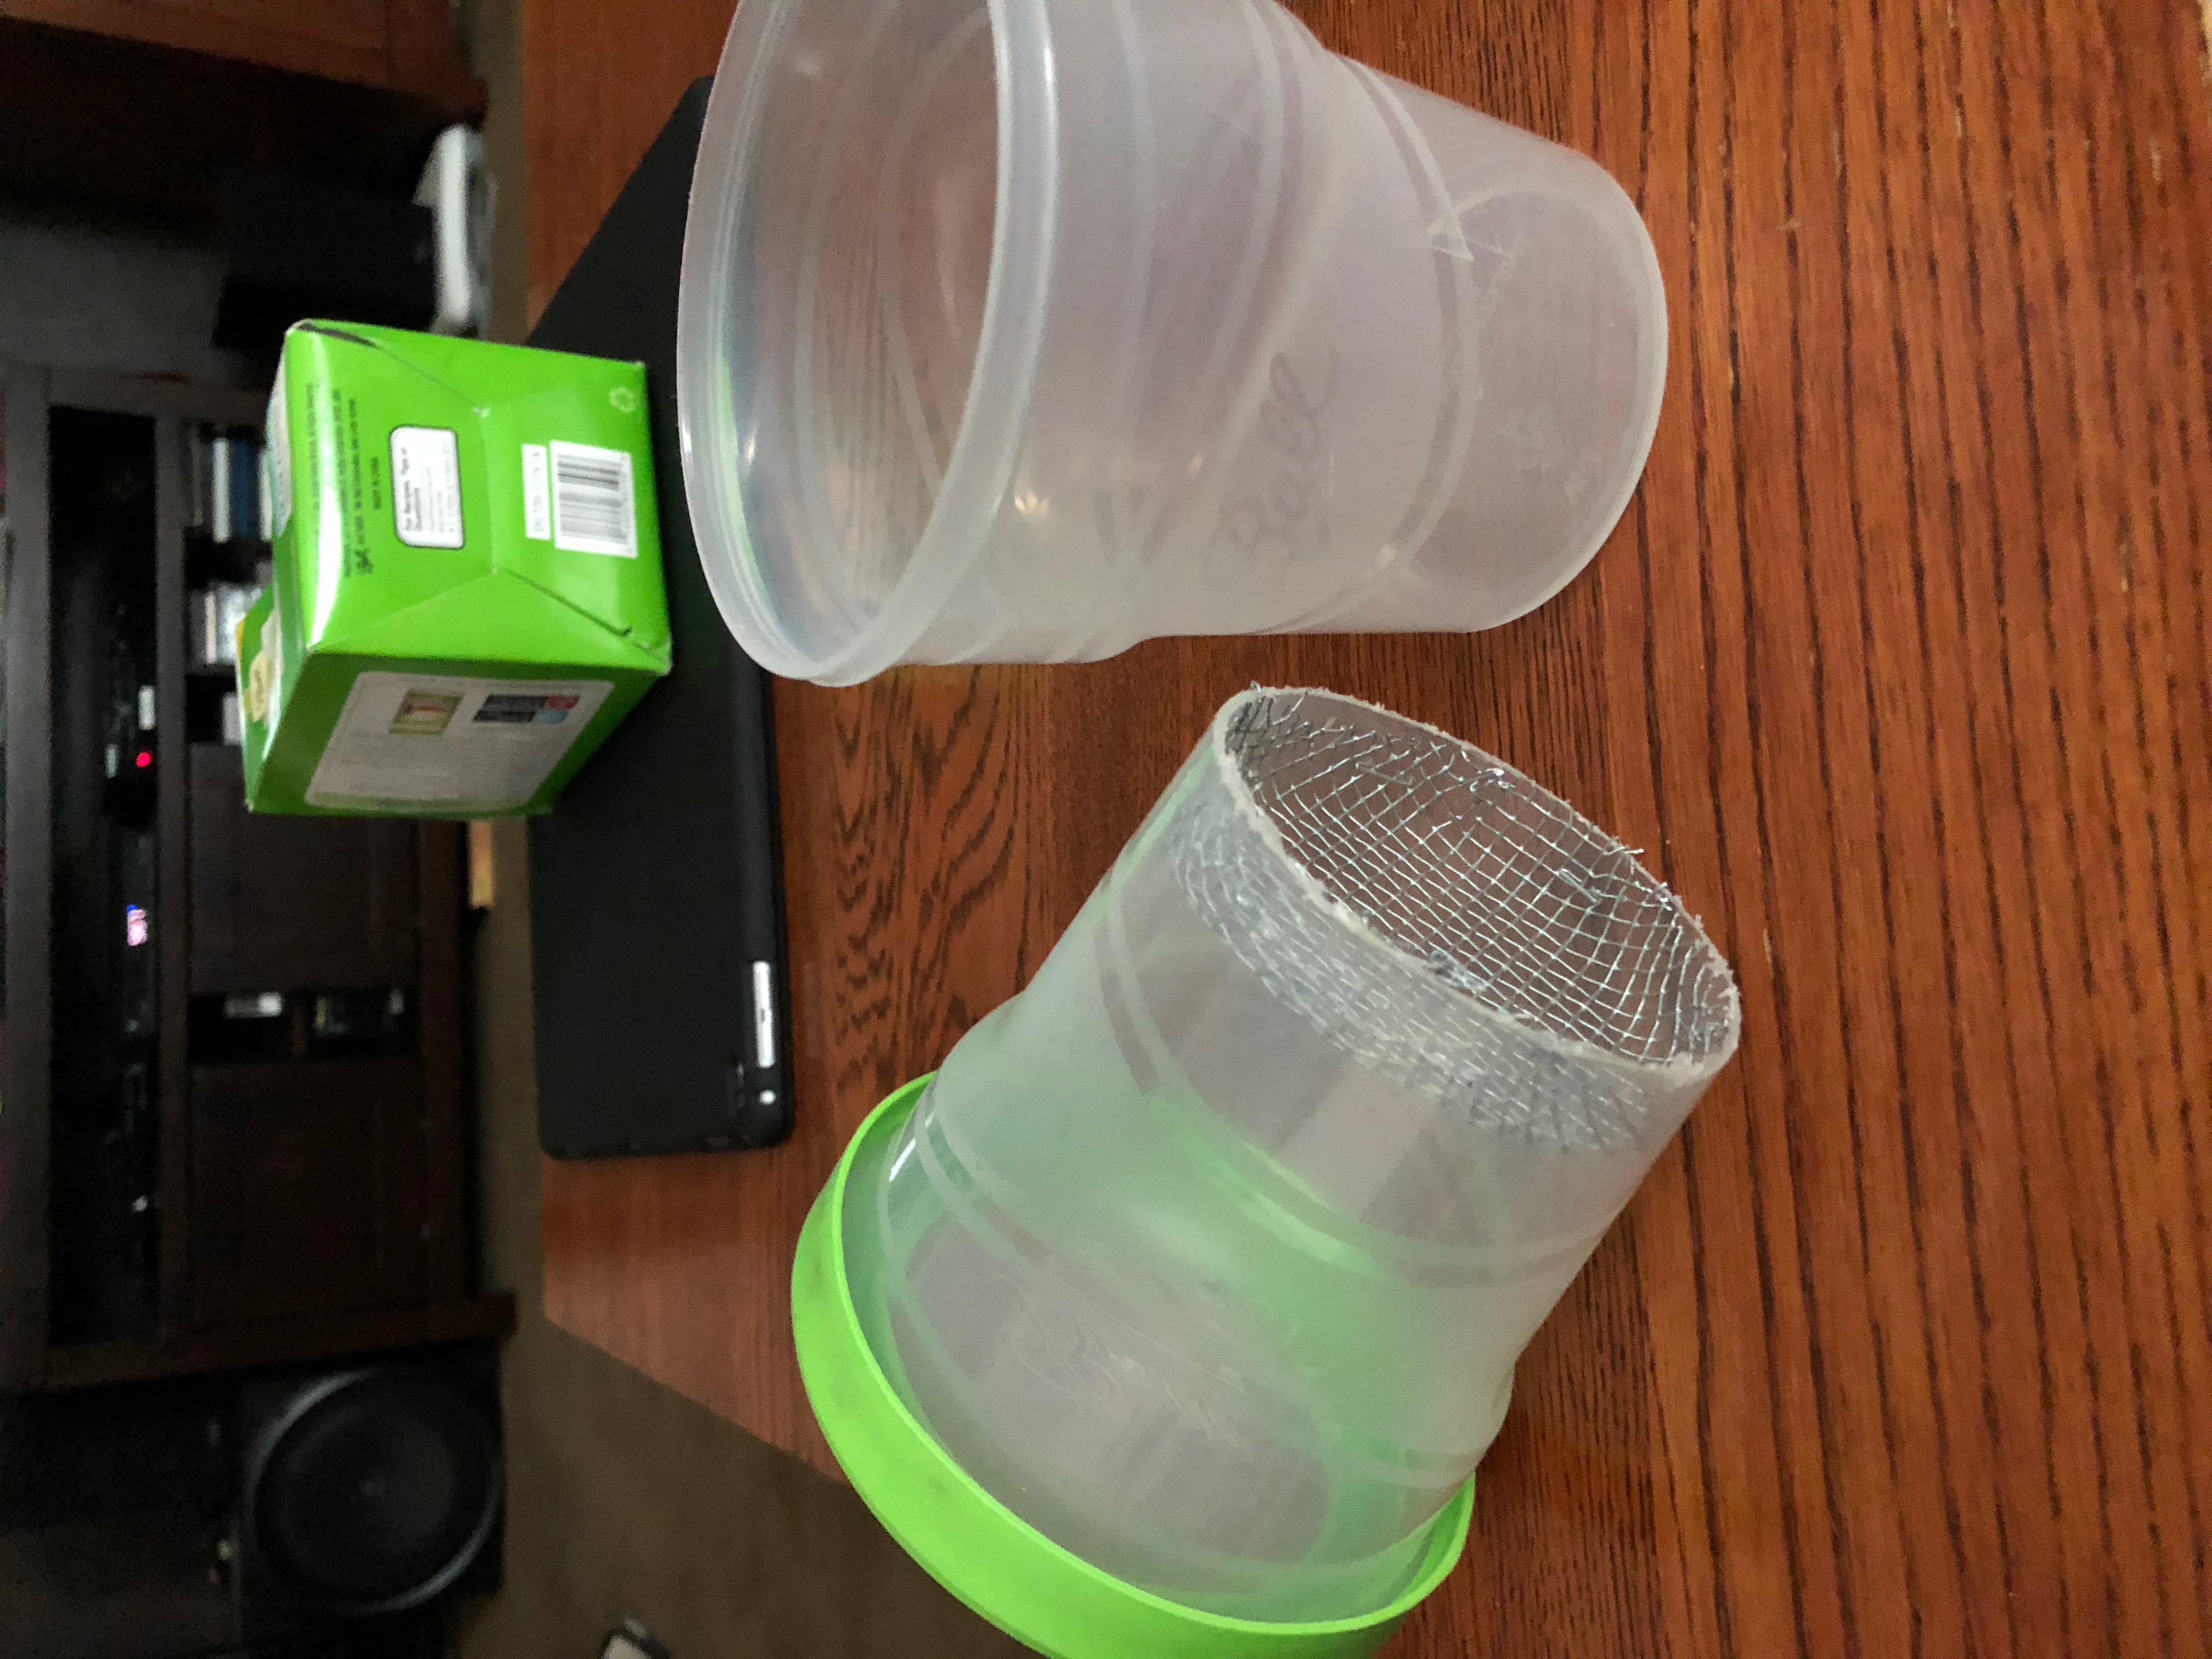
Jeffrey Rice found that Ball freezer cups work well. These may be difficult to find in the U.S., but I was able to purchase on Amazon. Steve Gomez found the same cup under the Bernardin brand label:
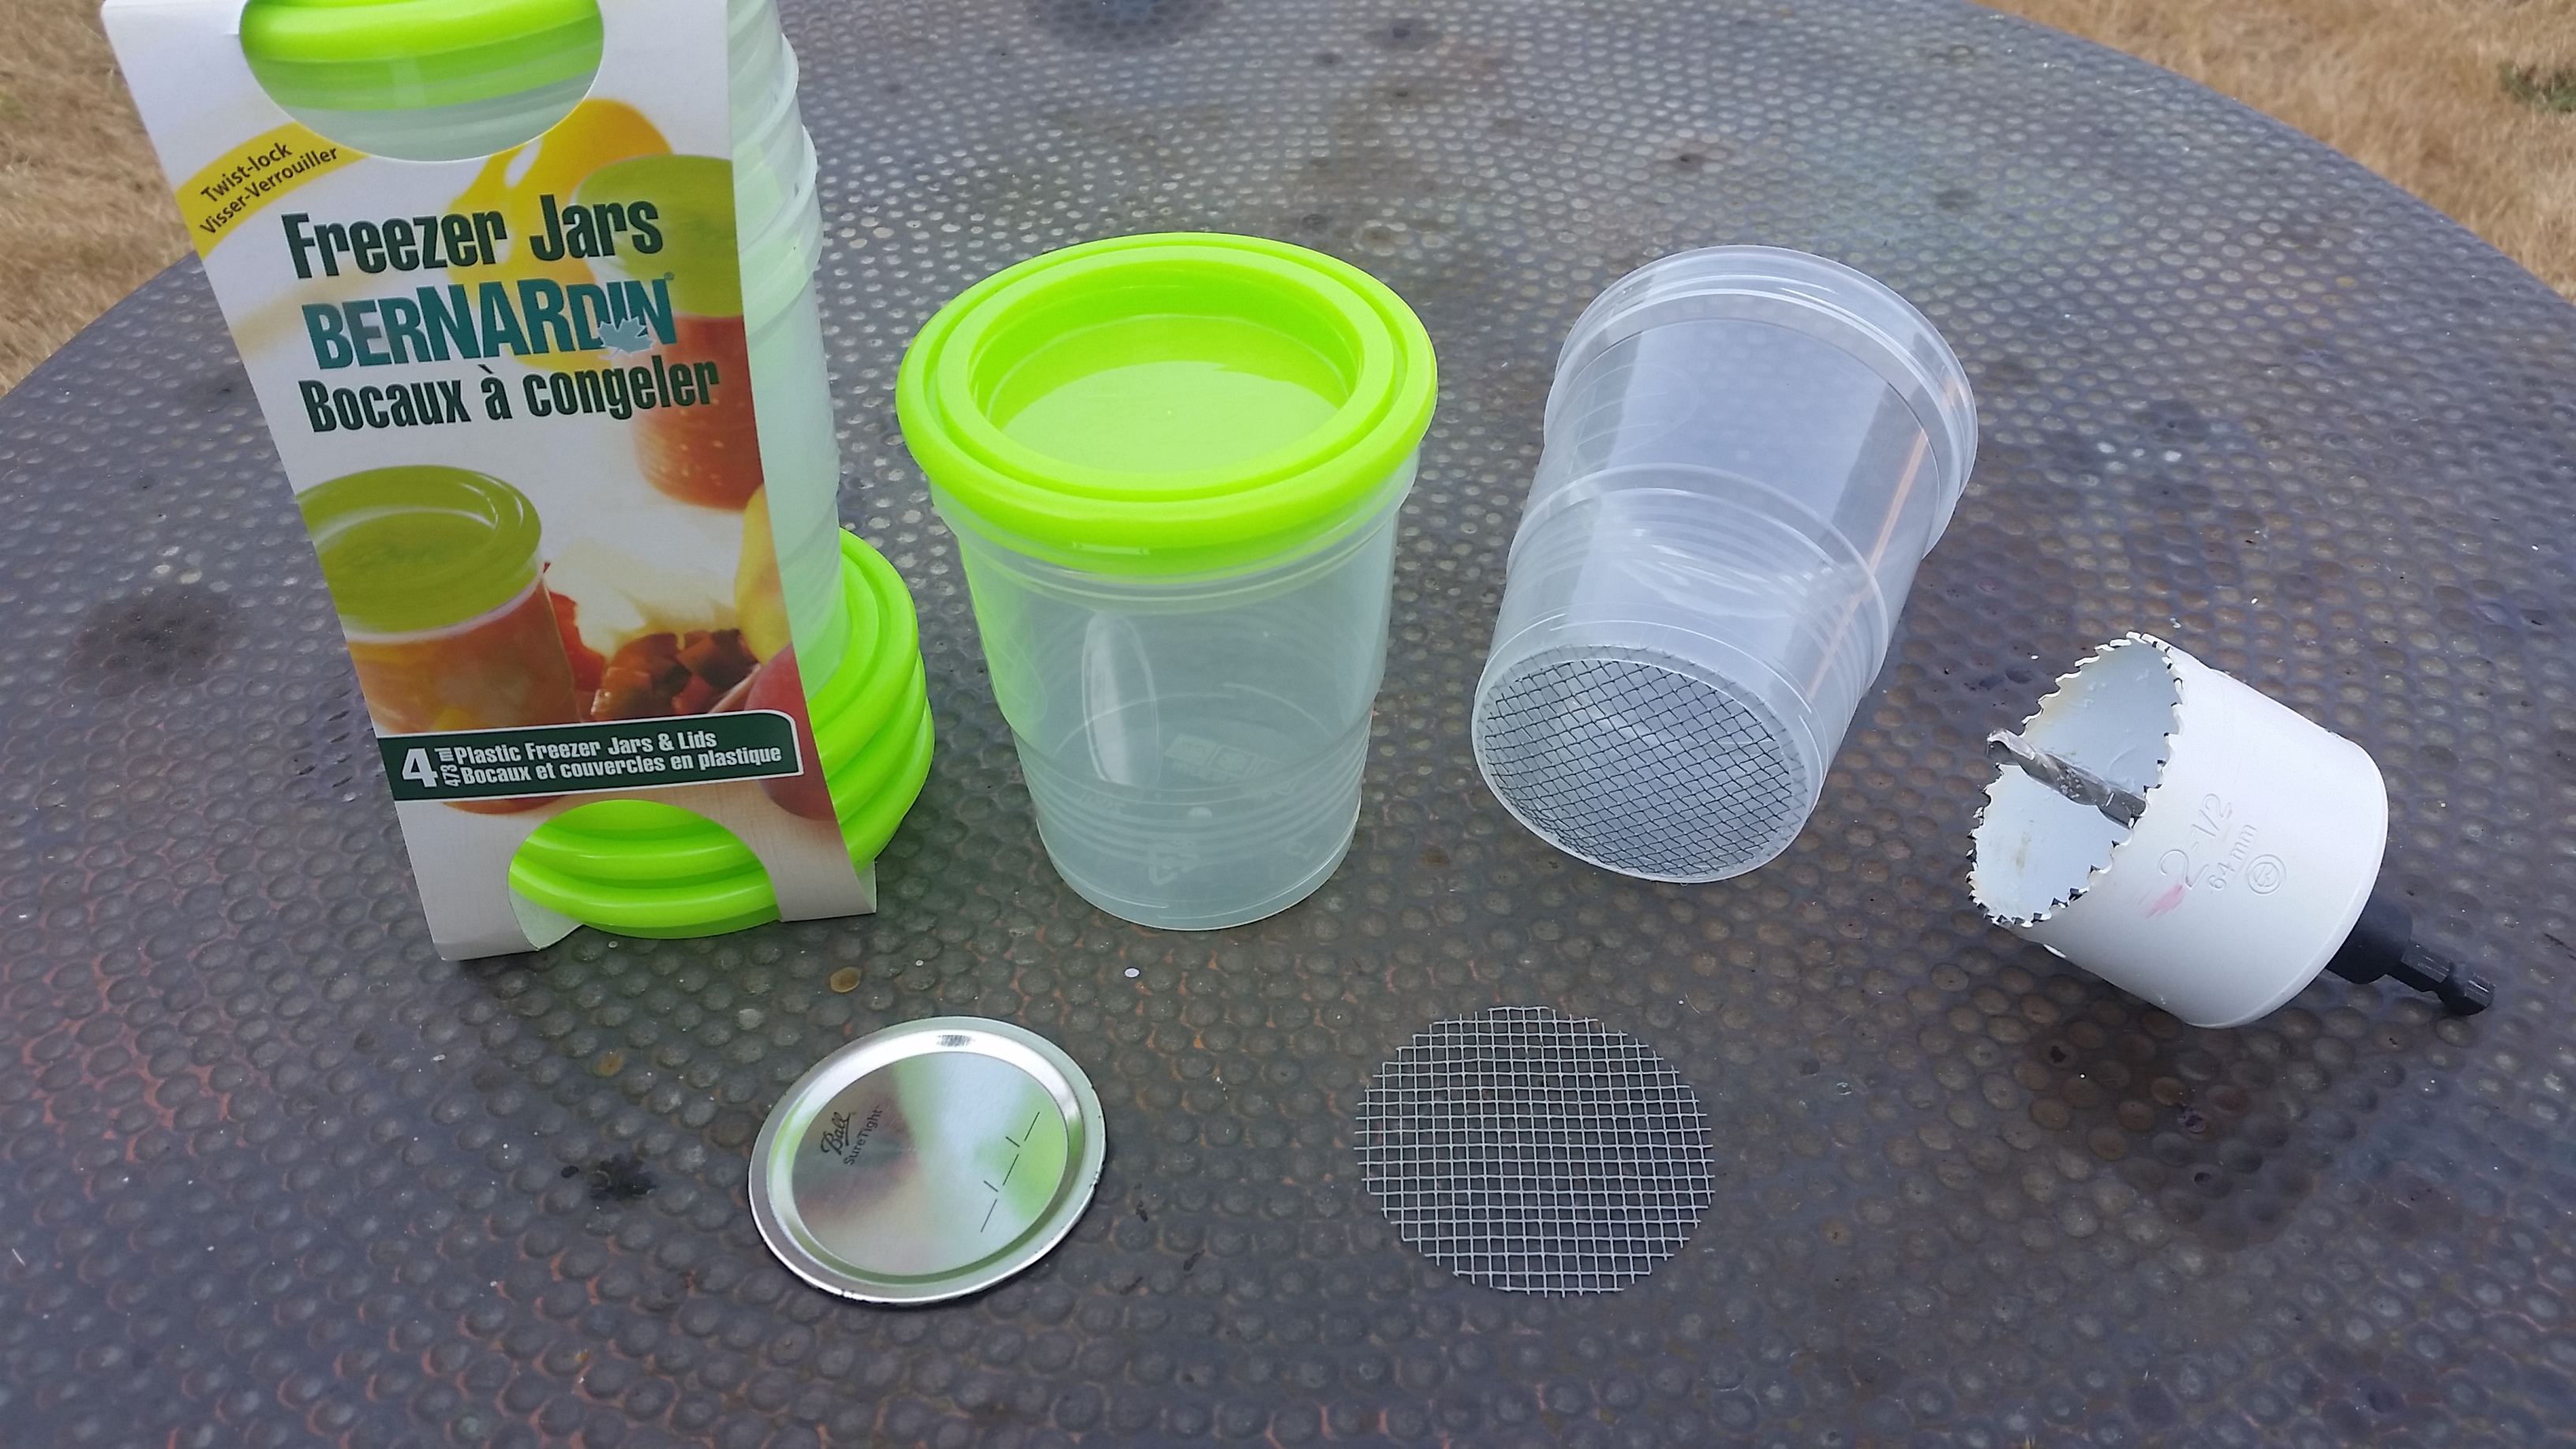
Steve wrote: “The bottom of the cup meets the 2.75 inch diameter requirement. Just cut out the bottom of one cup using a 2.5 inch hole saw (you could also do this with an Exacto knife), leaving a sixteenth of an inch rim for the edge of the screen bottom to rest against. Using a small-mouth canning lid as a template, cut out a round piece of #8 hardware cloth (slightly larger than the lid), and wedge it into place over the open bottom on the inside of the cup. That’s it!”
I’ve now got this cup on hand, and it looks promising! I’m working on a portable, rechargeable 12V washer design, and am currently testing it in the field (we love it!). I’ll modify it to see how it works with the cups above.


