
Messin’ With Varroa 2014

September 17, 2015
Messin’ with Varroa
Randy Oliver
ScientificBeekeeping.com
First Published in ABJ in Jan 2015
Some years we’re in the business of raising bees; in others we seem to merely be raising food for the varroa mite. When I returned in late November from speaking on the subject of mite management at several conferences, to my dismay I found out that I hadn’t practiced what I preached.
Losing The Fight
I spent most of October and November on the road at speaking engagements and conventions. So when my sons and I returned from the California Beekeepers Convention, we immediately headed out to our yards to assess the condition of our colonies. In far too many of them, the mites had won.
We’ve been able to manage varroa since we gave up synthetic miticides 14 years ago, but this year we’d been having trouble all season long keeping the mite in check. So we had a tailgate meeting in order to salvage a learning experience from our failure.
We checked our yard records. We’d hit our nucs in spring with an oxalic dribble, and then later applied more treatments of Apiguard (thymol) or MAQS (formic) than usual, so we couldn’t place the blame on lack of treatment. The problem, we realized, had deeper roots. There had been two deviations from the norm this season and we had been aware of each by April. But we obviously hadn’t taken these warnings seriously enough, nor had we reacted to them with enough vigor and diligence.
Red Flag Number One
The first anomaly this season was when, after almond bloom, we checked mite counts as we selected our breeder queens. We noticed that although we were able to find enough breeders with counts of zero, that there were also quite a few colonies with unusually high counts. But we assumed (yeah, I know) that our upcoming splitting of the colonies, with an oxalic dribble, would take care of that problem. What I hadn’t considered is that all mite treatments exhibit only a percentage degree of efficacy. A treatment that had in previous years been adequate at lower mite counts, would this year leave us with a starting mite count a notch higher than normal.
Practical application: this was mistake number one–the difference between a starting mite count of 1 and a count of 2 may not seem like much in the beginning, but can make a helluva difference seven months down the road!
Red Flag Number Two
We’ve traditionally split every single one of our hives four ways after almonds, selling off about half our brood frames in the form of nucs each spring. If you do the arithmetic, that also means that we sell off half of our mites each spring. But last spring, for the first time, we broke off nuking up our hives before we had gotten to every yard, and had instead taken frames of bees and brood from those yards to boost our nucs, also leaving a few yards unsplit.
Man, was that a learning experience! We’ll never try running unsplit overwintered colonies into a second year again. The problems with swarming and mites in overwintered colonies, compared with our norm of starting with fresh nucs, far outweighed the benefits of having slightly stronger hives for honey production. And in retrospect, adding untreated frames of bees and brood to relatively mite free nucs was just plain stupid! Adding to our errors, we ran a number of yards with a mixture of both fresh colonies and overwintered colonies, which then served as mite reservoirs that fed into the good hives.
Practical application: don’t mix high-mite hives with low-mite hives. It takes only a few bad apples to spoil the bunch.
Red Flag Number Three
We super up for honey in mid May, and don’t normally (if there is anything in beekeeping these days that qualifies as “normal”) start to worry about treating for mites again until July. But when we started taking mite washes in June, the counts, although not excessive, were clearly of concern. But the most telling red flag was a general lack of response to treatment (a single MAQS in hives with honey still on; Apiguard in those without). When we took confirmatory rechecks after treatment, mite levels often remained above threshold. And this is where we missed our opportunity to pull out the stops and regain the advantage.
Practical application: This should have been our call to battle—it meant that we had started too late, and allowed varroa to get a head start. We’d just gotten lackadaisical about mites, due to success in our operation over the past few years. But varroa is an enemy that never gives up the fight. It took that head start and laughed at us while we spent the rest of the season trying to pull honey and catch up.
Too Little, Too Late
California has been in a severe drought. We watched our hives when the late summer dearth set in, and hit them with pollen sub as soon as they started cutting back on jelly in the brood. But in many yards we didn’t get the normal response to the supplemental feeding. And we got a bit behind. The end result is that two things then happened simultaneously: (1) we didn’t stimulate enough broodrearing to keep the colonies full of young bees, and (2) my feeling (no supportive data) is that starving feral colonies from escaped swarms crashed and turned into mite bombs that seeded our hives with additional mites.
Practical application: when your normal mite treatments aren’t giving you the usual results, you’d better figure out why, stat!
Making Lemonade
But hey, when life gives you lemons, make lemonade! High mite counts present an opportunity to get some good data on mite treatments. The reason is that at low mite levels, the “signal to noise” ratio is too low, i.e., the measurable effect of the treatment is overwhelmed by the amount of variation inherent in bee samples; for example, the data is far more robust (statistically speaking) if you gofrom counts of 40 mites to 10 as opposed to going from 4 mites to 1, despite the proportional difference being exactly the same.
So we took ½-cup bee samples from the broodnests of 130 overwintered colonies that had not been split in the spring. All had been treated with a single MAQS about 10 days previously. The samples were preserved in alcohol and the mites separated by a mechanical shaker. We rewashed several samples containing at least 50 mites to confirm 100% mite recovery (Fig. 1).
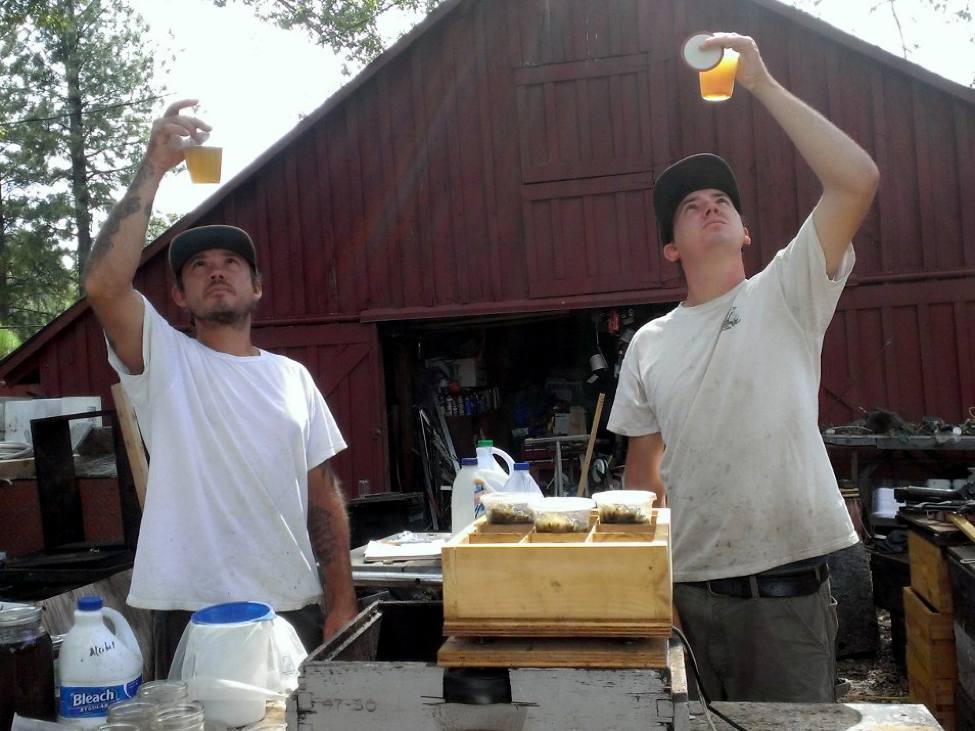
Figure 1. We brought the mite samples taken in the field back for washing on the shaker table for consistency. Here my trained technicians Eric and Ian are counting mites at the Oliver lab.
Boy, did we have some scientifically-useful mite infestation rates, with alcohol washes of 20-100 mites. And that brings us to the subject of:
Monitoring Mite Levels
I was recently reading a review by Dr. Ralph Büchler [1], in which he mentioned that mite counts from the honey supers might be more consistent than those taken from brood frames. This caught my attention, since it sure would be easier to take bee samples from the honey supers than from the brood frames, plus there’d be much less chance of accidentally drowning a queen. So that raises two questions:
- How does the varroa infestation rate of bees from the supers relate to that of bees from the broodnest?
- Is there a difference in the variability of samples taken from the two different locations in the hive?
In order to answer the above questions, I took a number of sets of two or three samples of bees from brood frames as well as from the honey supers of 9 hives, as well as additional sets of samples from the broodnests alone of another 10 hives, for a total of 43 samples from brood frames, and 20 from honey supers [2].
Results
Acknowledging that that these results are hardly definitive (due to the limited data set), I can report some tentative conclusions. The mite counts from the honey supers ran at about 80% of those from the brood frames. As far as variability, my results concur with those of Dr. Büchler–there was indeed slightly less variability in the samples taken from the honey supers.
Scientific application: when someone repeats a scientist’s experiment, it’s called a “replicate.” And if he gets the same results, his findings are said to “further support the hypothesis”—in this case, that there is less variability in samples from the supers. Scientists generally like to see experiments replicated three times. Keep this in mind whenever you see a press release about some groundbreaking scientific discovery (such as X is the cause of CCD).
Practical application: it may well be that samples of bees taken from the honey supers will work for monitoring mite levels. If you do so, you’d want to adjust for the generally lower infestation rate of those bees—for example, our normal late-season treatment threshold is 6 mites per half-cup alcohol wash, so we’d adjust it down to 5 mites. I’d appreciate it if anyone were willing to help us collect additional data.
Practical application: there is no perfect way of assessing mite levels from any single bee sample—samples from the same hive, or even the same comb, will often vary greatly. It is only by regularly taking samples from a number of colonies that you can get a good idea of your overall mite levels, and monitor the buildup and decline of mites over the course of the season. I’ve found that if I get down to trivial levels in early spring (zeroes and ones), that I can generally coast until at least June; from July on (and especially in August and September), we sample constantly and treat as needed. In October and November, mite invasion from other colonies can quickly overwhelm hives in some locations, so we keep taking mite counts until we’ve finished our November pre-winter final treatment (we use an oxalic dribble) and the weather has cooled to the point that robbing is curtailed.
Our Predicament
We don’t normally allow mites to get this far ahead of us, so we’re usually able to treat our hives effectively with “natural” treatments used at half dose, being satisfied with a reduction in the mite infestation rate of 50-70% to get us back below our treatment threshold. But when mite counts get high, a 50% efficacy won’t do the trick (e.g., a 50% reduction of a 40-mite count still leaves you with an unacceptable count of 20 mites). We needed treatments with an efficacy in the 90% ballpark. Could we get this with natural treatments without investing too much time and/or labor?
I decided to test four products: MAQS (formic acid Miteaway Quick StripsÒ), ApiguardÒ (thymol gel), Hopguard II (hops beta acids), and an oxalic acid dribble.
Since neither Hopguard nor oxalic acid are effective against mites under the cappings, we needed to do something in order to increase their efficacy. We could have repeated the treatments, but a repeat with Hopguard is expensive and time consuming [3], and I knew from previous experience that two treatments with oxalic dribble in a colony full of brood was not very effective, so I ruled out retreatment for these two.
We could have caged the queen for 12 days in order to create a window for treatment during which no mites would be hiding under the cappings (by applying the treatment 7 days after the release of the queen). I also ruled this out due to the amount of labor involved (requiring three openings of each hive). Plus we couldn’t have treated immediately, and these hives needed something done immediately!
Something Crazy
So I thought of trying something crazy—sacrificing all the sealed brood (and its contained mites) in each hive, so that the only remaining mites would be in the exposed phoretic phase, and thus exposed to the treatment. We could have removed all frames containing sealed brood, but that would be impractical. But how about killing all the sealed brood in the hive with a cappings scratcher? This would be equivalent to the loss of 12 days of broodrearing. My thought was that this brood was already full of mites and viruses and of little value, and that by eliminating it, we could give the colonies a fresh start.
The Limitation Of Hot Weather
Some of the strong points of MAQS and Apiguard are that they both penetrate the cappings to some degree, are quick to apply, and relatively inexpensive. But since both act by vaporization, they would be touchy to apply during the hot weather that we were experiencing (in the high ‘90s F), especially since these colonies were already stressed by mites and viruses. So I hesitated to apply either at full dose. As a compromise, I decided to apply each of these treatments at half dose, with a repeat treatment 7 days later.
Experiment #1—Application Of Natural Treatments During The Heat Of Summer
OBJECTIVE: To determine the efficacy of four different varroa treatment methods used on heavily-infested colonies with brood, during hot weather.
The Test Colonies
All colonies were in double deep brood chambers, about half with a queen excluder and an additional deep honey super. The main flow had recently ended, but colonies were in good nutritional shape and shaking nectar. All colonies had been selected due to having high mite counts the previous week, ranging from 17-150 mites per ½ cup of bees (mean 40, median 32 [4]). Many of the colonies were showing signs of severe mite infestation and DWV in both the adult bees and the brood. Many colonies had spotty brood, but a number had solid brood patterns and no sign of disease. There was little apparent correlation between mite levels and signs of disease at this time [5]. Most colonies contained 10-25 frames covered with bees, although some with extremely high mite levels had scant coverage of bees over their sealed brood, due to them going into a downward spiral from virus infection. All hives were dark wood, most in full sun, with ¾” full-width entrances, no additional ventilation.
Methods And Trial Log
July 1 (Day 0): We sorted the 60 most highly-infested hives by mite level, and assigned blocks of treatments from the most highly to least infected colonies (so that the treatments were evenly distributed by starting mite level, with 12 hives in each treatment group). From each colony we took a fresh mite sample, this time from one or more honey frames not containing brood. We then applied the following treatments:
MAQS—a single strip applied crosswise in the center of the hive on the top bars of the lower brood chamber; repeated once after 7 days.
Thymol—25 g Apiguard gel applied in a lump [6] on an index card in the center of the hive on the top bars of the lower brood chamber; repeated once after 7 days.
Scratch plus Oxalic—all brood combs were removed, the bees shaken off, and all capped cells scratched with a cappings fork to injure the larvae or pupae. The bees were then given time to repopulate the combs, and then dribbled with approximately 5 mL of medium strength oxalic syrup [7] per seam of bees.
Scratch plus Hopguard II—all brood combs scratched as above. We then applied 2 wet Hopguard II strips per hive, either in the same brood chamber, or one above the other, depending upon the location of the main broodnest.
Control group—no treatment.
July 8 (7 days after the first treatments): we applied the follow up MAQS and Apiguard treatments to those groups.
July 29 (Day 28 after treatment, in order to allow any effect of the treatments upon mite reproduction to take effect) we took final samples for mite washes.
To our surprise, it wasn’t that big a deal to scratch kill the sealed brood (Fig. 2).

Figure 2. Extreme measures—sacrificing all the sealed brood in order to get a handle on varroa. It wasn’t pretty, but our labor cost was less than I anticipated, and on par with the time required to catch, cage, and later release a queen.
These colonies were not in general the strongest in our operation, plus there was a light nectar flow on and the bees were quite gentle, so we were able to shake the bees off and scrape the frames quickly and without needing to put on protective gear. Most colonies had 6-8 frames with sealed brood. We timed how long it took for one person pulling frames and two helpers scratching brood to prepare a hive. It typically took slightly over 3 minutes, but not over 4 minutes, to shake off the bees, scratch the cappings, and put the hive back together.
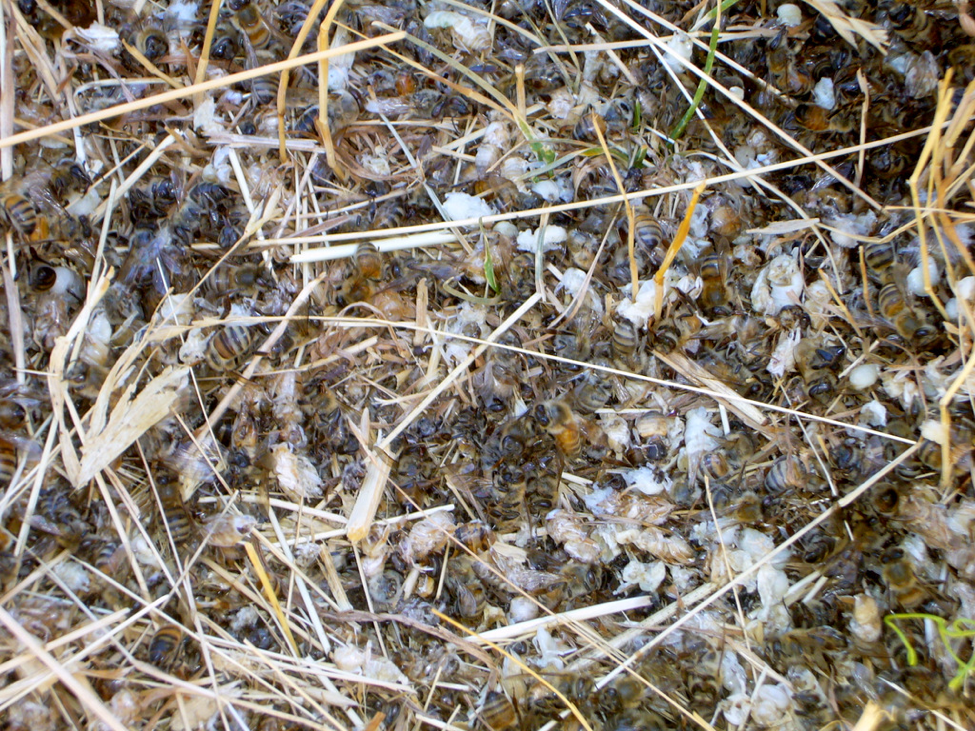
Figure 3. The gruesome aftermath in front of the hives the next morning. Was it worth the sacrifice?
The aftermath of the scratching again wasn’t pretty (Fig. 3). But most of the scratched colonies that we checked quickly cleaned out the combs, and the queens hopped right back on filling them with eggs (Fig. 4).
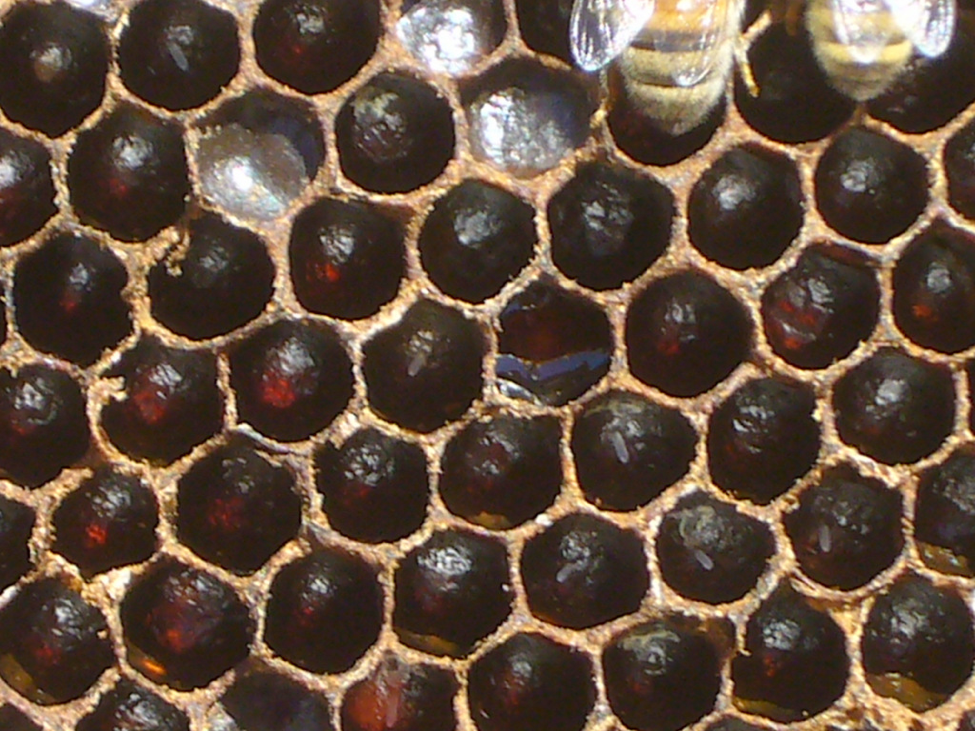
Figure 4. In a couple of days, the scratched cells were generally clean and polished, and the queens were busy laying eggs in them.
But not all colonies fared well after the scratching; the only colony deaths occurred in the scratched groups, although at least a couple of those were already in deep trouble with mite-transmitted viruses at the start. It’s possible that the exposure of body fluids of virus-infected pupae may have infected the cleaner bees.
Results And Discussion
Many of the colonies had not started in great shape, and we were not surprised that we lost a few over the course of the trial. One in the formic group superseded their queen. As expected, the mite counts in 9 of the 12 of the control hives went up. In the majority of the treated hives the counts went down (Table 1), but not enough for my liking (Fig. 5).

Figure 5. The above data points are of the means of the starting and ending mite counts [[i]]. All treatments (Apiguard and MAQS at half dose, repeated) reduced the mite loads, but none got us down to the target level.
[i] The perceptive reader will have noticed that the plots for MAQS and Apiguard are parallel, despite their efficacies being different. The reason is that in Table 1 I calculated the means of the individual percent reductions for each colony, which gives a different result than then the percent reduction of the means of the mite levels, which is a misleading figure.
| Treatment | Mean % change in mite level | * if statistically significant | % Efficacy |
| Apiguard | -0.47 | * | 60 |
| Formic | -0.30 | * | 50 |
| Sc/Hop II | -0.13 | 35 | |
| Sc/Oxalic | -0.06 | 39 | |
| Control | Æ0.38 | ||
| Anova F = 4.512, p = 0.003. * = significantly difference at the 5% level after applying the Bonferroni correction. | |||
Table 1. The treatments ranked by order of efficacy [9]. Only Apiguard and MAQS were statistically different from the controls.
All treatments reduced mite levels compared to the controls. But despite our heroic efforts, none reduced varroa to acceptable levels, and we needed to perform follow up treatments. I’d like to make it clear that these results are not a reflection of either MAQS or Apivar applied at label rate, since we used only half doses (although repeated at 7 days). We were surprised by the poor performance of these products in this trial, since we normally obtain better efficacy from them.
Practical application: cost and labor wise, we got the best results from the Apiguard and MAQS. The take home message is that if you are going to depend upon natural treatments to control mites in hot weather, you don’t want to allow mite levels to climb greater than twice what you want to bring them down to.
Since we’re consistently running behind on pulling our honey, we’ve been successfully using treatment with a single MAQS strip to hold mites down to that level until we get the honey off. But that’s not to say that it’s not a pain to crack the hives when they’ve got supers on, and yet another pain to later scrape out the spent strips. As much as we love MAQS, I’ve long been curious about the “formic flash” treatment originally described by Dr. James Amrine and Bob Noel [10], and subsequently successfully tested by Dennis vanEngelsdorp [11]. So this summer when beekeeper Bill Lord posted to Bee-L that he liked using it, I asked him for details and decided to finally try it.
Experiment #2—The “Formic Flash” Treatment
We still have the problem, as do many other beekeepers, that our mite levels really start to climb in the hot months of August and September. The thought of an inexpensive mite treatment that could be applied to the top of hives still containing honey is really attractive, even if it only provided a “knockback” effect.
So I purchased some 90% formic acid, and used a hydrometer to cut it to 50% strength [12]. To my great surprise, there seemed to be less of an issue with formic vapors when handling the 50% liquid (hereafter referred to as “formic”) than there is with opening MAQS on a hot day (likely due to having less surface area exposed for evaporation). We tested various absorbent pads for their ability to hold and slowly release the formic as vapor, and were pleased with a triple layer of blue shop towels; so we built eight flash boards for further testing (Fig. 6).

Figure 6. We modified telescoping covers, using some leftover Miteaway II rims to hold up the absorbent pad material. All treatments were with formic acid diluted to 50%, which we found to be relatively safe to handle.
An “Acid Test”
Recommended dosages for the formic flash range from 75-110 mL, and most previous experiments were done at lower daytime temperatures than we were experiencing [13]. I decided to put it to the “acid test” by using a relatively high amount (90 mL) on a very hot day (high of 99°F, low of 65°F). In addition, since vanEngelsdorp had good luck without the addition of HoneyBHealthy to protect the queens, we skipped it (although he had only applied 75 mL, and at lower temperatures).
We applied treatment on August 1 via the flash boards to eight 2- or 3-story hives with the entrances reduced to ⅜” x 3½“, waiting until the late afternoon, and covering the boards with the hive covers to shade them from the direct sun. In a little while, some colonies bearded up, especially the really strong triples. Bill had suggested to me that the proper dose could be confirmed if the treatment resulted in about 100 dead bees in front of the hive. The next morning this was indeed the case for most (Fig. 7), but it was obvious that we shouldn’t have put the entrance reducers in the strongest colonies, since they suffered a considerably greater bee kill.
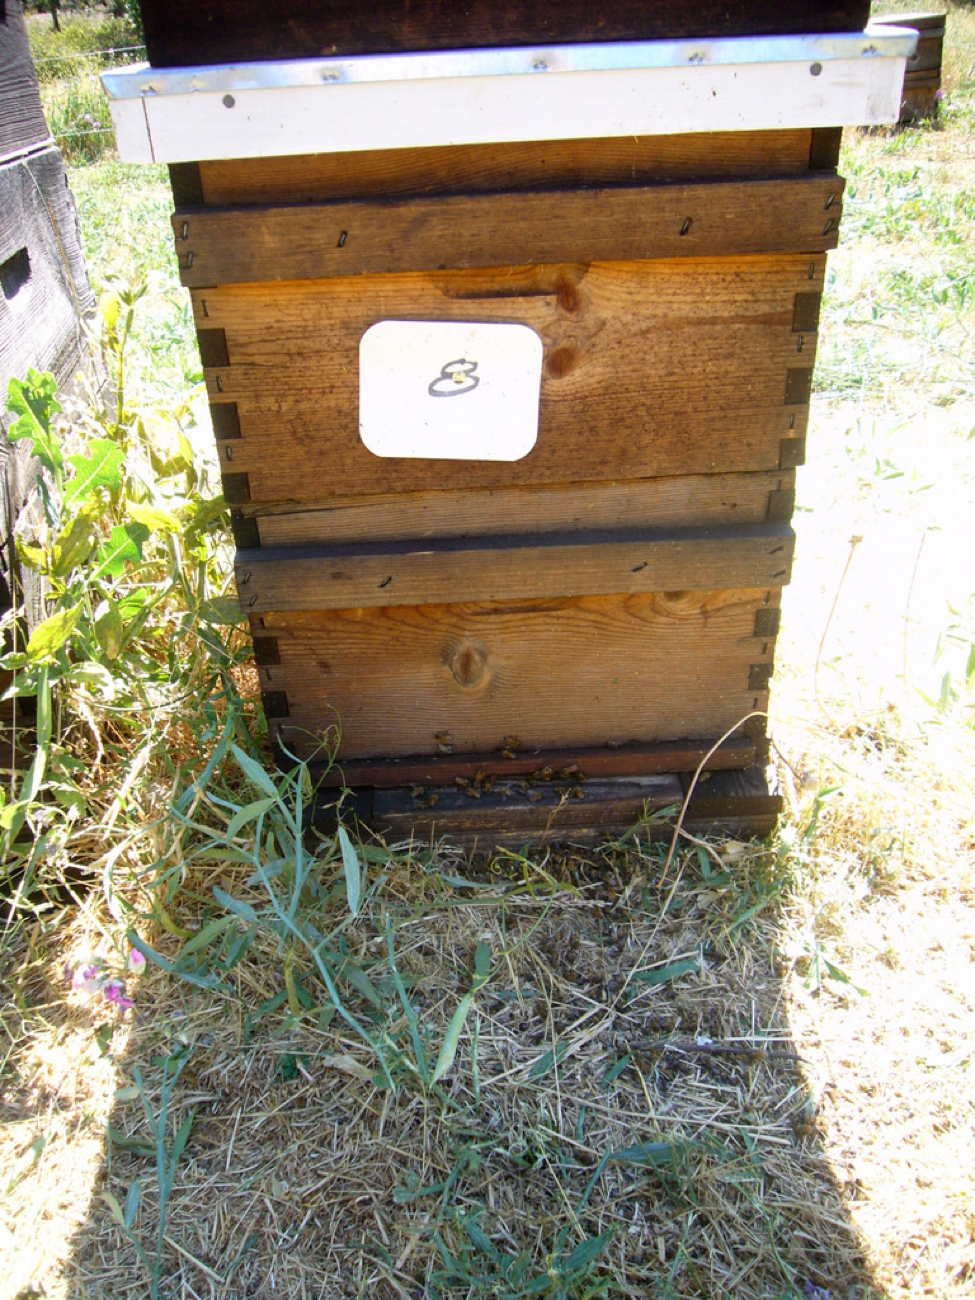
Figure 7. Bee kill the next morning after 90 mL (entrance reducer still in place). There were about 100 newly-dead bees, indicating that the dose was about right.
Assessing The Effects
Four questions now needed to be answered:
- The effectiveness of the treatment after 24 hours, as measured by another alcohol wash.
- The effectiveness of the treatment on mites under the cappings.
- The amount of collateral damage to the colony, especially to the brood and queen.
- The long-term effect of treatment as far as mite levels were concerned.
Result #1: After 24 hours we again took mite washes, and were amazed by the results. The median mite counts were reduced by 80% in the doubles, and 65% in the triples. This was beyond our expectations!
Result #2: In order to answer this question, at 24 hours we also broke open the hives and pulled out the brood frames. The first thing that we noticed is that, similar to MAQS, formic flash hits the eggs and young larvae hard (which to us is a good thing, since we find that mite-infested colonies benefit from the break in broodrearing and perhaps the acid-induced disinfection of the combs). It had also hit the newly-emerging workers, some of which were now lying dead in front of the hives; others died with their heads sticking out of the cells from which they were emerging.
We then dug a little deeper by using capping scratchers to pull out the pupae and checking for the percentage of live vs. dead mites in the cells (Figs. 8 through 11).
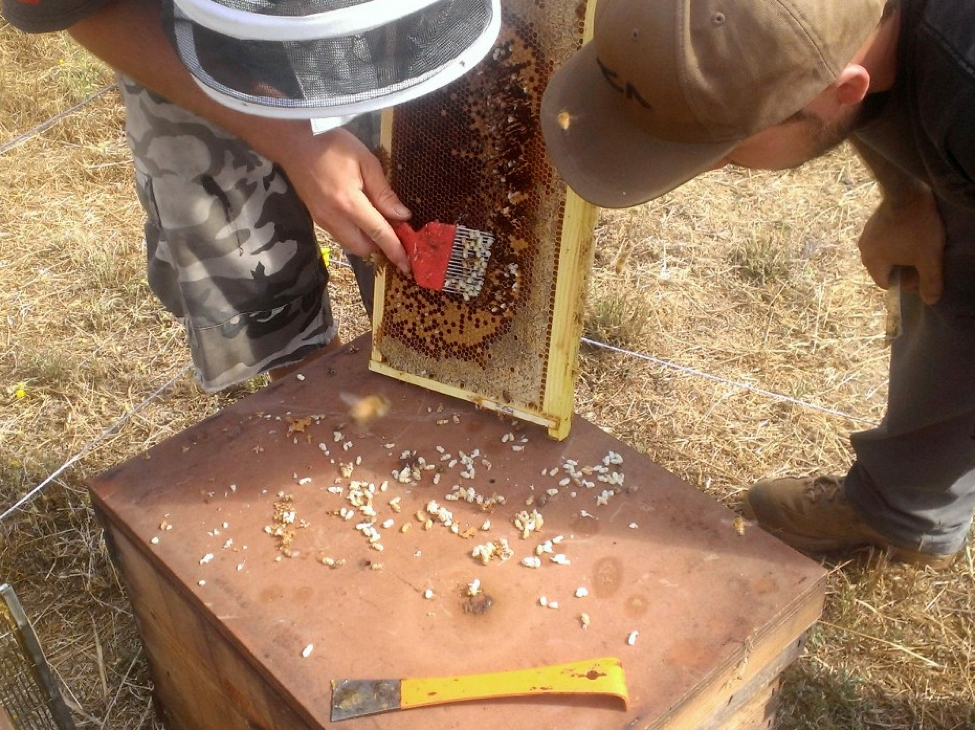
Figure 8. Eric and Ian using a capping scratcher to lift pupae from the sealed brood. We inspected mostly brood frames from the upper brood chamber.

Figure 9. We then banged the frame on a hive cover to dislodge the remaining mites.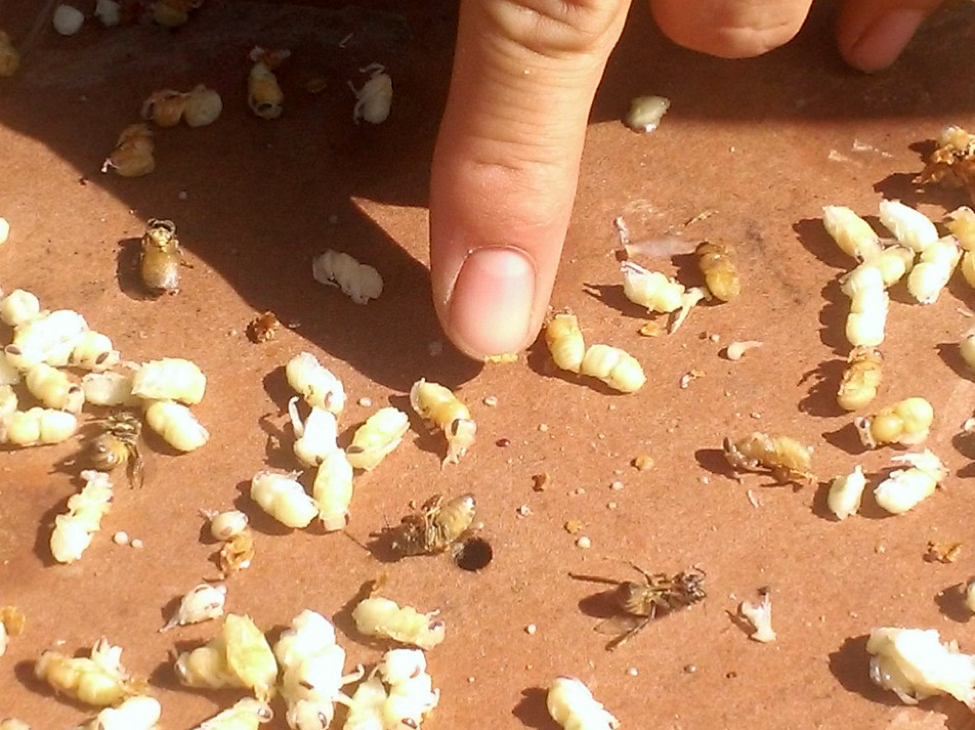
Figure 10. Ian’s finger is pointing at an immature white mite; we counted mites as dead if they didn’t respond to prodding and whispered coaxing.
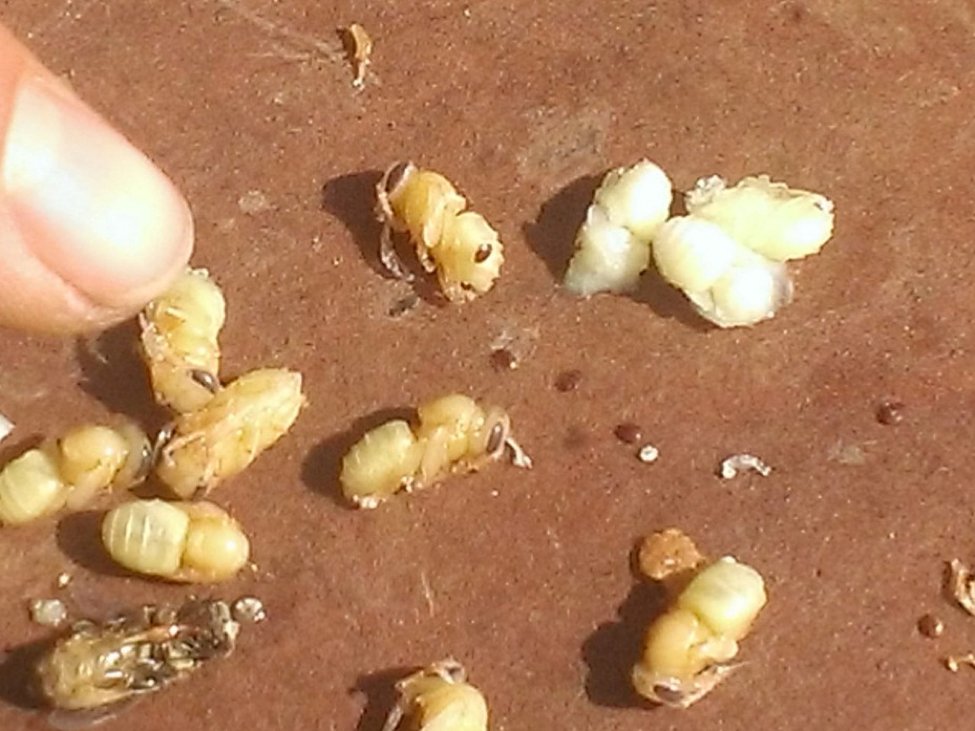
Figure 11. The treatment killed most of the immature mites and male mites, and about 70% of the hardened brown mites (50 -100%, although we didn’t record meticulous data). In one count, 11 of 11 mites found were dead.
One observation of note is that the percentage of mites killed in drone brood was noticeably lower than that in the worker brood, as noted by both vanEngelsdorp, and by Amrine when the drone brood was in older combs, and confirmed (pers comm) by David Vanderdussen, the developer of MAQS.
Result #3: The collateral damage to the workers and brood of the colonies, both in the short and long term, appeared to be minimal and acceptable save for one important effect–after a few days we noticed that we’d also killed 50% of the queens, which was a bit excessive for our liking (the queenless colonies were all rearing emergency queen cells).
In retrospect, perhaps we should have added lemongrass oil, as recommended by Dr. Amrine (who speculates that it keeps the stressed bees from balling the queen), or perhaps the temperature was too high. In any case, we didn’t bother with following these hives any further, nor continue with more tests of the 90 mL dose, deciding instead to see what would happen if we reduced the dose.
Testing A Lower Dose
The next dose we experimented with was only 60 mL, which didn’t appear to harm the queens. So we collected data from treatments on August 12-14, again on a mix of 2- and 3-story hives, but under slightly cooler temperature conditions (highs around 84°F, lows 56-61°F), but without entrance reducers this time. We collected 24-hr data from 24 hives, 20 with solid bottoms, 14 with screened bottoms; and mite counts on Day 28 from 16 of the hives.

As with other formic treatments, some colonies exhibit a greater response than others. Here’s one bearding up during treatment.
Results And Discussion
The colonies appeared to better tolerate this treatment, as evidenced by no major bee kills in front of the hives the following mornings. Not unexpectedly, the mite kill at 24 hours wasn’t quite as good as with the stronger dose, either in the brood or the bee samples. We didn’t record meticulous data on mite survival, but the 60 mL flash appeared to have killed about 50% of the mites in the worker brood, and perhaps a quarter of those in the drone brood.
In the 24-hr mite washes, there was a mean of the reductions in mite levels of 69% in the hives with solid bottoms, and 46% in those with screened bottoms [14]. Not bad for a quick, inexpensive, and easy treatment with honey on the hives.
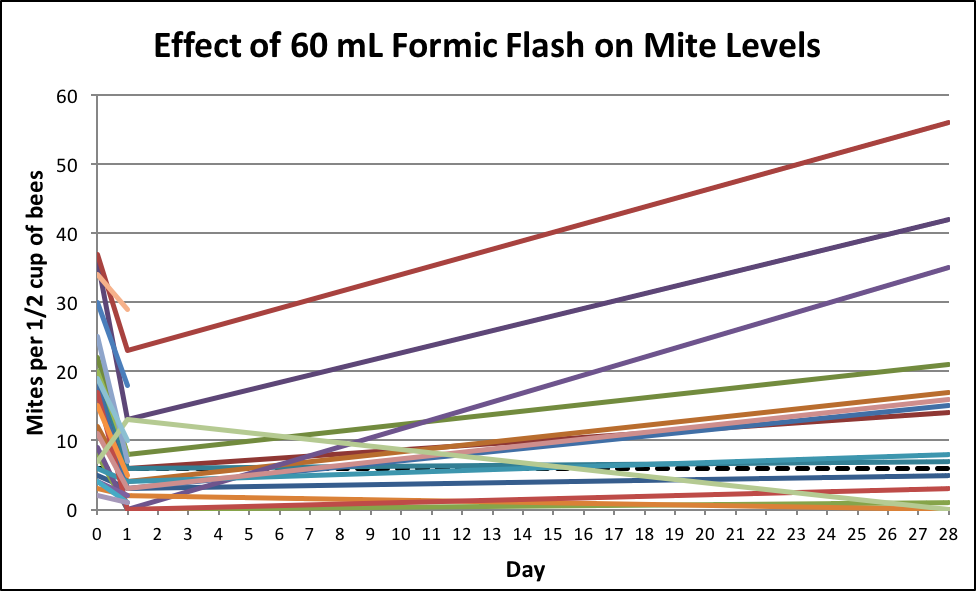
Figure 12. A 60-mL flash killed about half the mites on the adult bees, but only got a portion of the hives to below our target of 6 mites (dotted line). And even after 28 days, in nearly two thirds of the colonies the mites were still below the starting level.
Practical application: We didn’t lose a single queen to the 60-mL flash. At 28 days after treatment, mite levels in 10 of 16 hives remained at or below their starting levels, which I thought was pretty good for a quick and inexpensive treatment.
Perhaps we could use the flash to hold mites at bay while we had honey supers on. This emboldened us to try yet one more experiment…
Hitting Them A Second Time
What if we hit the colonies with a second 60-mL flash after a week? We set up 8 more strong hives heavy with honey, hit them once with no problems, and then hit them again a week later. Results: disaster in the majority of the hives (Fig. 13), although a few handled it OK.
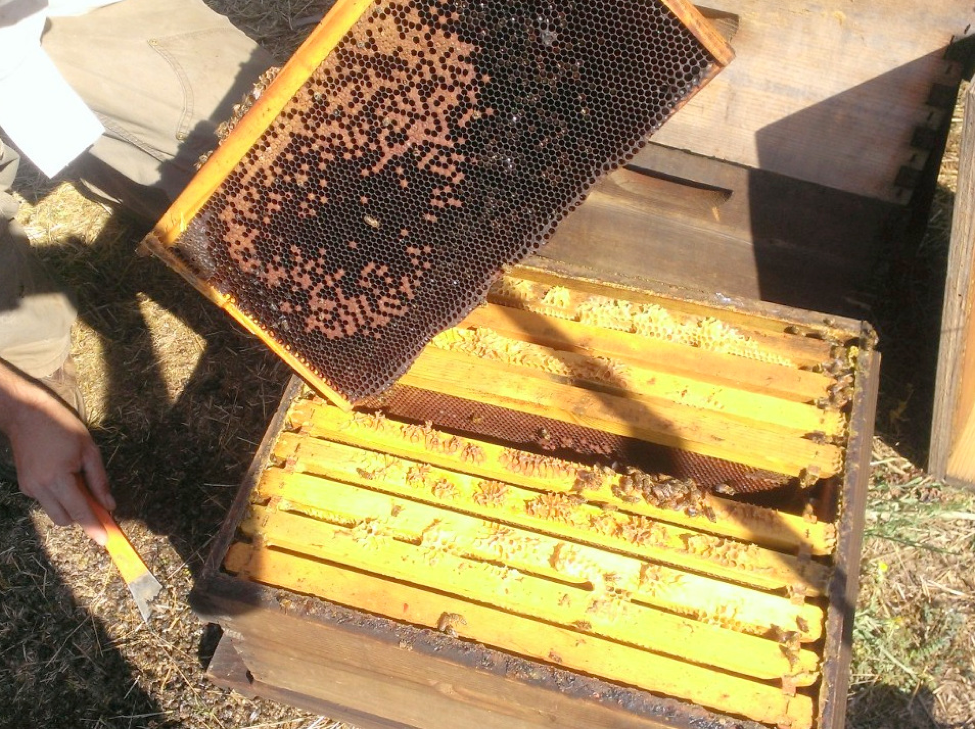
Figure 13. The aftermath of a follow-up 60-mL flash. A pile of dead bees (at the hive tool), the colony largely depopulated and queenless, most of the open brood killed. Not all colonies fared this badly, but it was quite clear that a colony needs a longer break between flash treatments [[i]].
[i] Also confirmed afterwards when I asked formic expert David Vanderdussen. In constrast, another Canadian expert, Dr. Medhat Nasr tells me that “in our work in Canada we use 65% formic, applied at 40 mL per double once every 3-5 days, temperature 15-25°C. In recent work we found applying 90 mL of 65% once every 10 days , temp 15-25 we can get 65-85% mite kill. In terms of queens we hardly lost any. We keep the bottom entrance open. I would suggest that temperature is a key and entrance of the hive must stay open. I would suggest 10 days if you are applying 60 mL.”
At this point in time, we’d run out of colonies with high mite levels to play with. My conclusion is that the formic flash definitely holds promise as a mite management measure. I still need to find the sweet spot with regard to tuning the treatment to colony size, temperature, number of supers, type of bottom board, and perhaps adding lemongrass oil to minimize queen loss. There are clearly more experiments needed to be run, and I’d appreciate an email [16] from anyone who has appreciable and successful experience with formic flash.
Final take home message: with regard to varroa (and nearly every other aspect of beekeeping), it is far better to be proactive rather than reactive.
We Are All In This Together
I was recently invited to speak to the beekeepers and veterinarians of the newly-formed Federaciόn Mexicana de Apicultures, and I thank them for their hospitality (Fig. 14). I made the point to them that beekeepers everywhere are learning how best to deal with varroa and bee nutrition, and we are all in this together. As you can see from the research that I publish, meaningful studies can be conducted using only one’s eyes and a pen to record data. We all know that the current synthetic miticides will eventually become useless due to the mites developing resistance. But there is no reason that beekeepers need to rely only upon university or government researchers to figure out how to manage varroa. I’ve posted a “Tips for Citizen Scientists” at https://scientificbeekeeping.com/tips-for-citizen-scientists/ to help those interested in performing useful experiments, and would be happy in assisting you in getting meaningful results published in this or other journals.
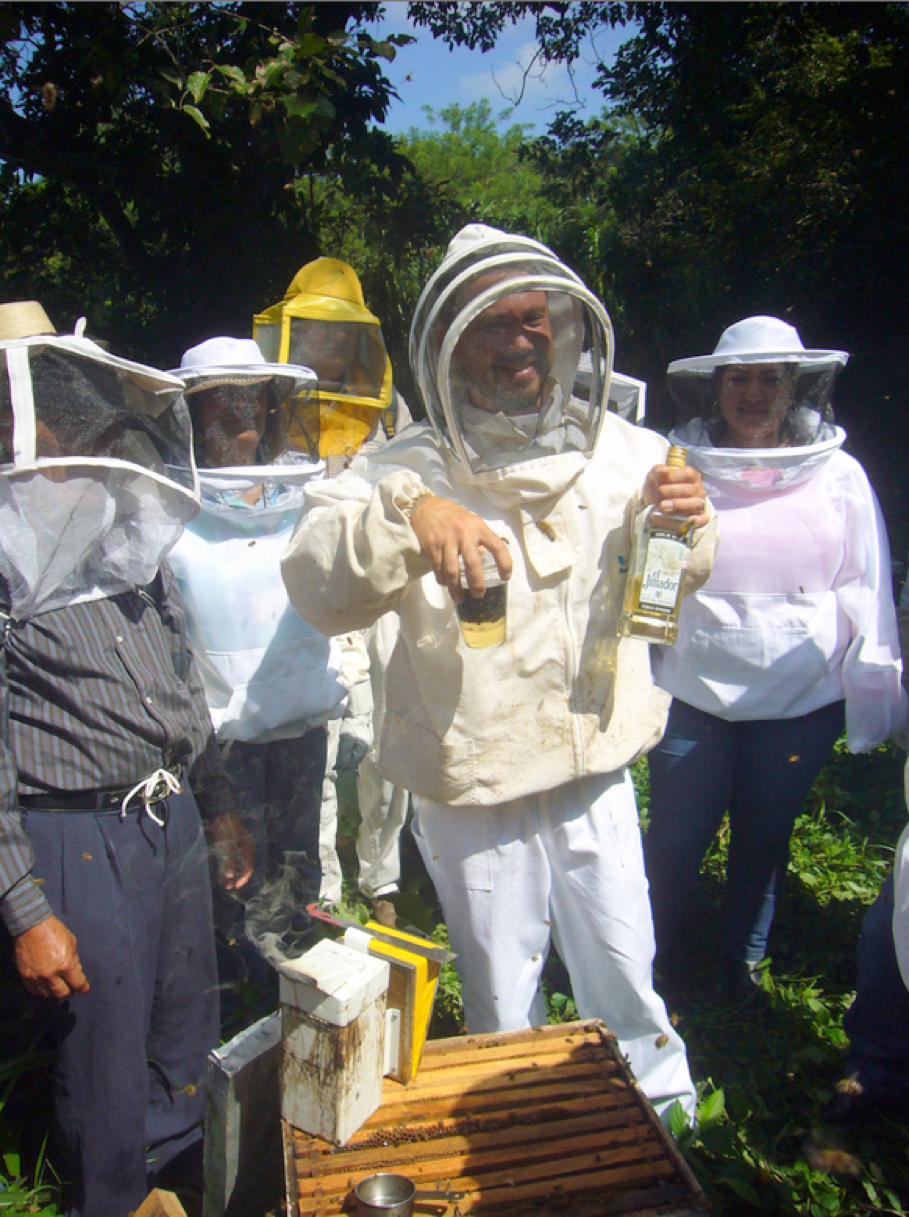
Figure 14. Eric demonstrating an alcohol wash in the tropical rain forest near San Andrés Tuxtla, Veracruz. The only alcohol on hand was tequila, which worked fine, but tended to disappear bit by bit between yards when carried by Eric and the other beekeepers in the back of the truck. Note the square smoker commonly used in the area.
Acknowlegements
These research projects were funded by donations from the individual beekeepers and beekeeper associations listed at ScientificBeekeeping.com. All work was performed by myself and my sons Eric and Ian, and we claim no conflicting interests. I would also like to thank pioneers on formic flash Jim Amrine, Bob Noel, and Dennis vanEngelsdorp; as well as Bill Lord and David Vanderdussen for helpful answers to my questions.
Citations And Footnotes
[1] Büchler, R, et al (2010) Breeding for resistance to Varroa destructor in Europe. Apidologie 41: 393–408. Open access. I corresponded with Dr. Büchler, and found that his suggestion was based upon a limited data set, so I volunteered to collect additional data.
[2] I make no pretense of being any sort of statistician, so in order to compare the variabilities, I normalized them to 1 for each subset of sample types (by dividing each measurement by the mean of that subset), and then calculating the standard deviation of each subset. The mean sd of the normalized broodnest sample subsets was 0.226, compared to 0.194 for the honey super samples.
[3] And as I later found out, two treatments with Hopguard likely wouldn’t have done the trick anyway; as detailed in my article last month.
[4] Equivalent to infestation rates of 13 and 10 mites/100 bees, respectively.
[5] Suggesting some degree of resistance to viruses in some of the colonies.
[6] This detail is important. If you spread the gel over the card, it flashes the thymol off too quickly.
[7] https://scientificbeekeeping.com/oxalic-acid-treatment-table/ or Google “oxalic acid treatment table.”
[8] The perceptive reader will have noticed that the plots for MAQS and Apiguard are parallel, despite their efficacies being different. The reason is that in Table 1 I calculated the means of the individual percent reductions for each colony, which gives a different result than then the percent reduction of the means of the mite levels, which is a misleading figure.
[9] As calculated by the Henderson-Tilton’s formula.
[10] Amrine, JW Jr & R Noel (2006) Formic acid fumigator for controlling varroa mites in honey bee hives. International Journal of Acarology 32(2):115-124. www.wvu.edu/~agexten/varroa/FAFumigat.pdf
Amrine, JW Jr, et al (2007) Results of 50% formic acid fumigation of honey bee hives Apis mellifera ligustica (Hymenoptera: Apidae)] to control varroa mites (Acari: Varroidae) in brood combs in Florida, U.S.A. International Journal of Acarology 33( 2): 99-109. (Broken Link!) http://rnoel.50megs.com/FinalPaper.pdf
Amrine, JW Jr & R Noel (nd) Formic acid fumigator for controlling honey bee mites in bee hives. www.wvu.edu/~agexten/varroa/FormicAcid.pdf
[11] vanEngelsdorp, D, et al (2008) Short-term fumigation of honey bee (Hymenoptera: Apidae) colonies with formic and acetic acids for the control of Varroa destructor (Acari: Varroidae). J. Econ. Entomol. 101(2): 256-264.
[12] One can’t assume that the 90% formic acid purchased is truly that concentration, so it is best to check the density of the final solution with a hydrometer to confirm that you’ve indeed mixed a 50% solution (specific gravity of 1.12). Unfortunately, hydrometers used for beer brewing only measure density less than that of water; 50% formic is more dense than water. So I looked up the density of an equivalent salt solution with which I could recalibrate my hydrometer (183.2 g salt into 936 mL pure water at 60°F). As it turned out the 5 gallons of formic acid that I had purchased was indeed 90%, so from that point on we could simply mix it with water in the ratio of 5 parts formic to 4 parts water.
Update: Beekeeper John Rhodes suggests “Specific gravity of formic acid can be measured with a lead-acid battery hydrometer available for <$10 at any auto parts store. You can remove the float from the syringe and place it directly into your 5 gallon stock solution if you wish. Note you can readily extrapolate the scale to pure water (sp gr = 1) to verify accuracy.” Thanks John!

I indicated above the specific gravity of 90% formic to test your stock solution, so that you can dilute by volume (5 parts 90% formic to 4 parts water = 50% formic). The final specific gravity (s.g.) of 50% is indicated. Also indicated is the s.g. of 65% formic, used for most other varroa control application methods.
[13] Bill Lord suggests using 85 mL for doubles, 75 for 1½’s, and 60 mL for singles; he uses the flash treatment into the low 90’s F. But he also uses the vented Amrine board rather than the fume board that I used.
[14] We didn’t run any controls in this trial, so couldn’t calculate efficacy.
[15] Also confirmed afterwards when I asked formic expert David Vanderdussen. In constrast, another Canadian expert, Dr. Medhat Nasr tells me that “in our work in Canada we use 65% formic, applied at 40 mL per double once every 3-5 days, temperature 15-25°C. In recent work we found applying 90 mL of 65% once every 10 days , temp 15-25 we can get 65-85% mite kill. In terms of queens we hardly lost any. We keep the bottom entrance open. I would suggest that temperature is a key and entrance of the hive must stay open. I would suggest 10 days if you are applying 60 mL.”
[16] randy@randyoliver.com


